Three Indian Block Printed Leaves

I mentioned recently that I’d attended another Adult Learning course covering Indian Block Printing & Stitching, but hadn’t shared much of that here just yet. Not wanting to tease you I thought I should share some of that now that I’ve mentioned it, though there’s much more to come on this craft as this is the one I’m finding the most addictive so far. There’s so many possibilities, especially if I combine this with my newly found pouch-making skills!

But let’s not get ahead of ourselves!

I’ll share more about the course and its format in a future post, here I want to focus on a completed piece - or almost completed piece…

How it started…

It started quite simply, using old bedding as my background material. This was from the box-pleated ‘frill’ of an old valance sheet which I cut off and edged using my overlocker. I ironed it too - there was a lot of it, though it was much easier to iron now that it wasn’t attached to the central section which goes under the mattress! We’d not used the valance sheet for many years as not only was it hard to iron, it was also tricky to manoeuvre under the mattress and well, life’s too short for all that.

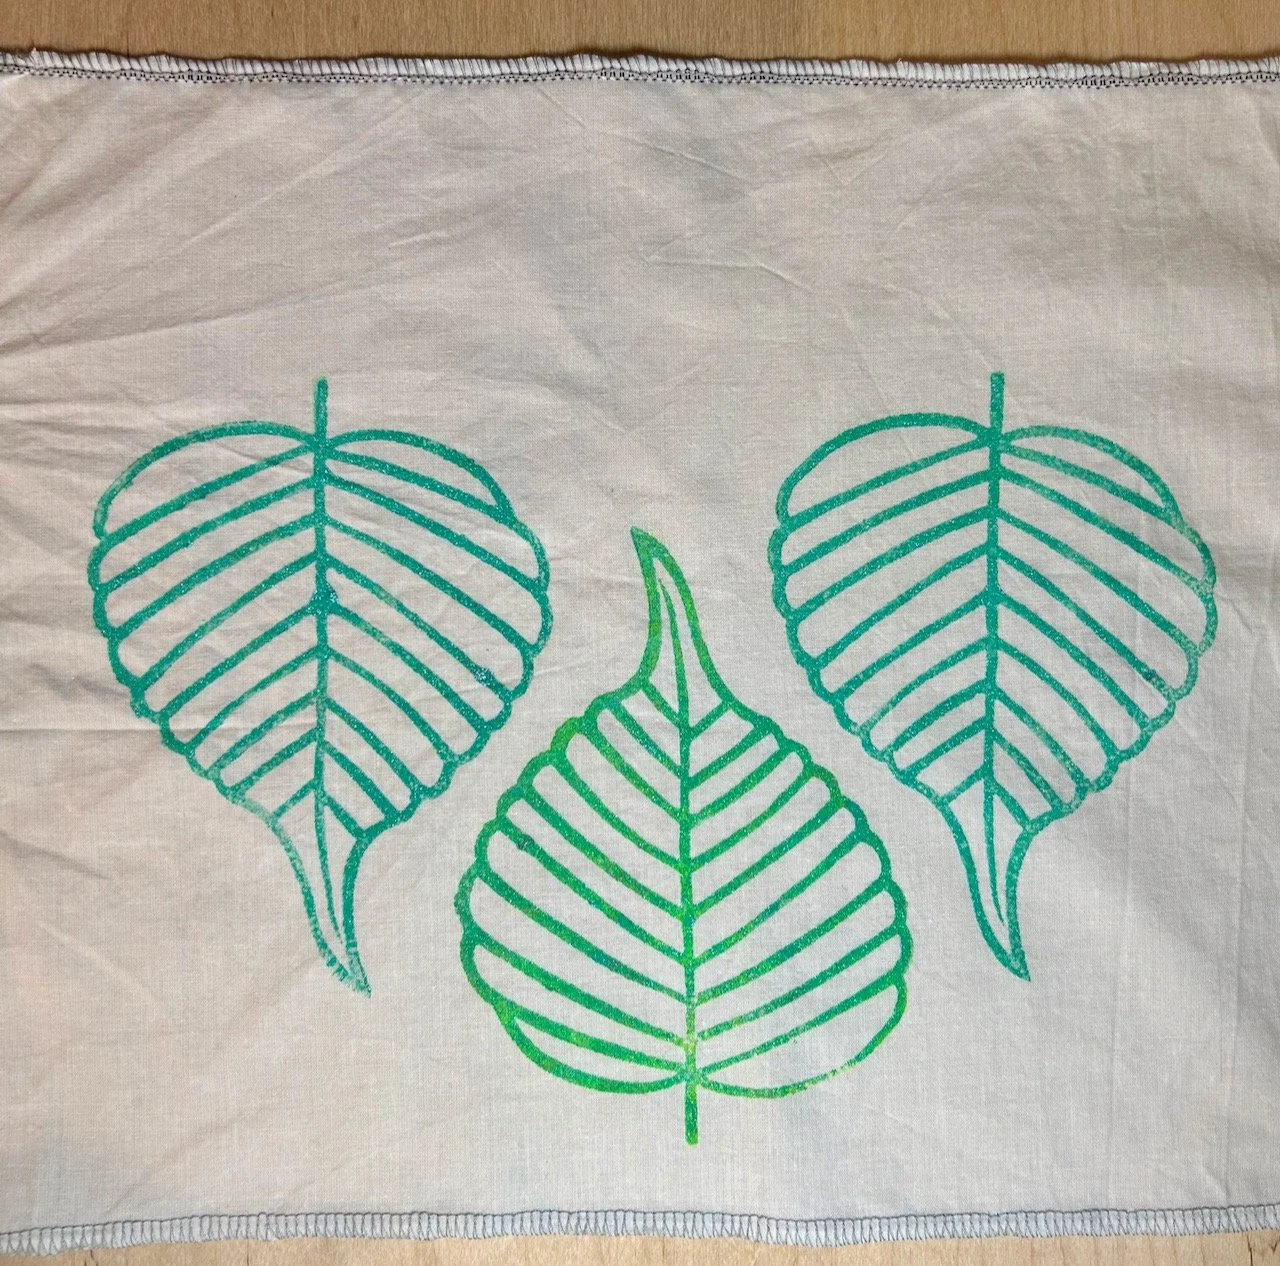
I printed the designs onto the fabric using fabric and Indian blocks at the adult learning class - and as you can see used the same block to create the design of three leaves. I also experimented with using two colour fabric paints on the middle block, adding an almost fluorescent yellow to the shimmering green, which I used on the outer leaves.

Three leaves block printed onto a piece of old bedding - two with the point down and a third between them with the point up

I liked this as a design and the resulting print, though the leaves kept reminding me of onions for some reason, and I’ve no idea why. Having rediscovered the joys of chain stitch as part of this course I was keen to continue that, and decided to outline the leaves and then fill in the blanks, but keeping the central design different.

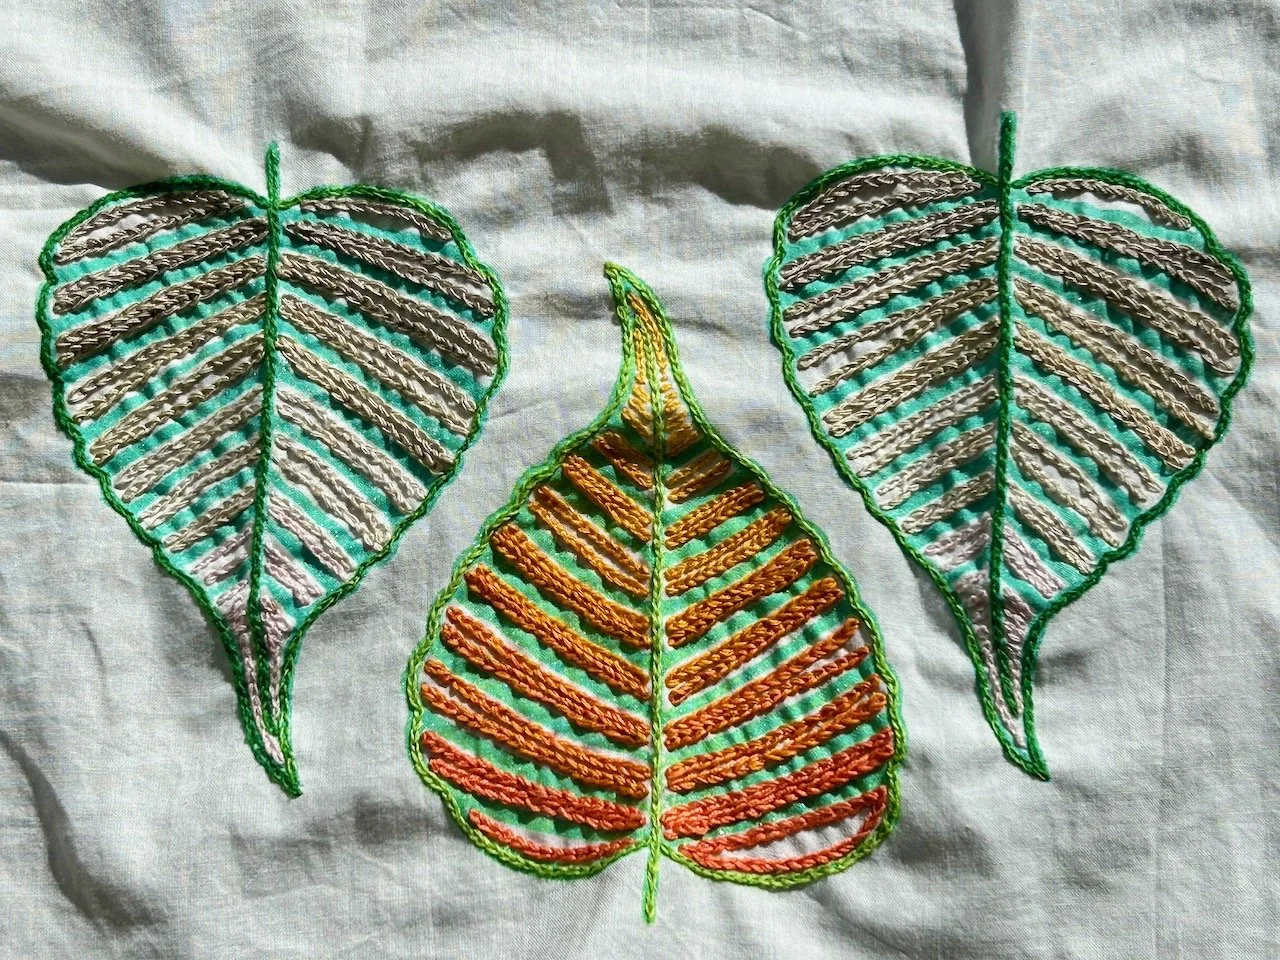
I wanted to keep the green and green/yellow outline, and I wanted the central design to be prominent. Looking through my threads I opted for browns through to blush pink for the outer leaves and for oranges through to yellow for the central motif - the colours just seemed right.

All three motifs outlined and filled with chain stitches in neutral colours for the two outside leaves and warm oranges and yellows for the middle motif

Stitching was surprisingly addictive, and quick. It seems I didn’t stop and take many photos of the in-between stages, but if you look at the middle leaf that’s edged with a lime green thread, rather than the darker green used on the outer two.

I also made it up as I went along, mixing and matching strands of my threads to help ease the colour progression, and I’m really pleased with how this turned out.

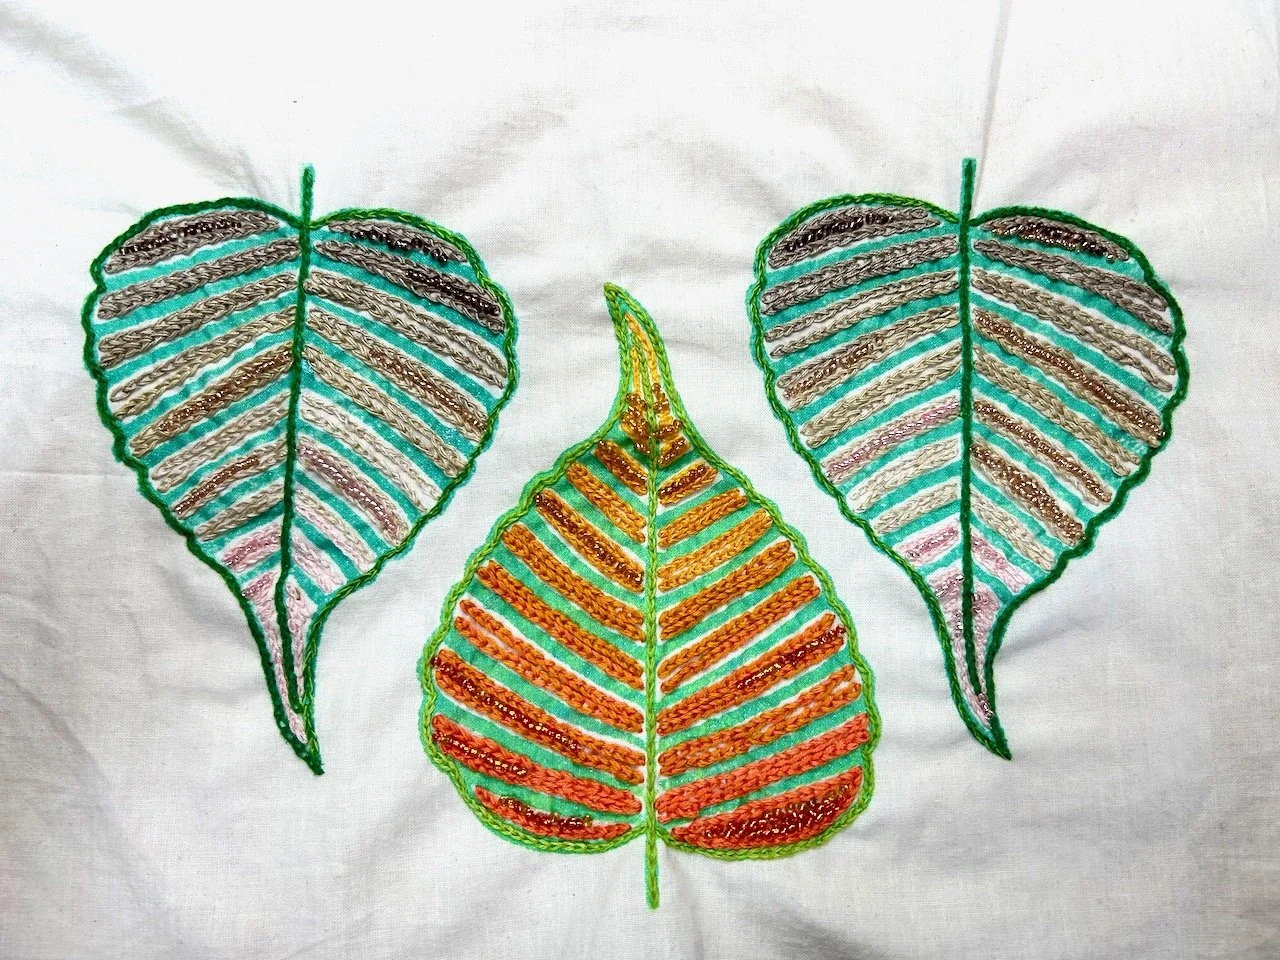
So then I decided to add some beads.

Just tiny little ones.

In some of the gaps.

The same three leaves, now with added beads in some of the gaps - the beads follow the colours of the threads

Again allowing my creativity to lead.

It’s quite different to how it started isn’t it?

The embroidery is done, but this piece isn’t yet fully completed as I want to incorporate it into a pouch somehow - I’m just not sure how, just yet but I’m sure I’ll know in the not too distant future. For now I’m enjoying this unique piece which I’ve created without knowing where I’d end up.

PostCommentLove

Keep off the grass!

* I was invited to the press preview for and provided with a pair of tickets to Gardeners’ World Live so I’m marking posts from the show as 'Ad’ - as usual my views and opinions are very much my own. Be sure to check out all of my posts from the show.

Be prepared for something entirely different - and a beautiful border which I absolutely love. I don’t think it’ll be something we recreate here, although the yellow red hot pokers could be a contender!

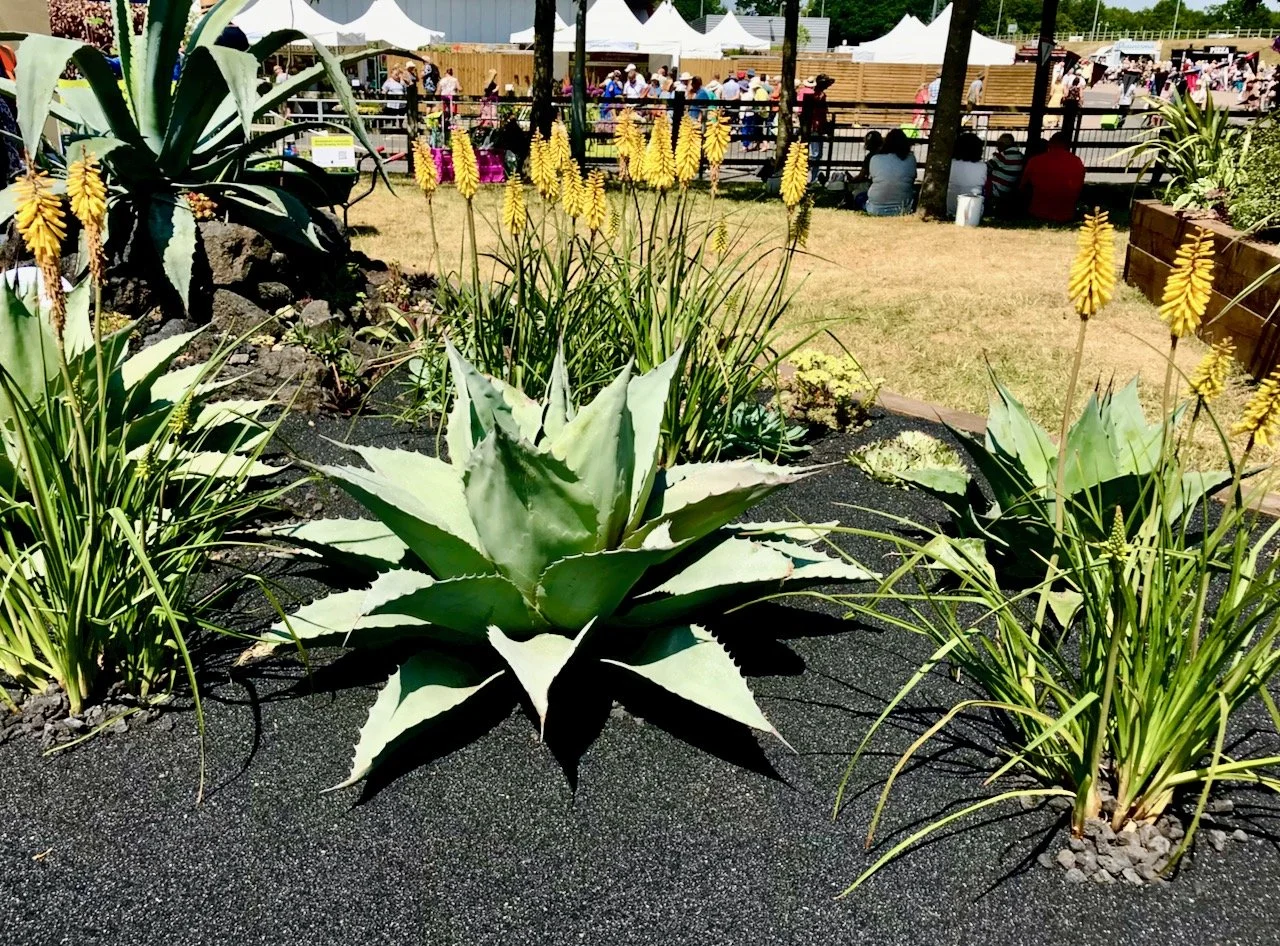
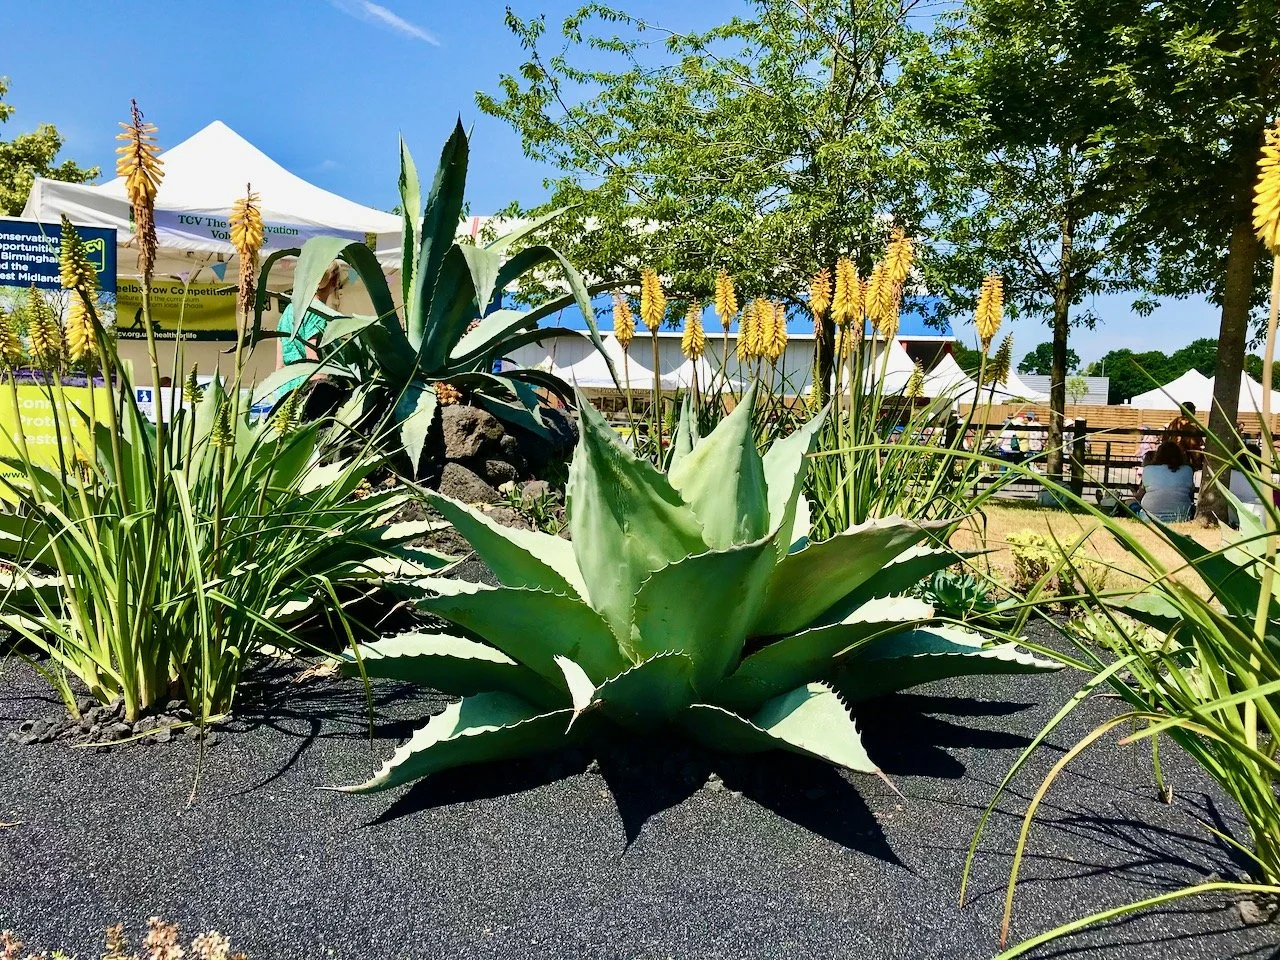
This garden designed by James Fenneberg takes the brief of ‘my garden escape’ to an entirely different level. He has designed a space which transports you through his choice of plants and materials. Agaves with their texture thorns feature prominently and symbolise ‘the sense of protection he wanted to create in his border’, and the results are stunning.

In addition James was also inspired by our ever changing climate to create a drought tolerant design which also features repurposed volcanic sand and rocks to create an ecological habitat for insects. And the weather on the day we visited the border couldn’t have underlined his message any more. We spent some time chatting with James and remarked how he was noticeably less flustered than some of the other garden designers who were watering the plants in their gardens so that they would look their best for the duration of the show.

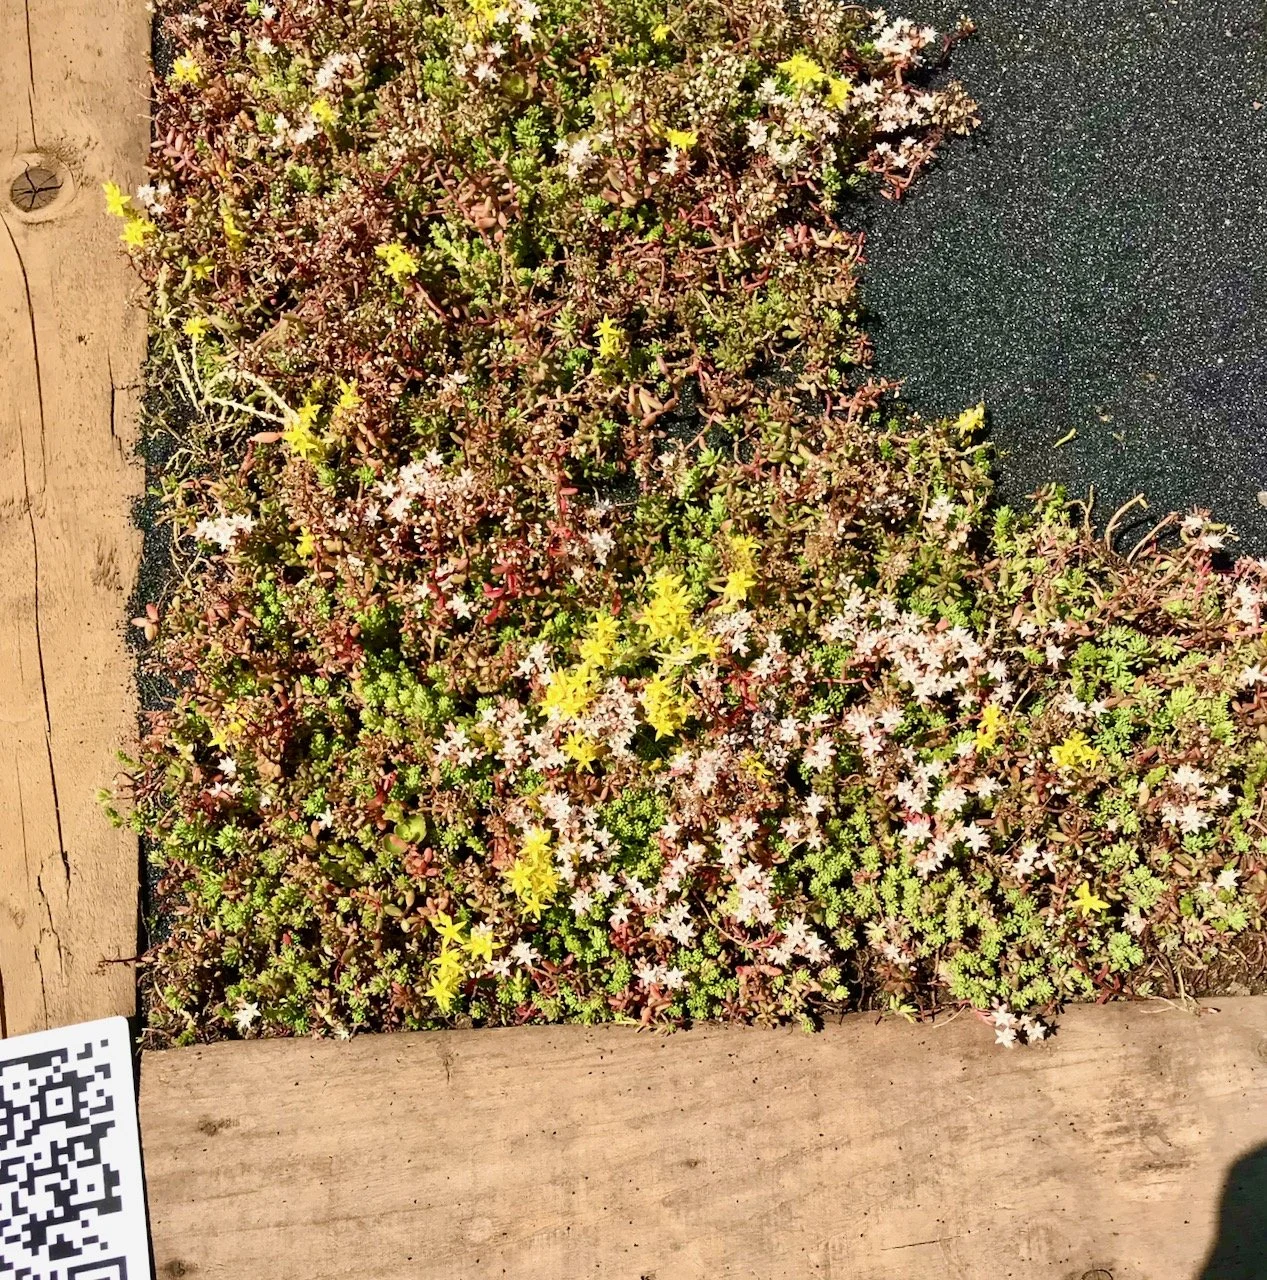
small sedum like ground covering plants  in one corner of the beautiful border, encroaching onto the volcanic sand
The agaves in the foreground and in the background on a rock flanked by yellow red hot pokers on each side

Not so for James though, that’s definitely a design element that paid off - and one that I think we will all need to incorporate more and more into our garden spaces. Though if it means having sculptural plants like this, then it would be relatively easy to get on board with that wouldn’t it?

* With thanks to Gardeners’ World for inviting me to Gardeners’ World Live, it was as fabulous as ever!

The loos in the bank vault

Yes that’s right, and it’s definitely a first - even for me - but it was kinda fun, and very well done. Before we get to the loos though, we were in Nottingham for a visit to the opera, like you do. Well we don’t that often actually, it’s probably only our third or fourth opera and it was a fabulous production of Romeo and Juliet by Northern Ballet. It was our first time in the Theatre Royal, which was a lovely old theatre and completely in contrast to the Concert Hall which we’ve been to many concerts and productions in before.

Inside the theatre royal in nottingham - a grand old theatre

Before the opera though we went for pizza - we’d seen a restaurant we wanted to try on a previous visit, and then neither of us could remember its name or where it was. But, after some internet searching we found it and so found ourselves enjoying pizza and mocktails in Rudy’s Pizza admiring the architecture, the high ceilings and the plasterwork and so much more.

Looking up to the plasterwork on the high ceiling in Rudy's pizza in Nottingham

How beautiful and grand is it? It’s definitely a statement of wealth and prestige. So even before my visit to check out the loos we knew we were sitting in an old banking hall - we’ve both been in a fair few of those in our time working in the City!

The thickness of the wall and doorway into the Ladies confirmed the prior use of the building - the thickness of the wall confirmed this was a previous bank vault.

The entrance to the Ladies loo - just look at how thick the walls are - at least two foot thick, it's an archway now though rather than a door

And the safe’s doubly confirmed it!

Two safes still in the vault, one has a doorway and toilet cubicle built around it

It makes total sense to leave them in situ - as not only will they be heavy (to say the least) they’re huge and more than likely would struggle to get out of the vault, and they definitely wouldn’t have got up the stairway I went down. The ladies cubicles were built around the safe, sadly though I wasn’t able to look inside the one with half a safe in so I’m not sure if it was visible inside or not. Though I’ll happily go back and try another time as the pizzas were pretty good too!

Looking up to modern pipework insulated and on show on the ceiling and tiled wall

So quite a different vibe here, but one that reuses a space creatively and with a nod to the building’s heritage - and another post in the Loo Series, which just a week or so ago I wasn’t sure when the next one would be! And I’ve another one to share too, but I’ll save that one for a moment.