My garden in March

In last month’s update from my garden there was the promise of colour, but it hadn’t yet materialised - well in March, it materialised with daffodils, blossom and the tulips making their mark. That wasn’t all though, and thankfully looking back you can see how much the garden has transformed in a month, with Spring taking its first tentative steps - thankfully!

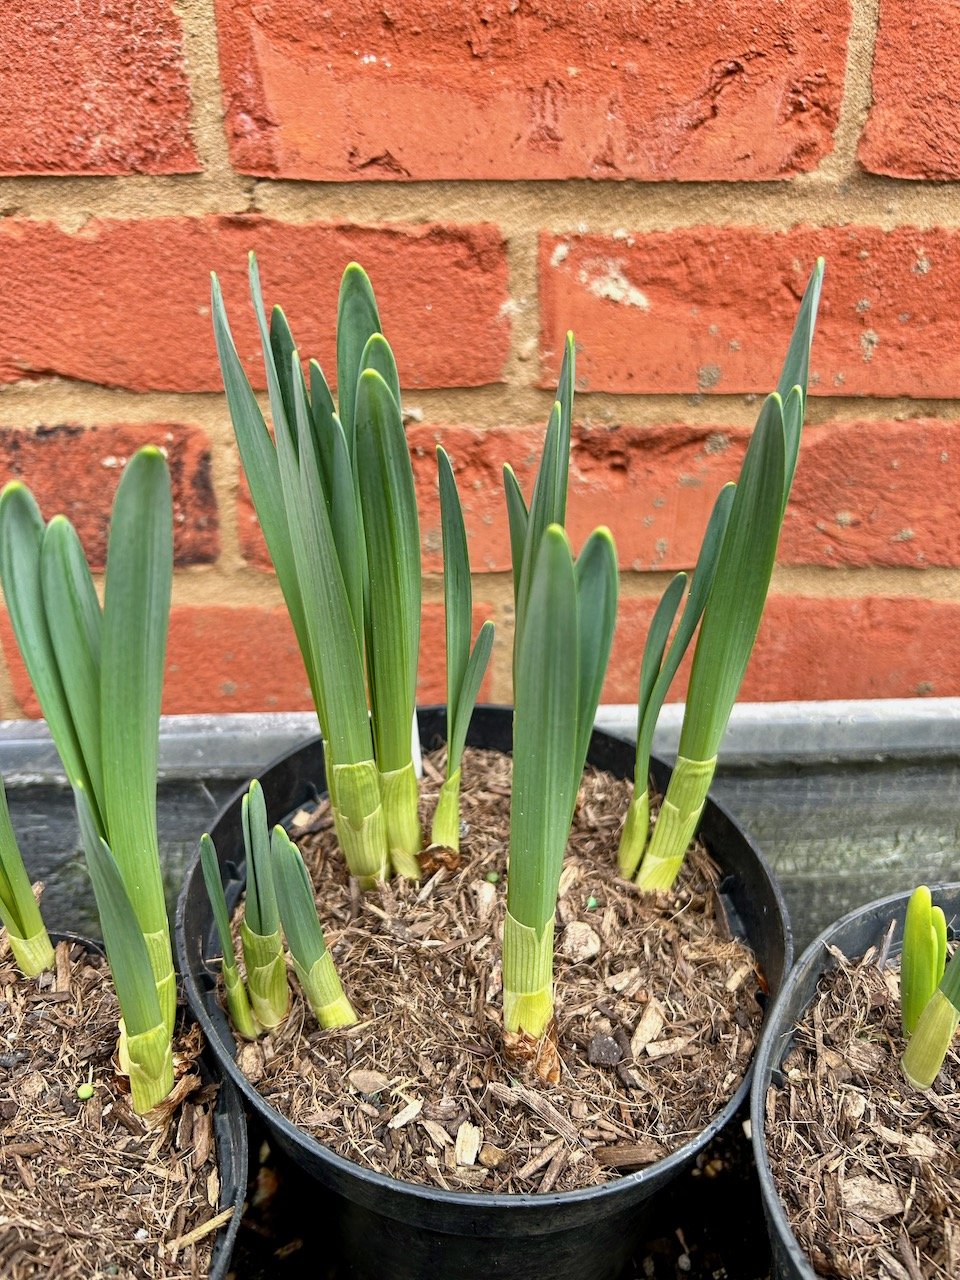
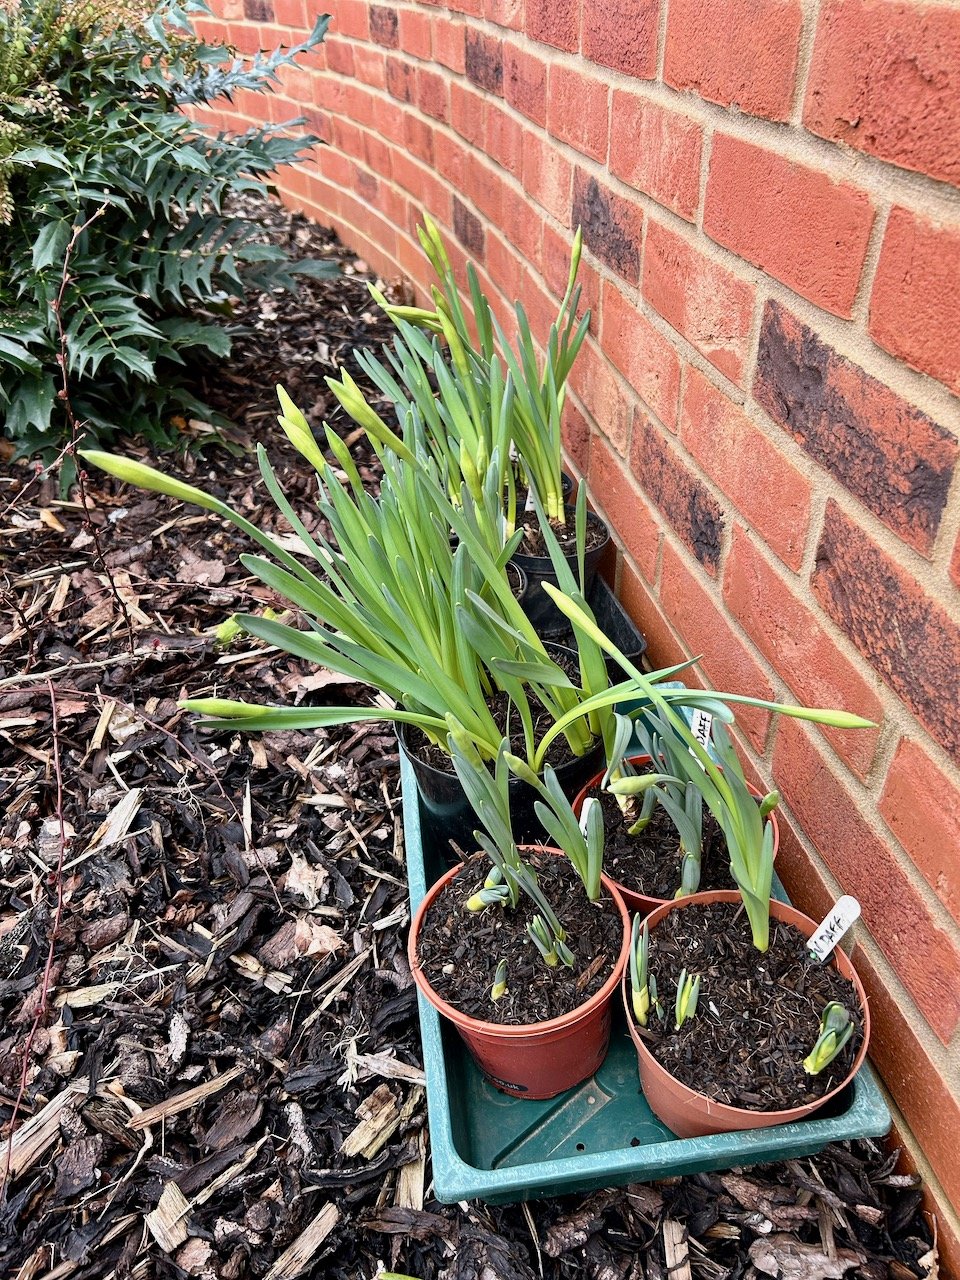
These three terracotta pots have kept me busy over the month, with MOH quipping at one point that our daffodils probably had the most attention than any anywhere else, which is actually a fair comment. These egg yolk yellow daffodils were the first to flower, not surprisingly as they were the ones that got into earth in the autumn. The errant or curly wurly ones that I didn’t plant until the new year flowered much later, but they did flower and they brought their pale gentleness to the garden as they did.

three pots of flowering daffodils on the edge of my patio
A close up of three daffodils in flower with a blue sky behind them.

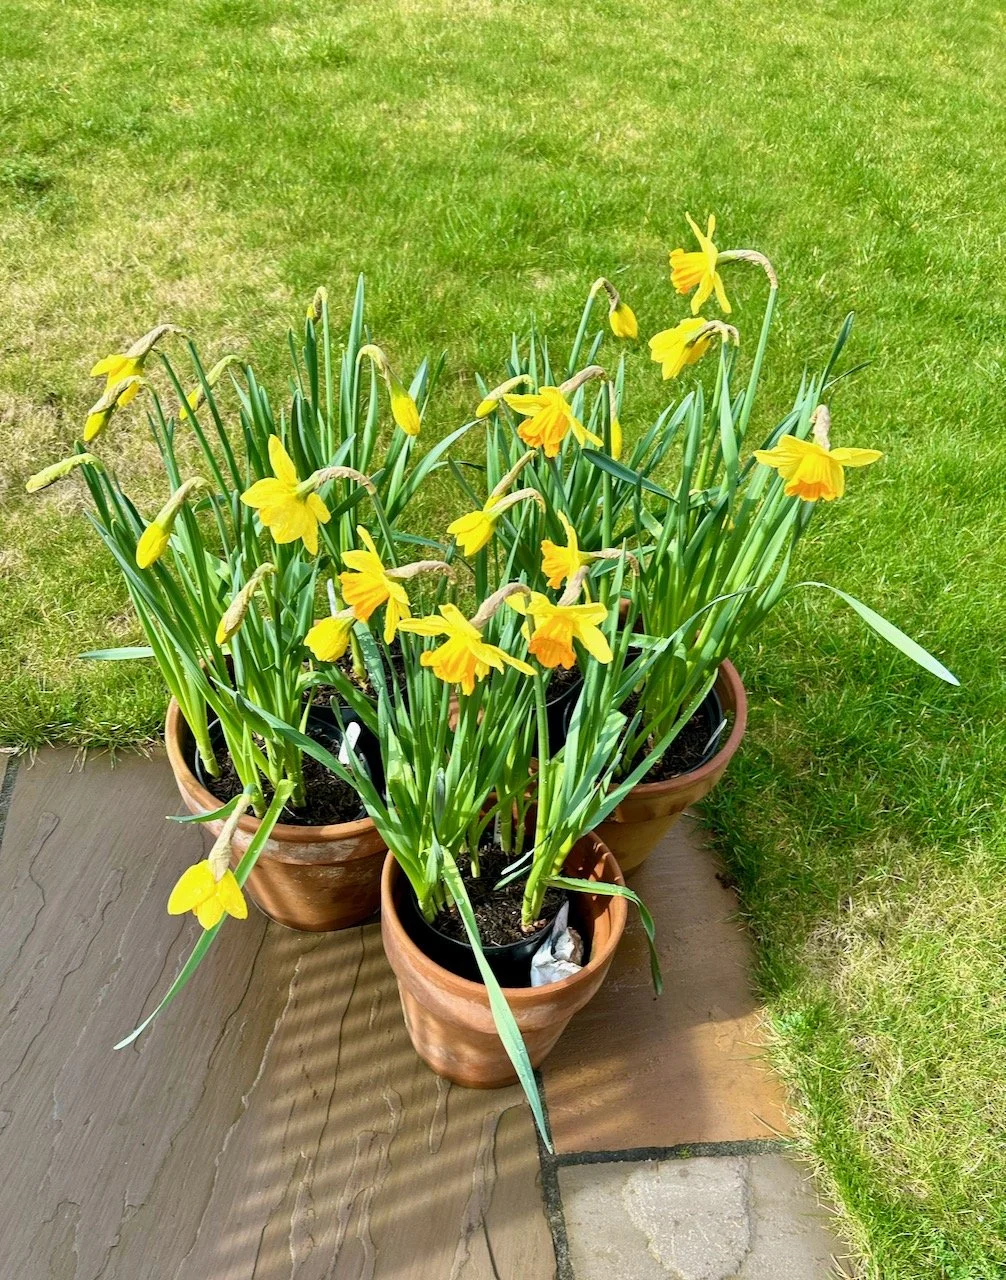
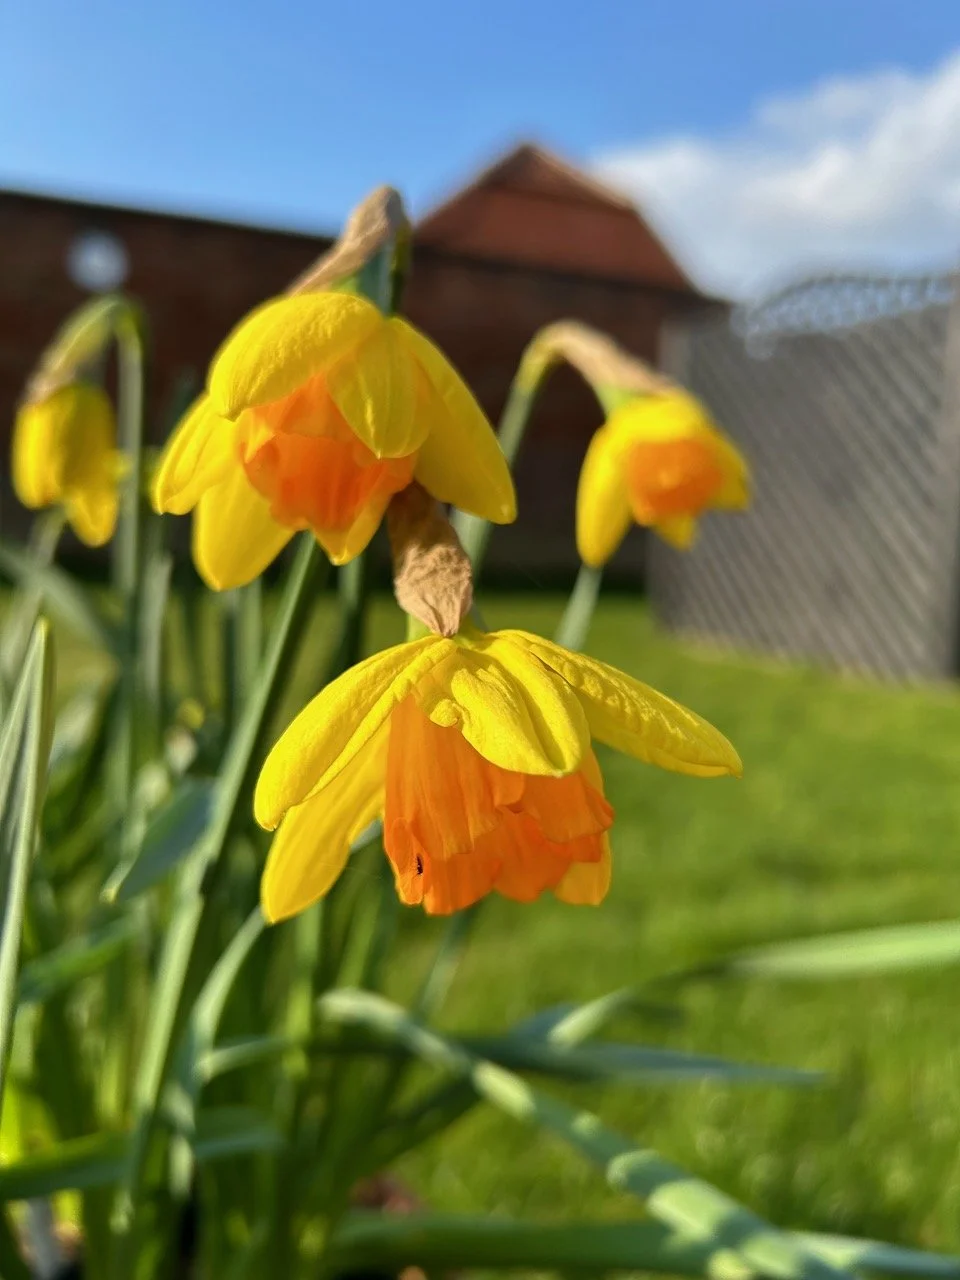
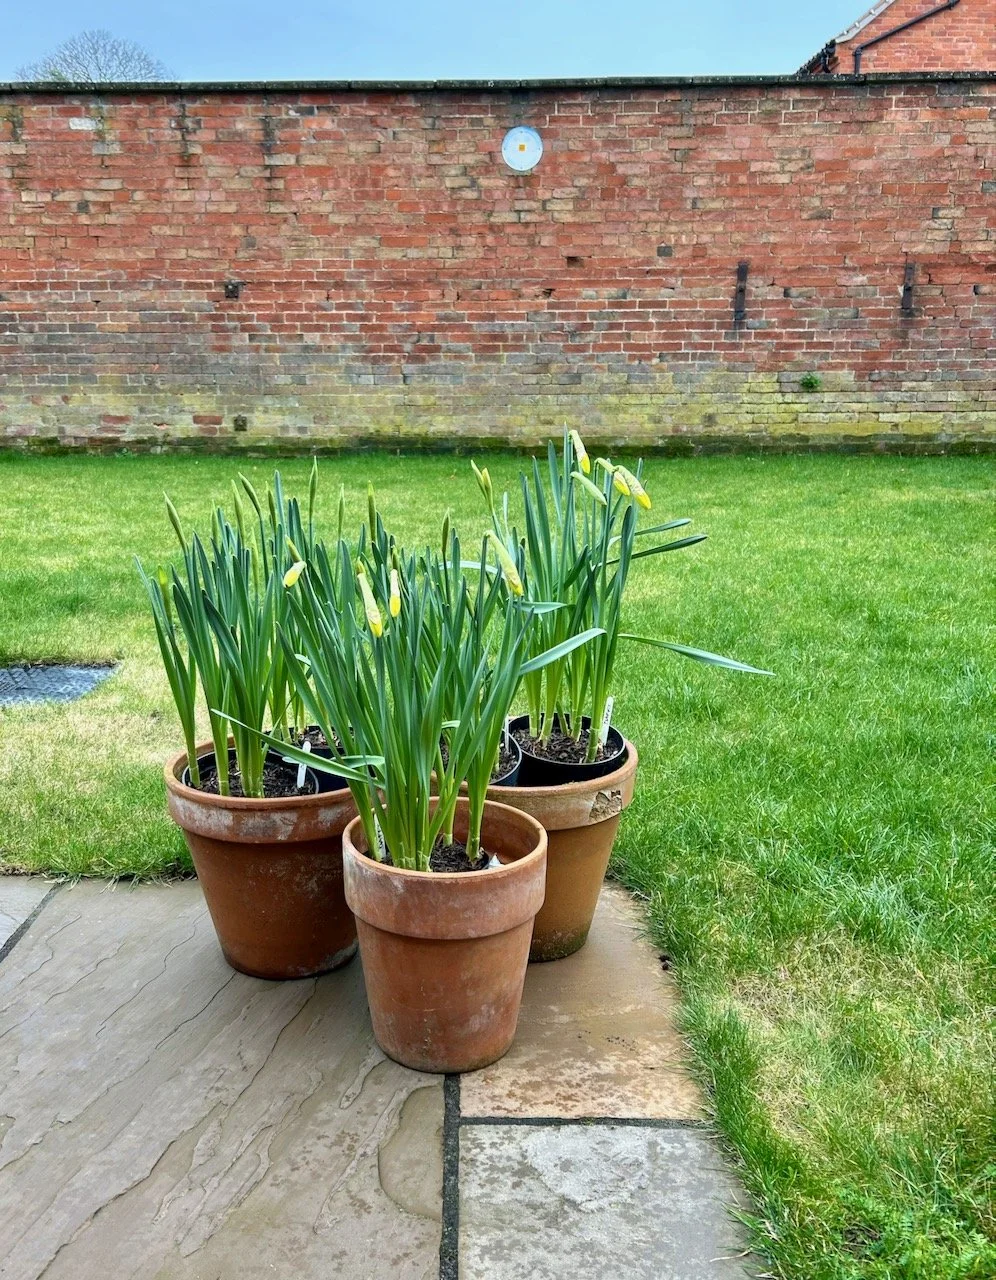
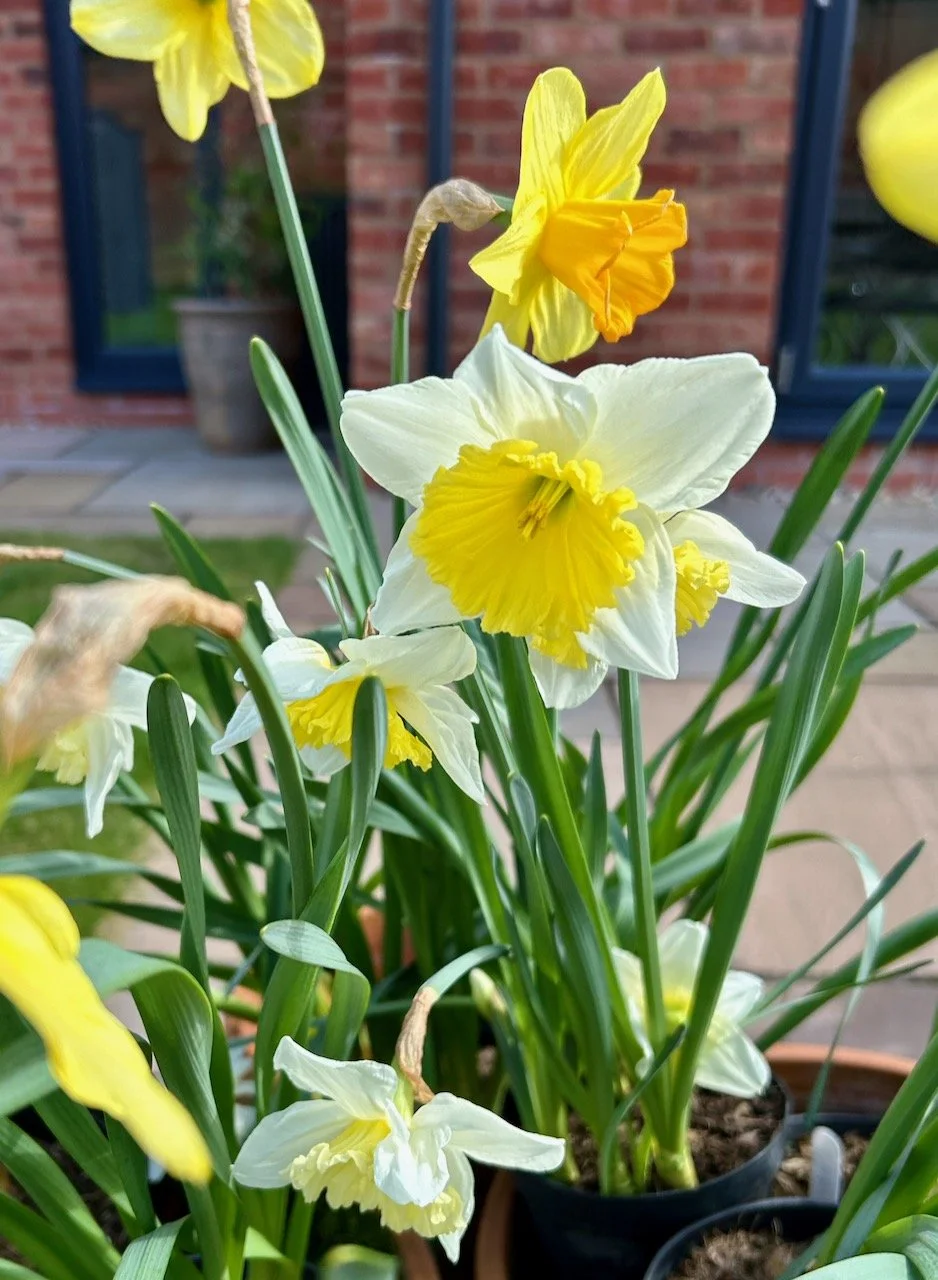
You’ll have seen this photo before I’m sure, and I make no apologies for sharing it again as I really like it and it was the first time on ‘daffodil watch’ that I had flowers, the blue skies were an absolute plus too.

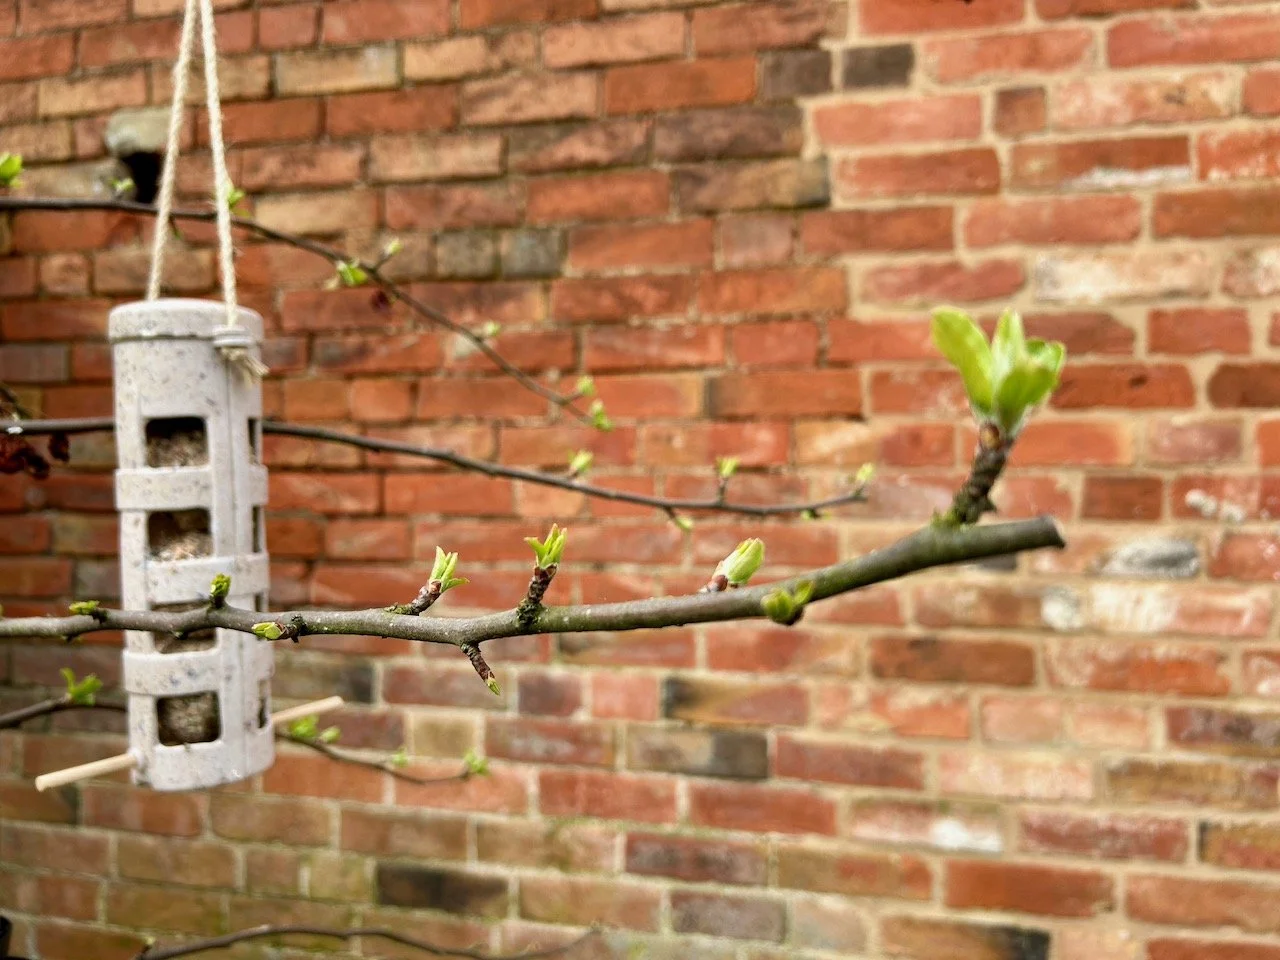
It was good to see the crab apple tree spring back into life too. I’d pruned it at the end of the summer last year, to reduce its size and give it a better shape and over the winter it acquired a bird feeder. Unfortunately the only birds that were interested were a couple of crows who were doing their utmost to get to the fatballs it holds. Not wanting to encourage the crows into my crab apples (there’s a lot of them here, with nests in the taller trees a few gardens away) I moved the bird feeder out of the tree and hung it on the wall, as we’ve nowhere else for it at the moment.

Watching the crows and their confusion on their next visit made me feel bad (briefly), but also they were quite comedic too - they haven’t found where I’ve hung it temporarily yet either, though we do still have a crow or two patrolling the grass every now and then.

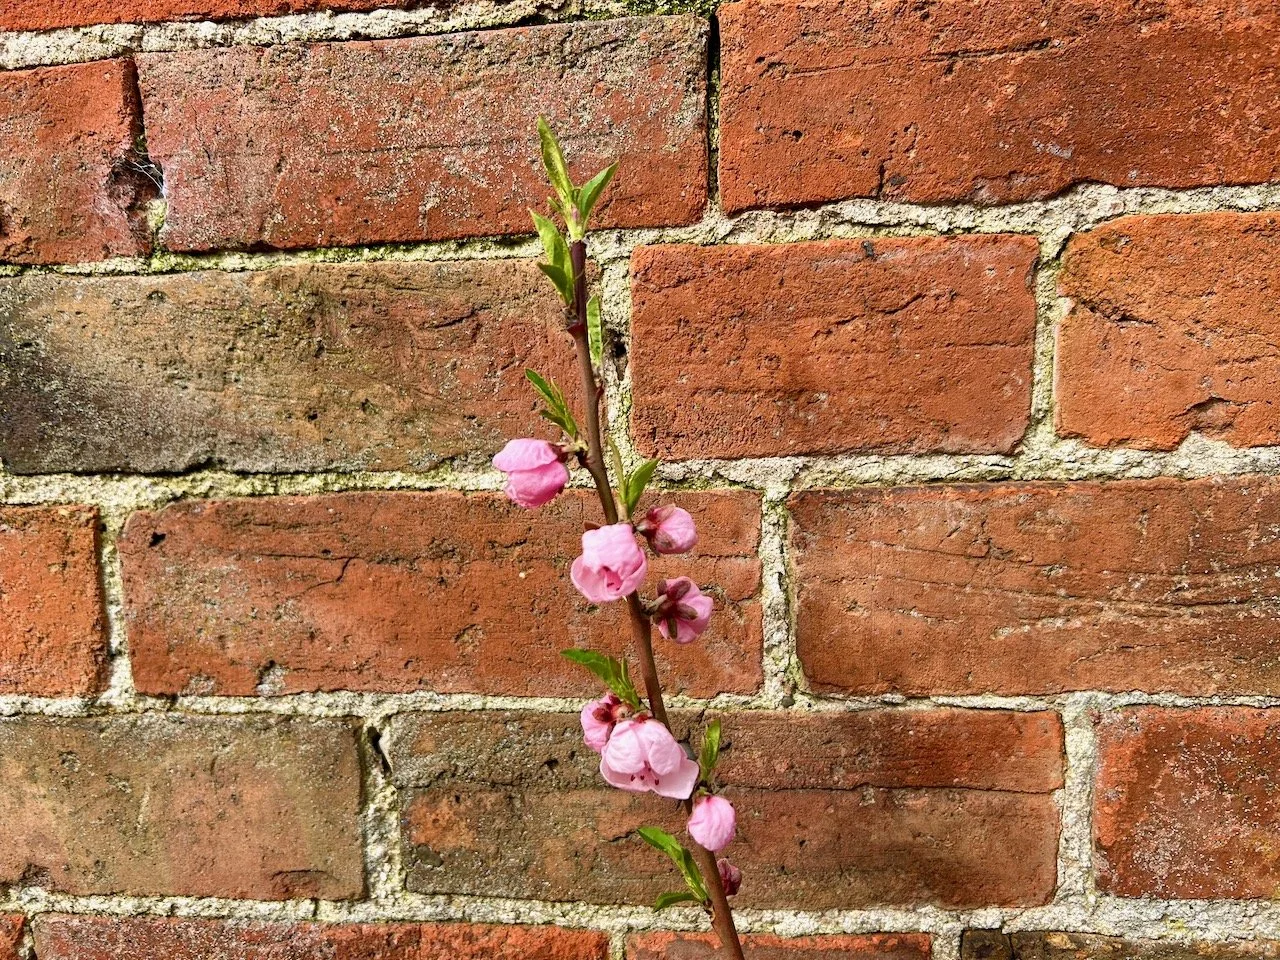
In terms of blossom our small nectarine tree really put on a show. This plant came from dad and it’s our first year of seeing what it gets up to, and so far it’s going well! I repotted it in the autumn and as we want to eventually grow it in front of the wall on a more permanent basis, I’d pruned it so there was a central stem and two branches on each side with the intention of tying it to a cane support. I didn’t get around to that before winter, which given the wind and storms was probably a good thing, and its rewarded me with some early and very pretty blossom - I’m keen to see what it gets up to over the next few months now.

Round pink blossom buds on the upright stem of the nectarine plant (against the brick wall)

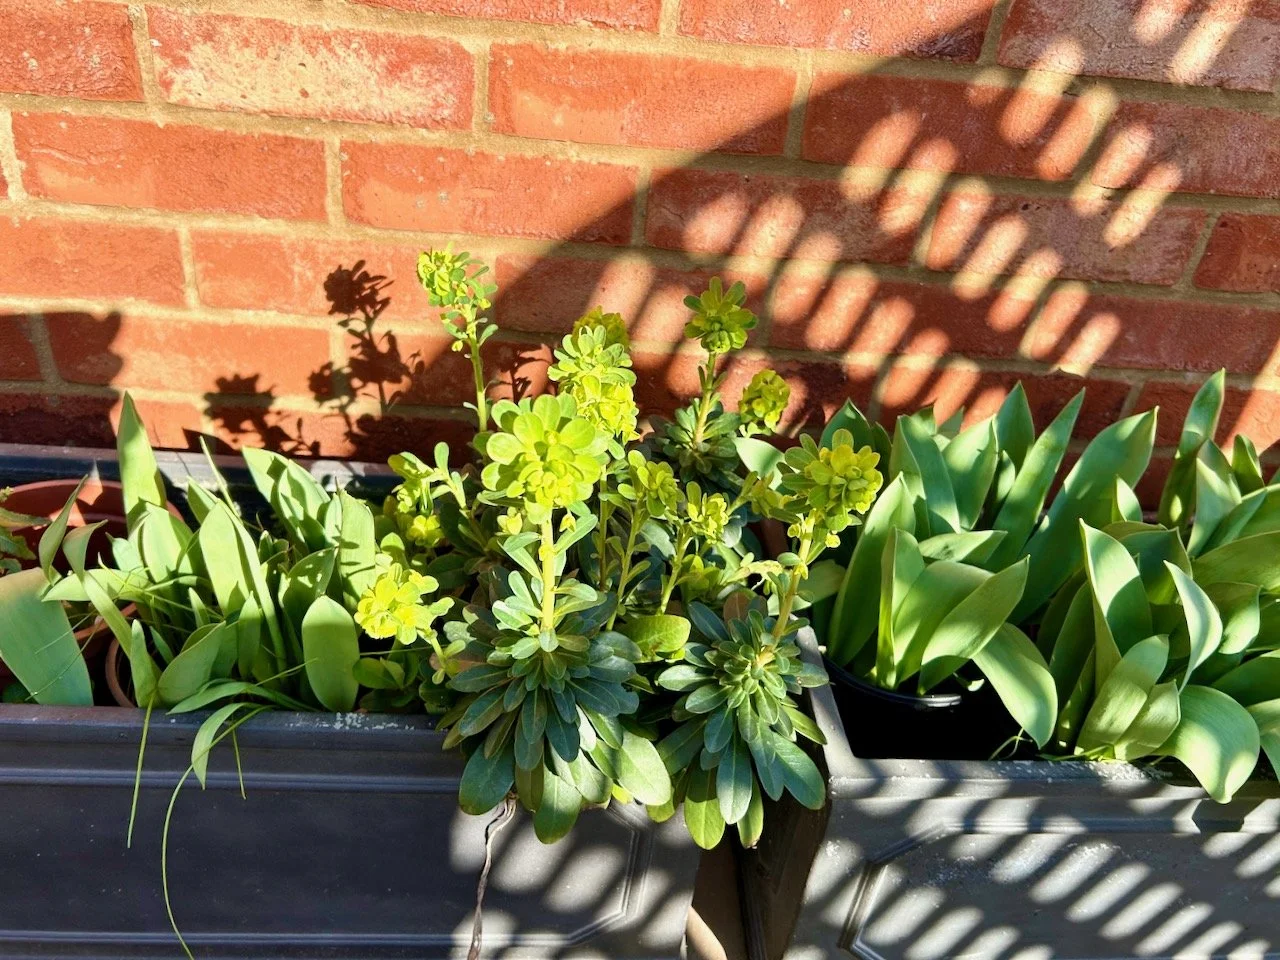
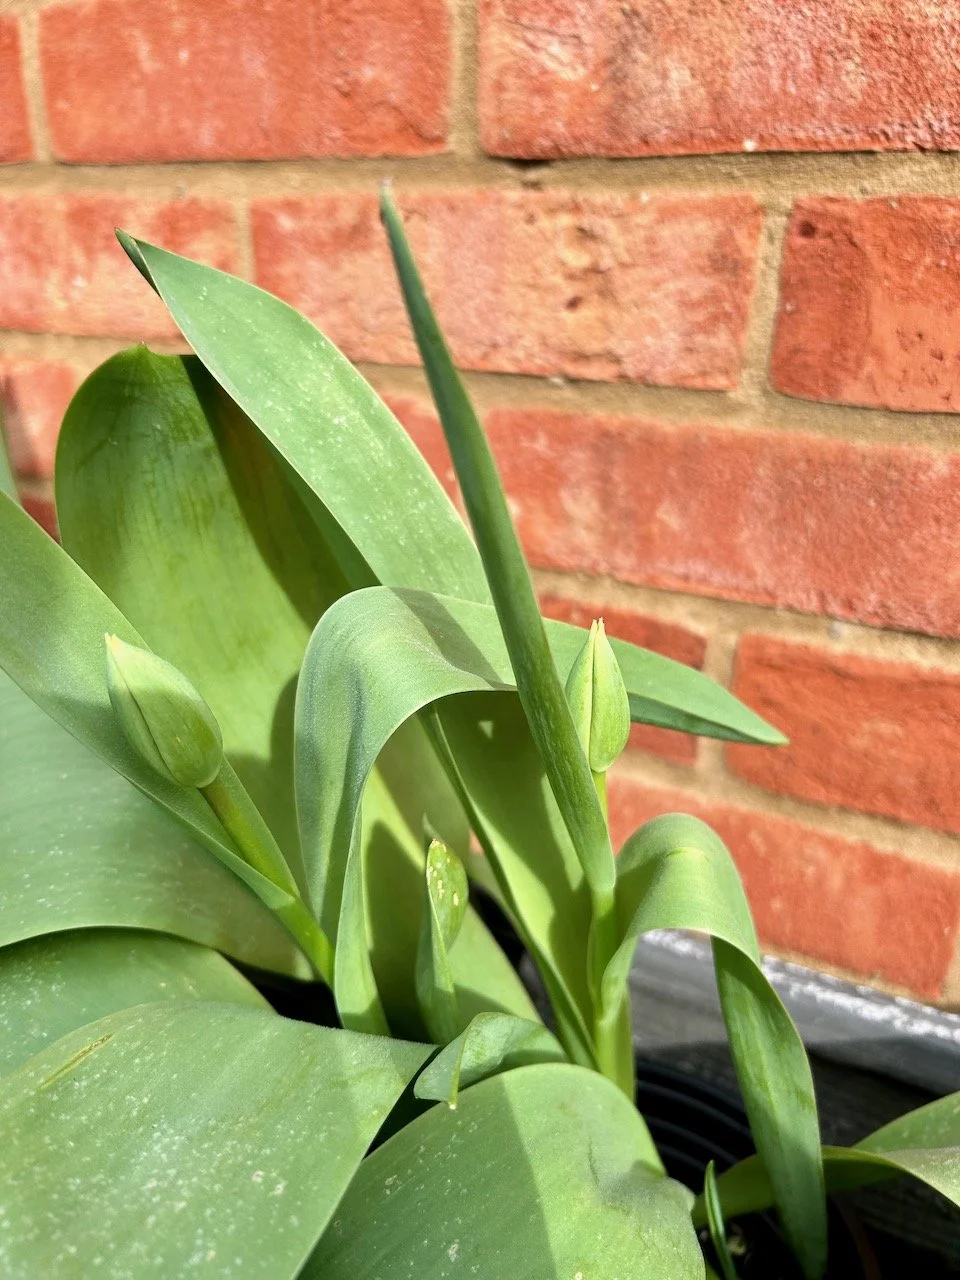
My tulips were also showing signs of promise early in the month, and are clearly happy in their new location - which while windy is also protected and of course they get the heat from the garage wall behind them. I love how they’re so very green when they’re at this stage.

Two tulip buds (still green) amongst the leaves

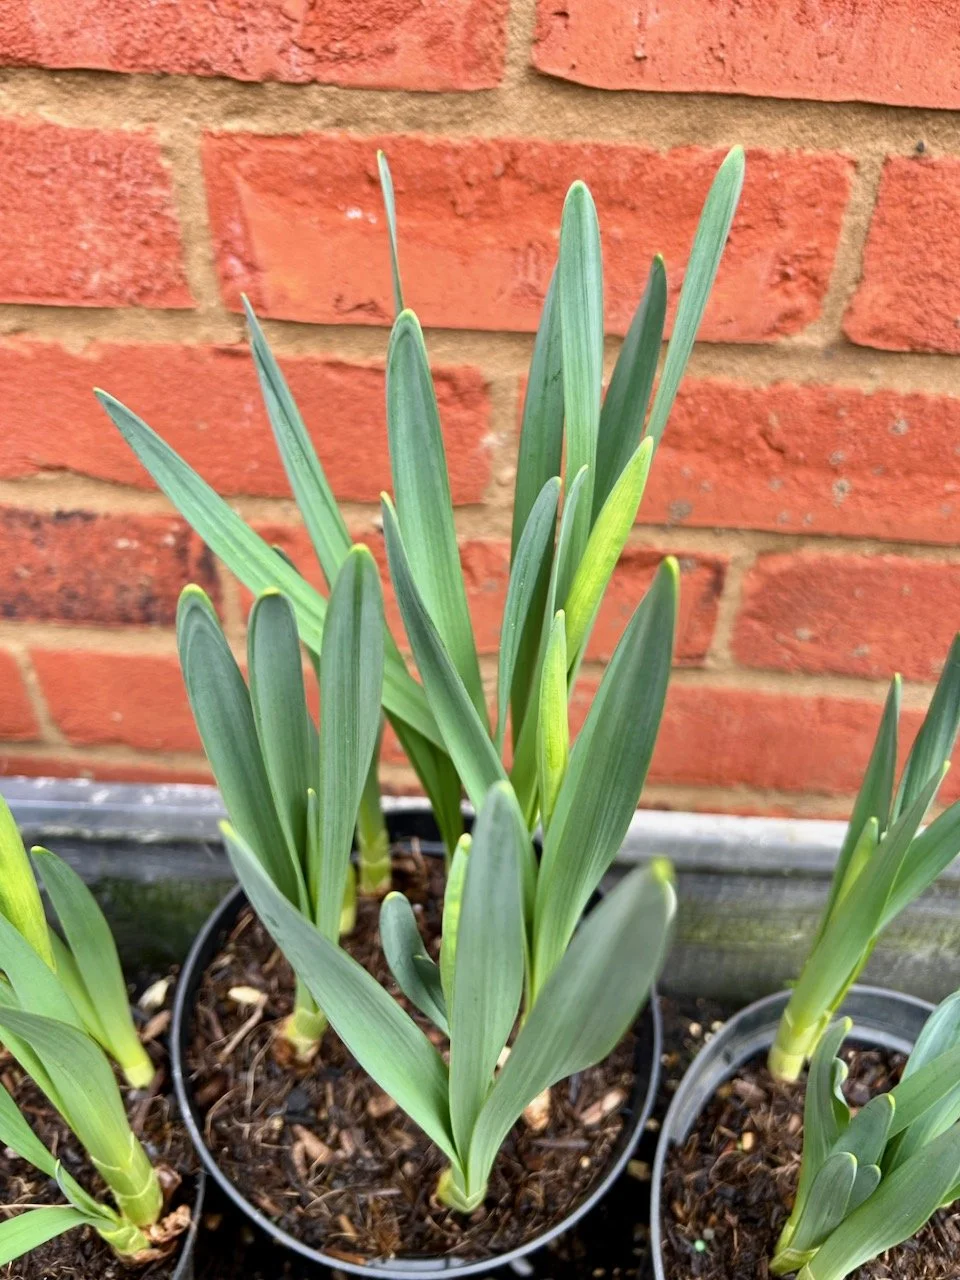
Here’s the errant daffodils, some were quite tall in the end, but some of the others not so much!

The later flowering daffodils nestled against the wall and waiting to flower.

They are much more delicate in their colouring though, and while they’re lovely I much prefer the egg yolk yellow sort!

a pot of daffodils flowering - both varieties on show

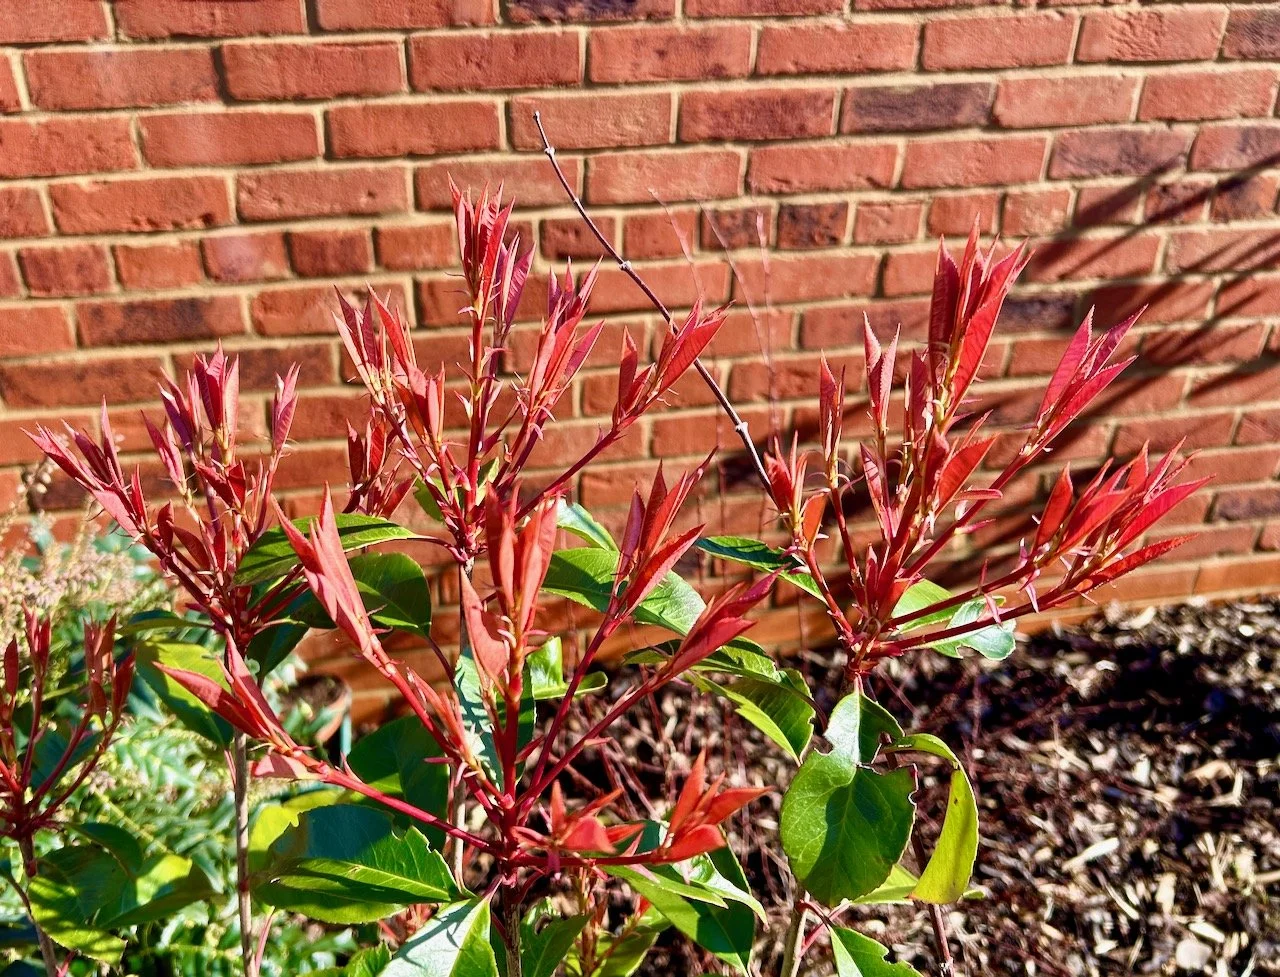
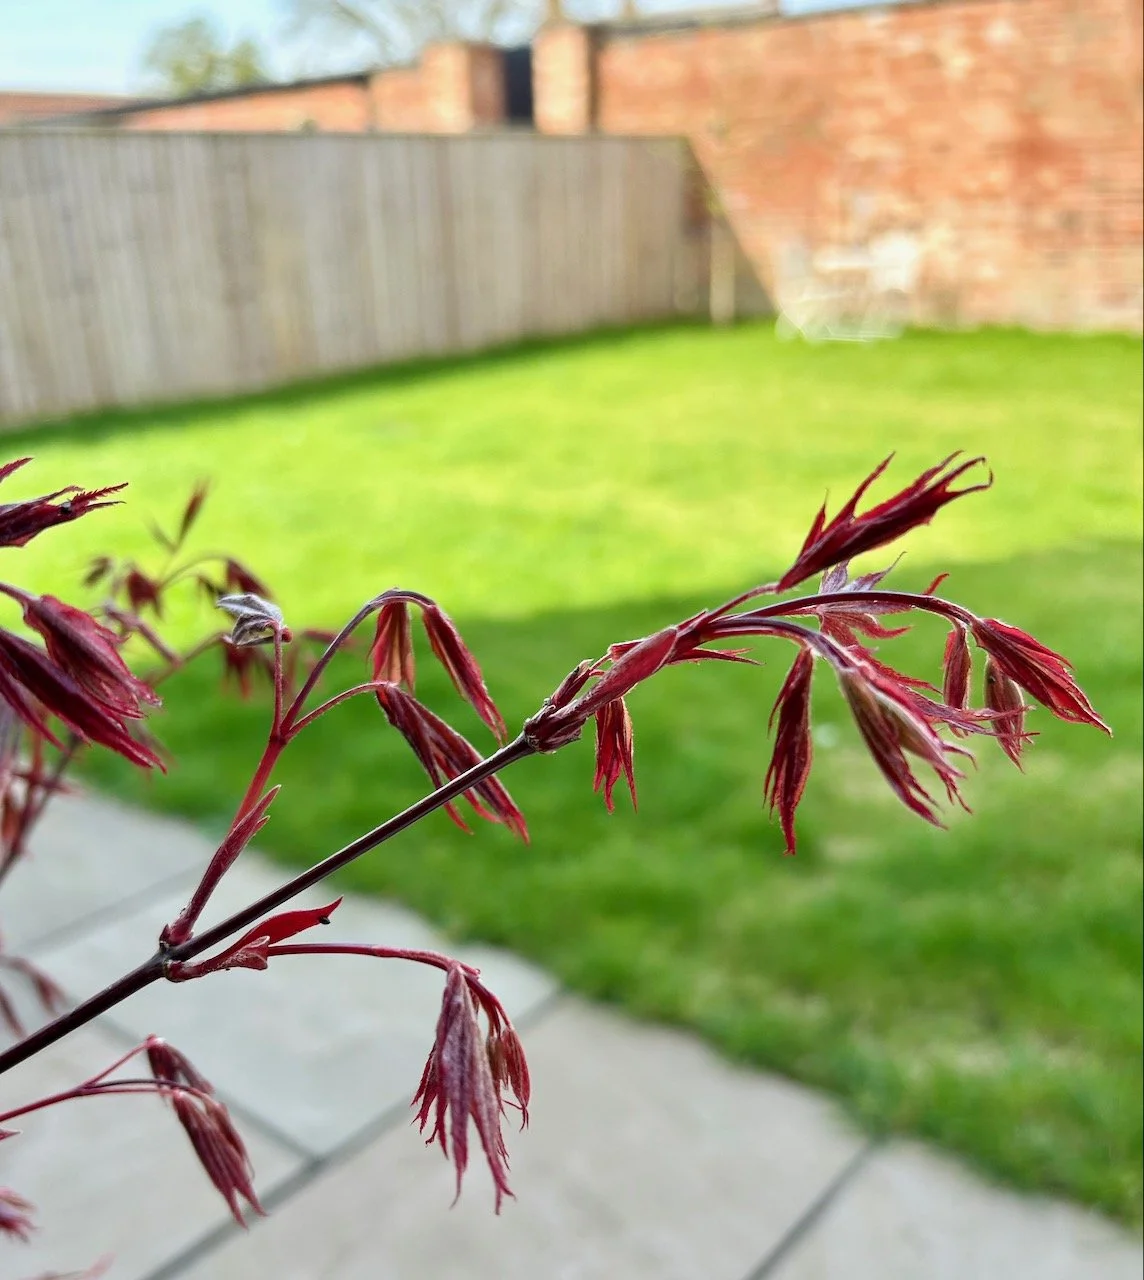
Throughout the month the acer which we brought with us has come back to life too. It started with small buds, which gradually turned into these folded up leaves. It’s great to have the colour back by our back (front) door - and I think there’s more leaves than I remember in previous years.

Our red acer starting to show its small red leaves

Although I’d been keeping an eye on the tulips, they did take me by surprise and were suddenly in full flower. I think they too are enjoying the more open, and sunnier, garden and have come much earlier than they would usually in our previous garden. That gave me a headache though as my patio pots were still full of daffodils, but I didn’t want to miss out on these either.

flowering tulips and euphorbias in the trough pots alongside the garage

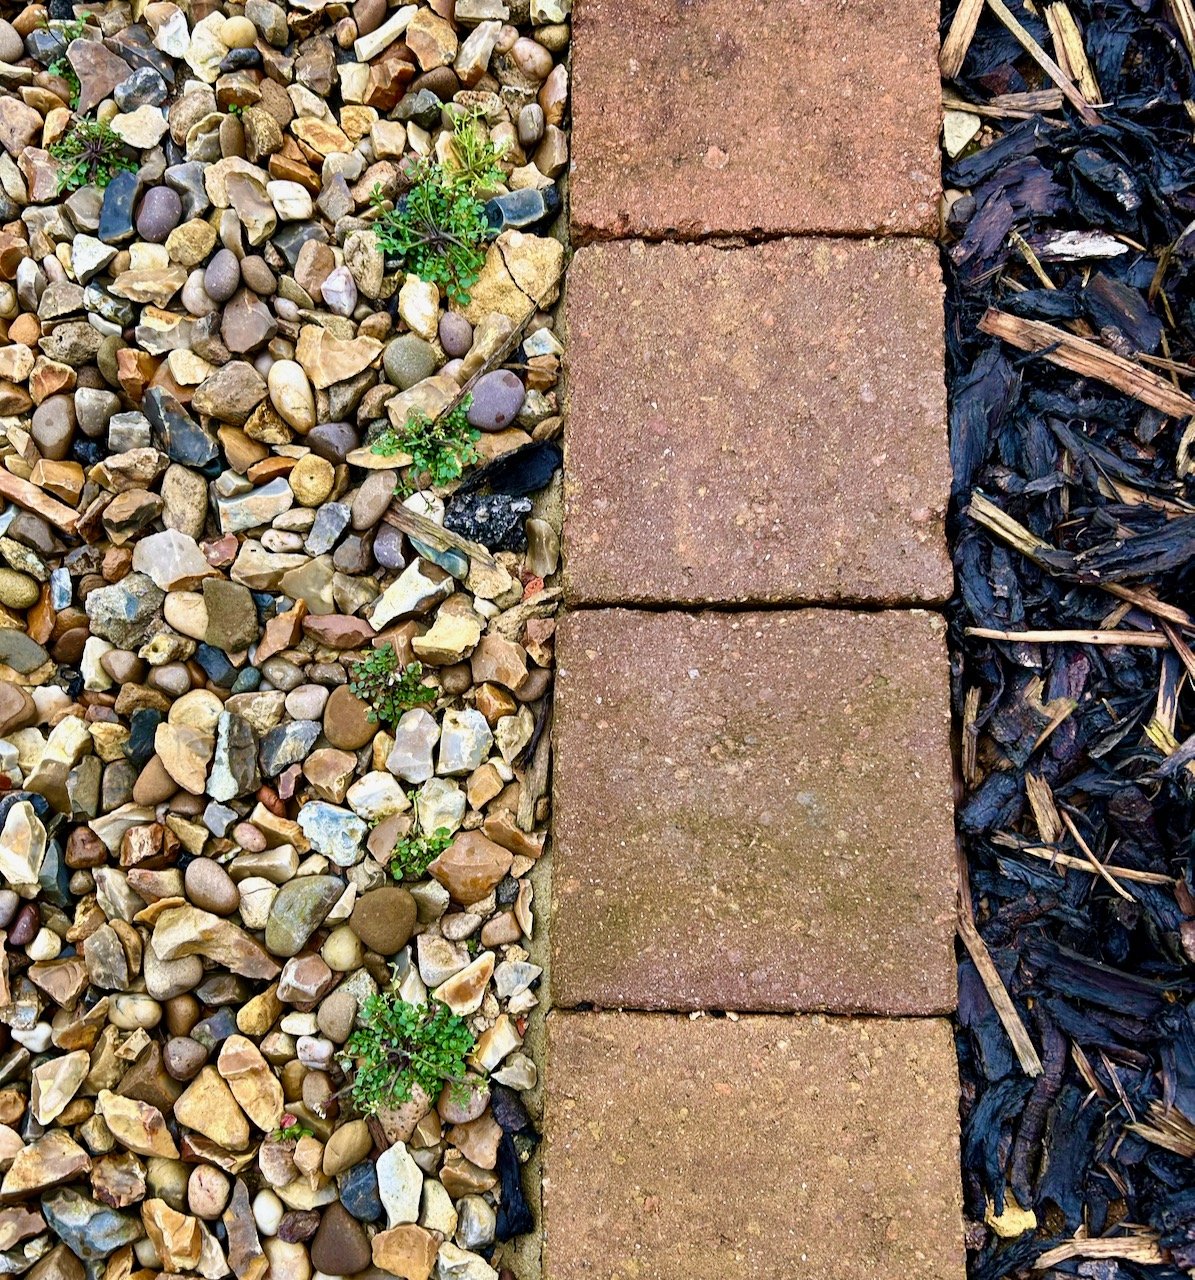
I soon solved that conundrum by moving the tulips onto the patio and arranging, and rearranging, the daffodil pots in the large border so that we could see them from the house. I also learnt that our soil is saturated, I bought some snowdrops in the green and needed to plant them, but also needed to mix in some compost to the soil so that they stood a chance. Knowing this I was glad I put the daffodils in pots, but now I’m thinking I’ll keep them in pots and half dig them into the border - especially as know I’ve worked out the optimum spot for them all.

A close up of an orange and yellow tulip
Tulips and euphorbias enjoying the sun - oranges and yellows of the tulips and the lime green euphorbias just make me smile.

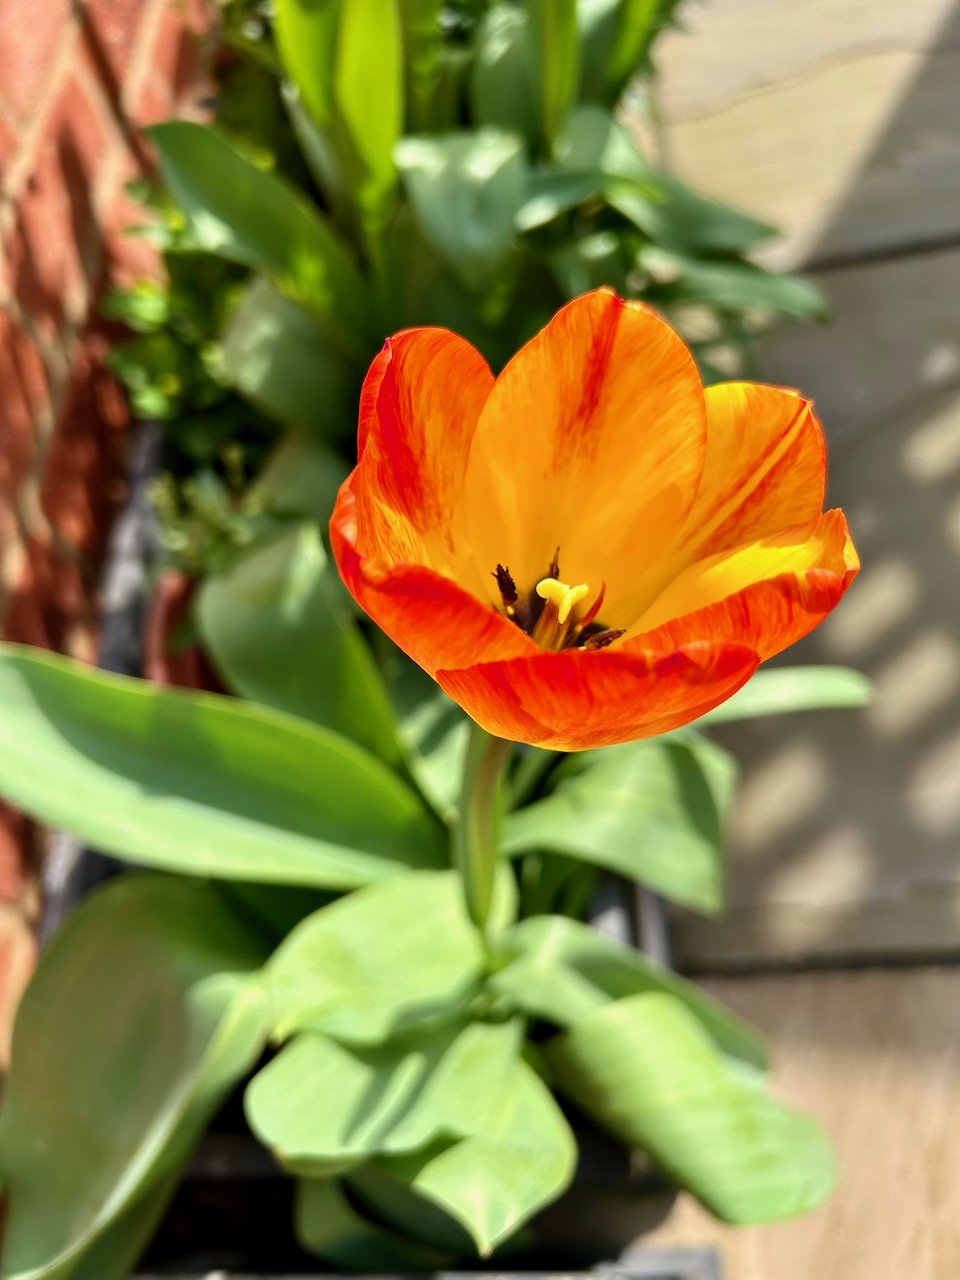
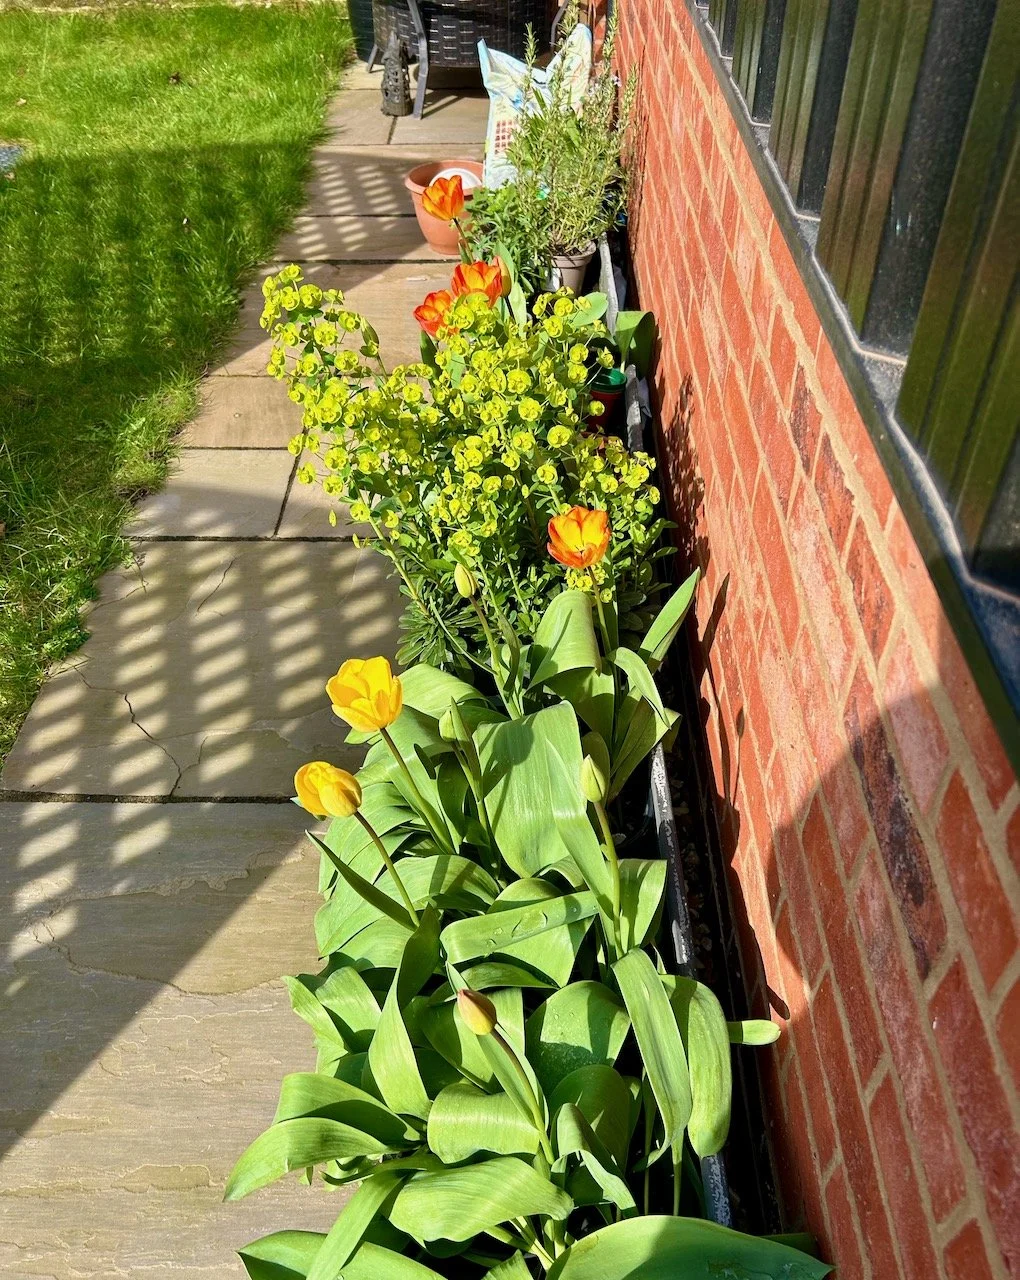
So a burst of colour this month - and aren’t the bold tulips against the lime green of the euphorbia just divine? I’m thinking I should pot up some of that euphorbia so I can bring that into the patio pots as a foil for the tulips next year - I know they spread when planted in borders, so maybe this could be a way to keep them more contained!

Other than these pots, we’ve still not been gardening proper this month thanks mostly to the weather - let’s hope April brings better weather and more opportunities to spend time outside in our new garden.

PostCommentLove

My garden in February

The weather in February has been just as dire and uninspiring as in January’s update, and I’ve not been tempted into the garden for anything more than taking some photos and moving some daffodils onto the patio so we don’t miss them flowering. But the good thing about our new garden is that we see a lot more of it from the house as every room pretty much has a vista over the garden and we walk through it every time we go out, so that alone brings plenty of opportunity to see what’s going on.

And in summary, that’s quite a bit for this month - hellebores, daffodils and even a few weeds!

Let’s start with the daffodils, they’ve come on so much.

Daffodils peeking through the soil in pots with a brick wall behind

AT THE START OF THE MONTH

Once I’d spotted that the new daffodils were peeking through the soil and gaining height, they became a regular waypoint on the way to the car, and by the middle of the month after being looked at a great deal the flower buds started to develop. Though I was still in for a long wait for further developments, but I can wait (mostly).

FLOWERS DEVELOPING MID-MONTH

The bulbs are much taller and more daffodil like, but still not flowering.  The pots are now in terracotta pots on the edge of the patio with the grass and brick wall behind

BY THE END OF THE MONTH THEY WERE ALMOST THERE, ALMOST!

By the end of the month I was sure that flowering was imminent, and I didn’t want to miss it by leaving them alongside the garage and nestled against the wall where they’d spent the winter months. So despite being full of cold I moved them, arranged them and rearranged them several times to get them in prime position.

I’ve taken to growing my bulbs in smaller flower pots so that I can move them around and add them to some terracotta pots when they’re in bloom (or about to be) - that approach worked well for the tulips in our last garden and it’s something I’ve done for the first time with the daffodils we bought from the garden centre here in the autumn. I’m hoping it gives me the flexibility to have some colour on the patio without necessarily tying up pots for bulbs when they’re dormant, or have gone over.

The errant daffodils (which were the ones I was late to plant) have also been checked on, and they’re still errant but are still growing - they’ll be the crazy gang members of the daffodil world this year I’m sure!

The errant daffodils bulbs growing in all sorts of directions in pots in front of the brick wall and nestled behind the mahonia

Other plants which we brought with us (and haven’t potted out yet) are also doing well - the early flowering elephants ears did just that, and their burst of pastel pink among the shrubs, where I’d hidden the pots for protection over winter, was very welcome.

The pastel pink flowers of the elephants ears we brought with us in a terracotta pot
The euphorbias (centre) and tulips either side enjoying some dappled sun through the trellis in the troughs alongside the garage

The euphorbias and tulips enjoyed bursts of February sunshine, almost appearing to dance with glee in the warmth - and quite honestly, I know how they felt. It was also good to see the geraniums which originally came from my FIL’s garden come back, I’m less keen to see the grass they seem to have acquired, but at least its still in a pot so should be relatively easy to resolve at some point.

The geraniums in another pot in front of the brick wall and nestled under a planted bush have also come back well, though this one seems to have been interspersed with grass

The rhubarb is a bit of a star, already I can see some delicate red stems which glistened in the sun. It’s coping well with being in the pot, and sharing that with some lords and ladies, and I expect it will do even better when its planted out when the soil warms up a little. Though of course that means no cropping for a while, but I think it’ll be worth the wait.

early growth on the rhubarb

The mahonias continue to look majestic and they’ve added some great structure to the flower bed over winter, their yellow flowers are no more but berries with a blueish tinge are starting to appear - I think there’s more to come from this new-to-me plant yet.

Looking into the crown of the mahonia, with it's blueish berries replacing the yellow flowers
The red tipped 'red robin' bush providing plenty of colour in the beds and against the brick wall

The red robin bushes have also been much welcomed during the greyer days, and they’ve held up well with their gorgeous red tips - as well as this one, there’s one in the outside border which makes me smile every time I drive in.

And remember that buddleia that brought so many butterflies to the garden last summer, and the one I was tempted to cut down and move slightly? Well I gave it a hard prune instead, and already it’s back and growing well - I shouldn’t have been quite so worried about it should I?! I’ve also removed many seedlings from the gravel, so it seems I was never going to be without one, which is absolutely fine by me.

The buddleia is already going strong despite cutting it back well last year

I thought the deep maroon hellebore that we brought with us was a goner when I looked at it early in the month, it had lost most of its leaves and gained a lot of weeds, but I was pleased to be proven wrong as it’s given us the most beautiful deep coloured flowers as it usually does.

The palest creamy greeny hellebore in flower - so delicate

But this year it’s been joined by a hellebore in the border which is aiming to steal the show with its creamy green flowers which really does pop against the bark mulch. I’m hoping that both of them are happy enough to drop seeds which in turn are happy enough to develop into more plants!

weeds growing in the gravel, the border edging and bark mulch

And weeds, they’re starting. We’re seeing a lot more in the gravel now the sun’s making an appearance and so I’ve a feeling that one of our first gardening jobs of the year will be to remove as many as we can. I’m under no illusion, this is something that won’t be a one-time job, it’ll be the thing that becomes my life’s work in this garden, but looking on the positive side on the right day it can be quite mindful!

Book Review: The Ultimate Sewing Machine Mastery by Katie Matthews

* I was sent a copy of The Ultimate Sewing Machine Mastery book by Katie Matthews for the purposes of this review - as usual my views and opinions are very much my own.

Like many people I don’t often think about the mechanics of my sewing machine until I absolutely need to, and by that I mean when something’s gone wrong. Then I dig out the manuals and scratch my head a bit, or sometimes a lot and set about trying to solve whatever’s gone wrong. But actually that’s potentially not the most efficient way is it? If I had a greater understanding of my machine in the first place then perhaps I’d spot an issue early on, and I’m pretty sure I’d get more out of my machine than I do now.

That’s what this book - The Ultimate Sewing Machine Mastery by Katie Matthews - has highlighted for me, and as such having read it it will be kept close to my machine and I’m sure become an essential part of my kit. As much as my pincushion, scrap fabric and scissors, and dare I say it the stitch unpicker - though truth is I keep that close to hand to fend off stitching woes, as I know as soon as I put that away again, I’ll need it and probably won’t remember where I’ve put it.

The book takes a comprehensive look at every aspect of sewing machines - from the evolution of the domestic sewing machine, including that the Science Museum in London displays the first model taken from drawings by Thomas Saint in 1790, and how one Isaac Singer (now there’s a familiar name) patented a machine with a foot treadle for powering the needle in 1851, through to the anatomy of a sewing machine and the all important troubleshooting.

So whether or not you want to learn about your take up lever, tension discs or your stitch selector then it’s worth getting your hands on a copy of this easy to read and informative book. Katie is a sewing machine engineer and owner of K&B Sewing Machines in Hampshire and uses the knowledge and experience gained from helping customers, and her technical insight to “share the joy that comes from a well maintained sewing machine.”

And in case you’re wondering your take up lever helps feed the thread and maintain tension while a stitch forms and is at the top of the front of the machine directly above the needle; your tension dial can be along the top or on the right hand side of your machine and loosens or tightens the upper thread tension and your stitch selector is where you can open up a whole new world of fun, but more on that later.

It’s not just a book for beginners either, as I said at the start of this post not many of us learn the technical side of our machines - we just get on and start sewing, but there’s a lot to be said for knowing what sounds right for your machine. I would class myself as a ‘handy’ sewer - neither beginner, nor experienced. I know my way around a machine, and have used one on and off for a good number of years, I rarely use patterns and if I do I tend to veer off if and when I get an opportunity - though I need to get better at following patterns more closely as I’ve a stack of wearables building up that I really should get started with. For quilts I think there’s more scope to go off piste, for clothes less so - or at least until I’m more experienced at those.

But anyway I was surprised to read that when I’ve finished a sewing session I should leave the needle at its highest point - I checked my machine, it wasn’t - it is now - and was reminded that I should cover my machine to protect it. I rarely do this either, but I should get into the habit as it is a sensible thing to do.

Needles, Thread and Bobbins

There’s whole chapters on needles, thread and bobbins and bobbin cases - all of which are essential, but with the potential for so much to go wrong, and of course go right! And that’s before you even get to the chapter on Tension.

The Needles chapter includes demystifying needle sizes and types, and a tip to test if you’re using the right needle size for your thread, as well as answering the question on how frequently you should change your needle - and it’s more often than you do, I bet!

The Thread chapter explains how to choose the appropriate thread for your sewing machine, how to store it and recommends buying the best thread you can afford, while avoiding old threads as well as threading the machine and the purposes of spool caps and their correct use.

Did you know that if your bobbin is incorrectly wound or unevenly filled that it may cause you to have irregular stitches and tension problems? Katie explains why it’s crucial to use the correct bobbin in your machine - and most importantly the wrong bobbin could damage your machine and that could be frustrating, and costly.

Getting more confident with the Presser Foot Types

This is something that’s on my hit list for this year - I’m quite happy to sew in straight(ish) lines, and to even use the decorative stitches on my machine (I haven’t forgotten I promised more on this later!) but I’m less sure about using different feet. Since I went on the overlocker workshop recently I am more confident in changing the plate on my overlocker (that was a requirement for the fancier rolled and lettuce hems), but I could do with being better changing the feet on my sewing machine.

Though I was partly reassured and partly horrified to read that I’m not alone - approximately 70 percent of people don’t know how to use the specialised presser feet for zips and buttonholes, which I’m pleased to be reassured simplifies these otherwise tricky tasks - it’s definitely time to get braver and take the plunge, rather than continue to choose patterns without zips!

Stitches, straight and otherwise

An explanation of how a stitch is formed and the straight stitch might seem the obvious place to start, but many of us take the former for granted and rely on the latter, sometimes veering into a triple straight stitch or even a zigzag. But our sewing machines can do so much more, even the basic ones - and unless we ‘play and learn’ we’ll never get outside of our comfort zone, and it’s really worth doing, and doing more if you do some already.

I know that I’m a practical learner so I got more comfortable using decorative stitches by attending a workshop to create a rustic barn. The majority of this was done not on my machine but one provided at the class, but I finished the applique and added more detail to the barn door using my machine at home. This project provided the perfect opportunity to test out in a playful way, but learning and building confidence at the same time.

A rustic hessian barn shape on cream backing fabric.  The barn is decorated with appliqued 'windows' and uses decorative stitches to create the barn door and other panelling/decorative touches on the barn

I still love how this turned out, and at the time I was looking for something useful to turn this into - in the end I settled on a cover for my sewing machine but didn’t do too much about that, though the reminder to cover my machine when I’m done may just re-ignite that idea - watch this space!

And mini-projects too

The book also includes a couple of mini-projects, I’m more keen on the one to make a stitch book than the one to reuse thread scraps - which is a surprise really as I like to reuse as much as I can, even pondering what size scrap is too small to keep (still undecided btw), but reusing thread scraps may be a step too far, even for me.

However I agree with Katie that the felt stitch book is a good way to familiarise yourself with the stitches on your machine, and to do it in a way that will be a useful reference for the future - and pretty too. It’s simple really take some plain felt (or material) and sew every stitch your machine has on a separate row - use a single colour, or multiple colours, a rainbow or tones of your favourite colour. Then once you have your pages, sew them along with the cover into your own unique stitch book.

In summary

I got a lot out of this book, and hope to get a lot more out of it going forward. Reading about this from Katie’s view with her experience from the ‘other side of the machine’ it made a lot of sense - a well maintained sewing machine will bring more consistent results and less frustrations, and much more.

I mean, we make sure other machines, such as our cars and domestic heating systems, are looked after and serviced and so it makes sense to do the same for our sewing machine too. Even if that means introducing our own regular cleaning routine, which goes beyond ‘fuffing’ out the fluff when we see it, if our budgets can’t always extend to a regular full service, though I’m sure most sewing machine engineers would advocate a full service wherever you can.

Certainly food for thought, and some new habits for me to adopt.

* With thanks to Katie and her team for providing me a copy of this book for the purposes of this review.

PostCommentLove