My handmade Advent calendar

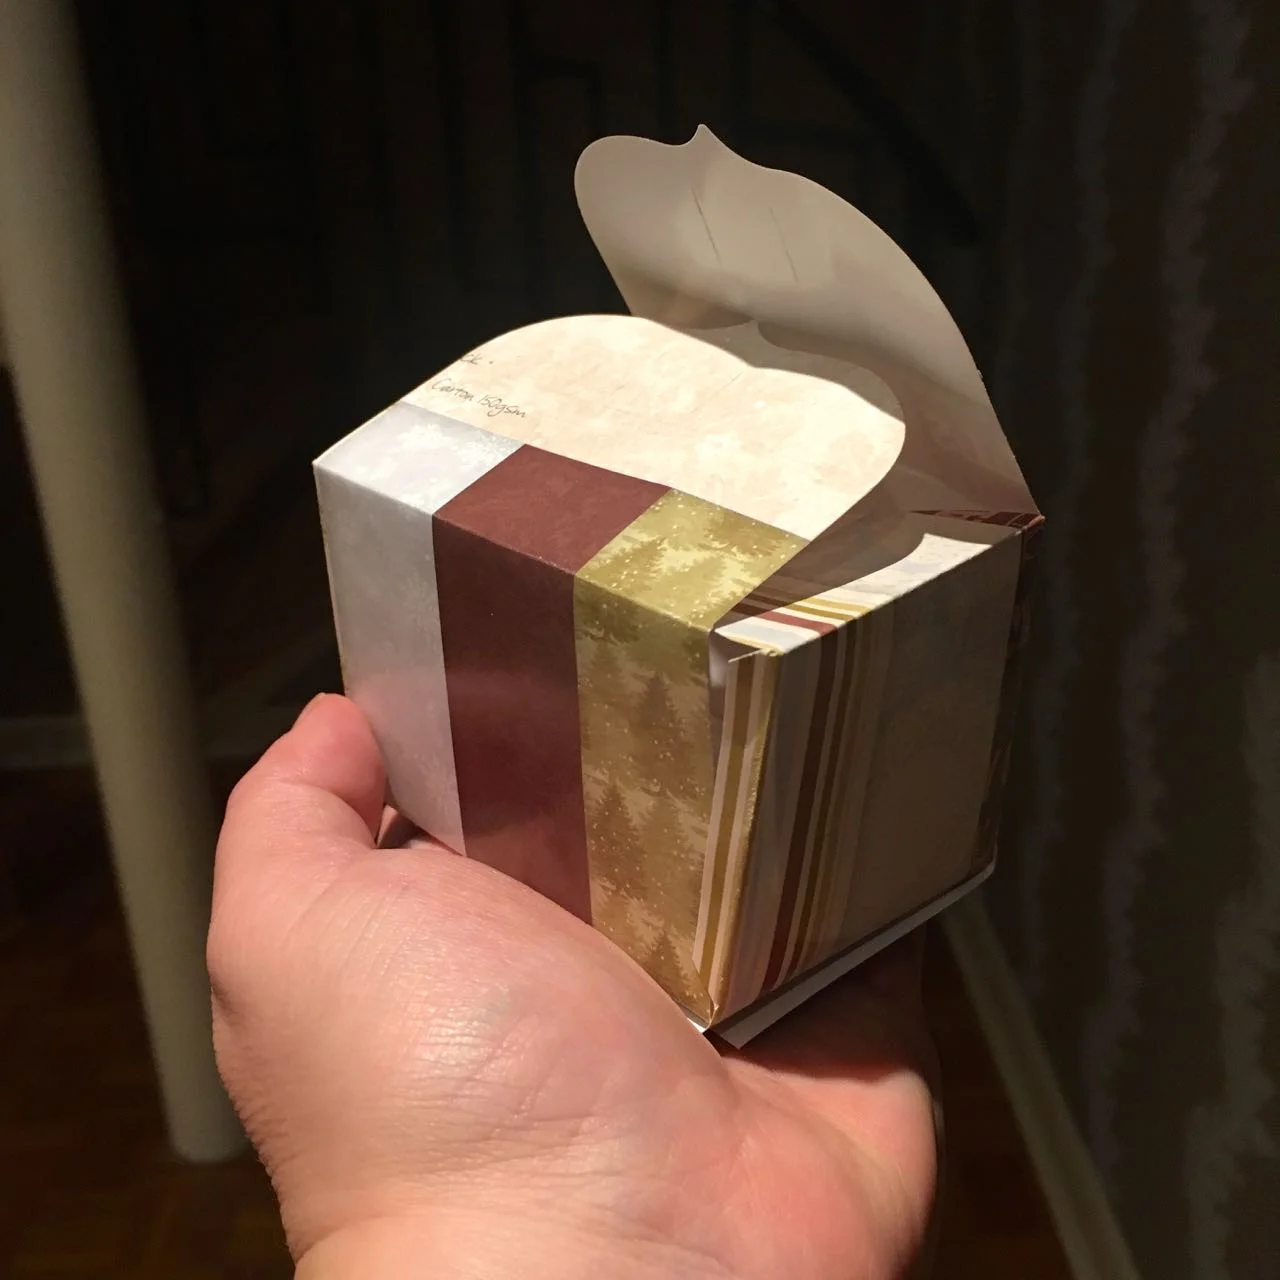
A few weeks ago I shared my prototype box for what I hoped would be my advent calendar.  The good news is that it's finished, but a few days into December. In preparation I'd bought a new die for my die cutting machine from Tonic Studios. Initially I was looking for a pillow box, but when I saw the Marquee Box I realised its potential and my plans changed.

I sussed out how it could work using the prototype, which I cut from the header page of some Christmas scrapbook paper, and as a fan of patchwork and colour, liked how it came out so have kept that in the final design.

The prototype box

Twenty four boxes is quite a few though. Each box needed two cuts of the die, so after a small workout for my arm and forty eight cuts later I was ready to assemble my boxes. The sheer number of these put me off for a bit, despite the start of the month looming. But with some pre-folding and a tray in front of the TV I set about sticking.

I'd tasked MOH to buy contents for half of the boxes, and I set about buying contents for the other half. Somehow all of our boxes have ended up with chocolate fillings, but that's no bad thing.

It did feel like a bit of a production line, and on more than one occasion I did wonder why I'd started, and if perhaps doing something for the twelve days of Christmas instead. But I'd started...

A collection of boxes, assembled and filled

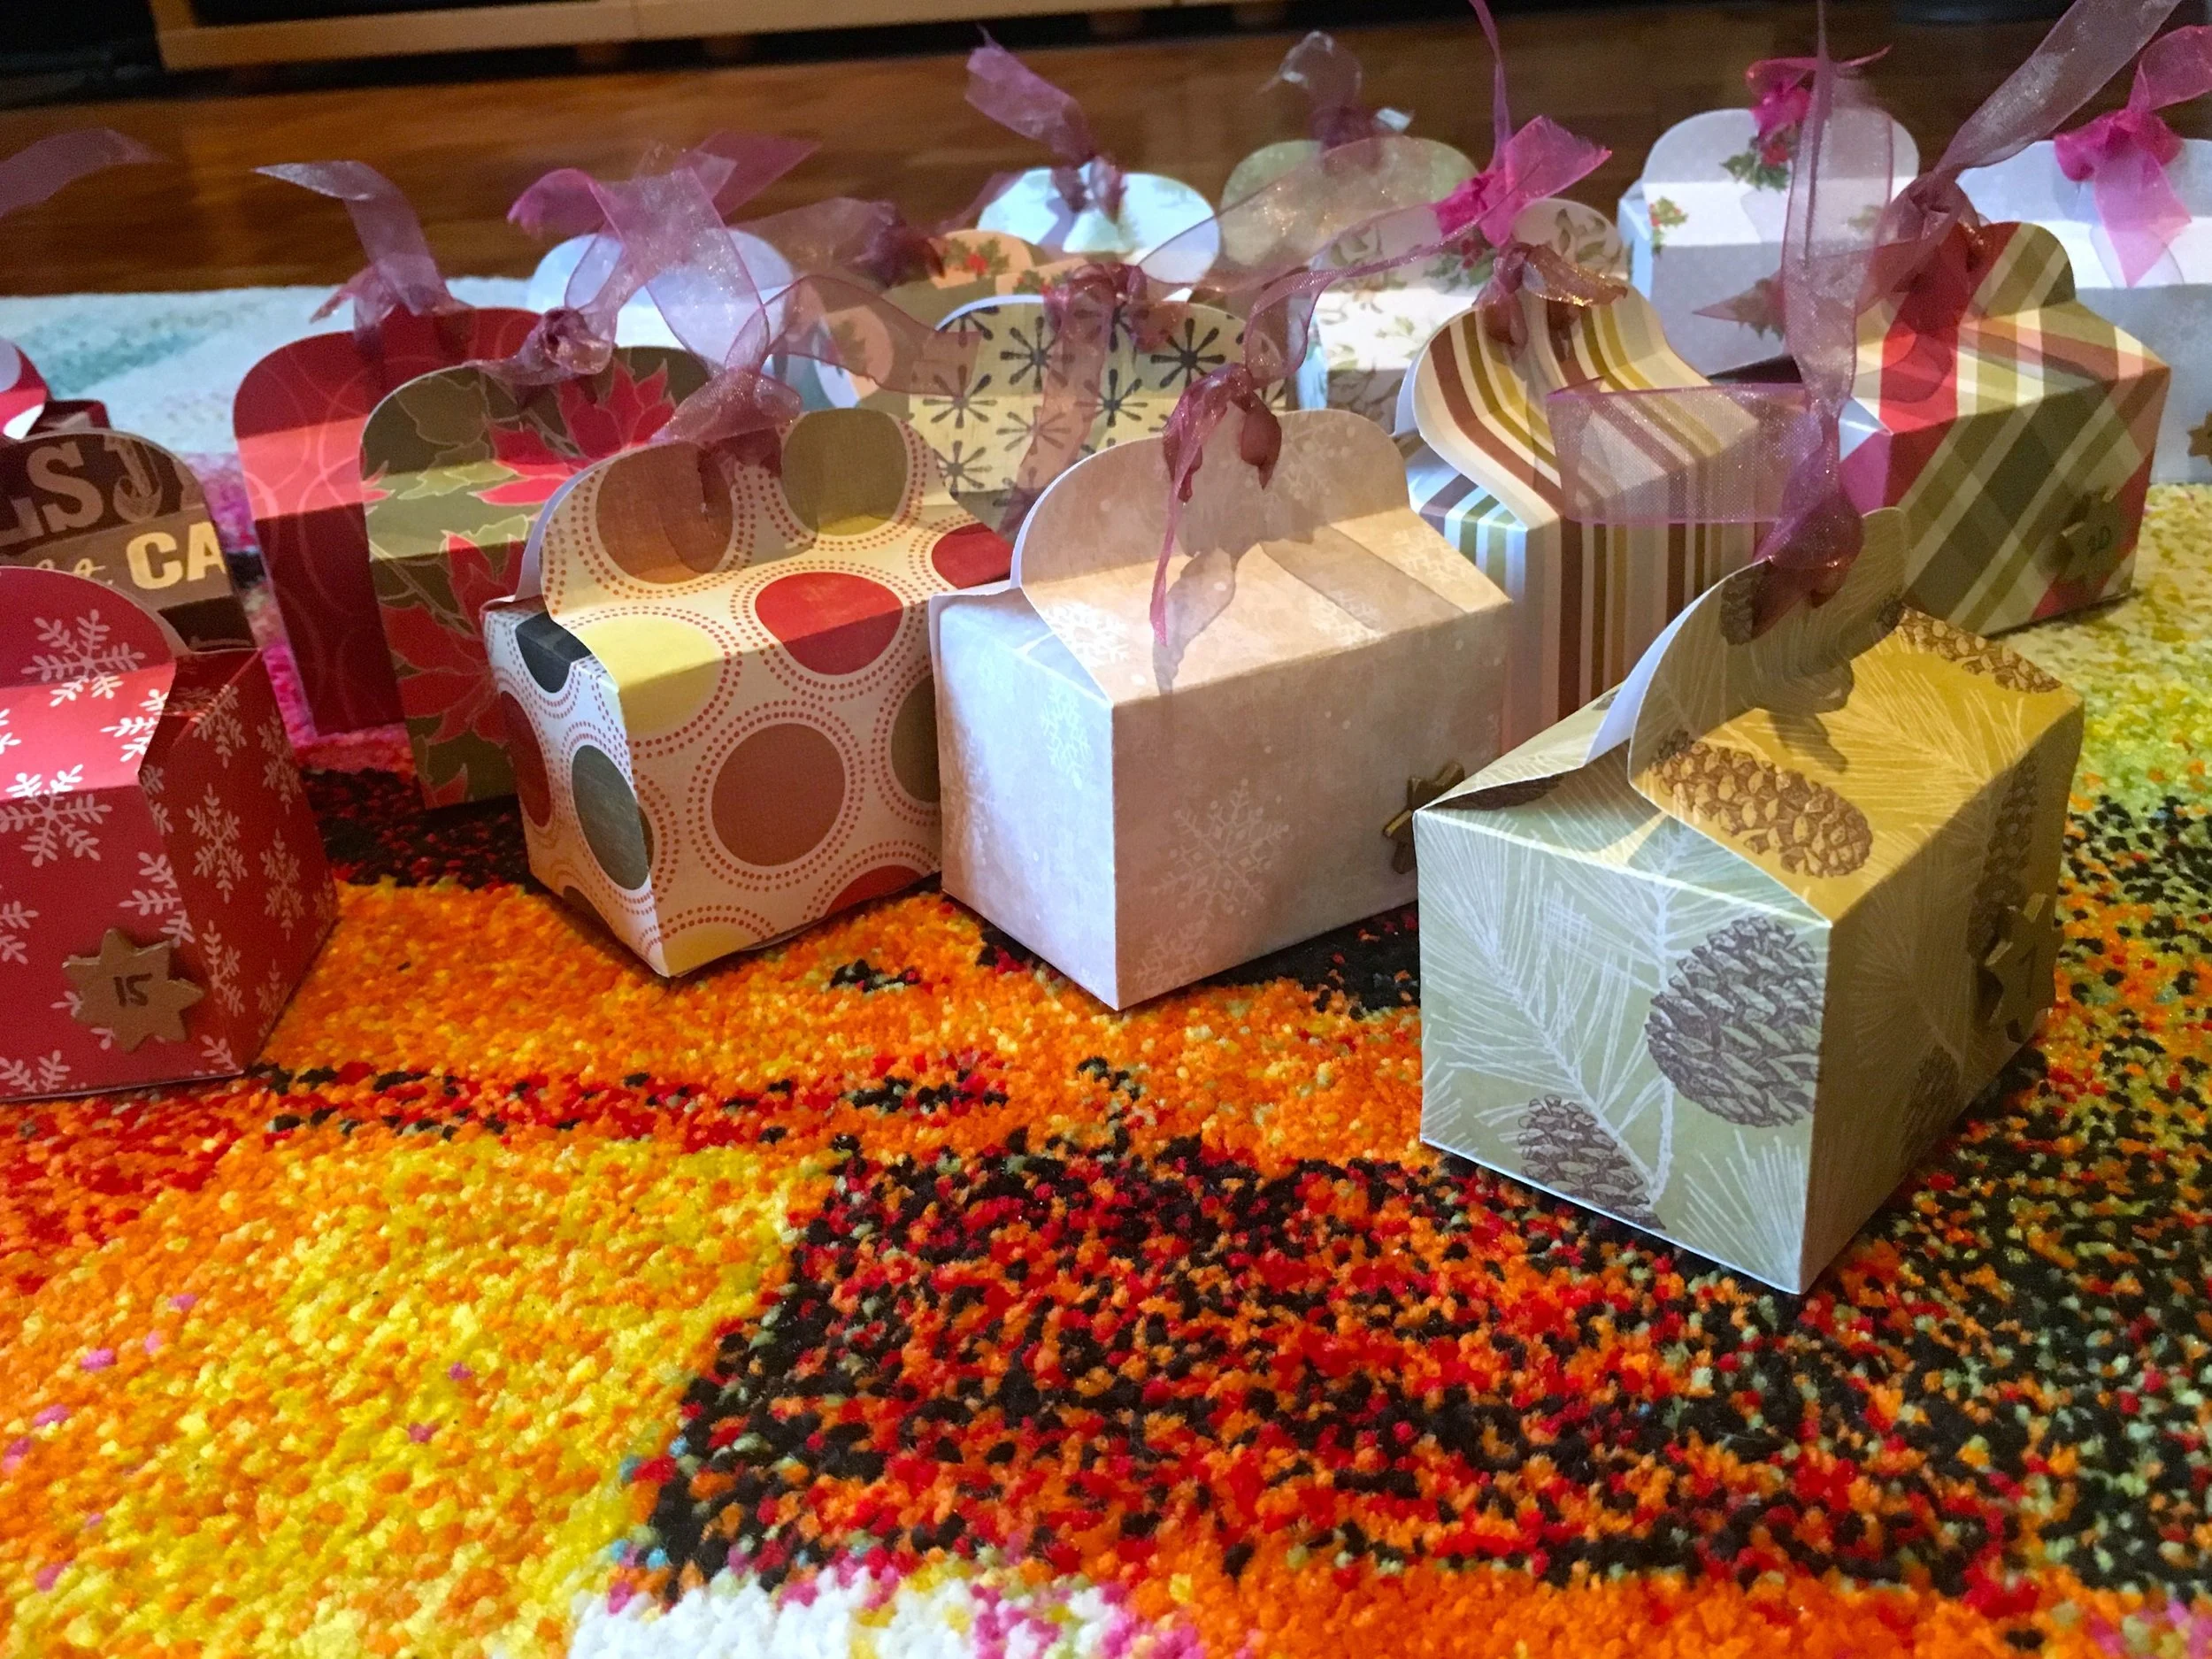
And so I finished. A few days in to December!

I was able to make use of lots of things I had too, which is always a winner for me. I had the scrapbook paper, I recycled tissue paper inside the boxes, the stars which I used for the numbers were from many years before - I'd previously used them as decorative touches on gifts, tags and cards, and the ribbon that I used to close the boxes were left over from an earlier craft project.

So apart from the die cut and the contents it turned into quite a thrifty project. 

Our handmade advent calendar assembled and in place
 
a few more of the twenty four boxes of our advent calendar

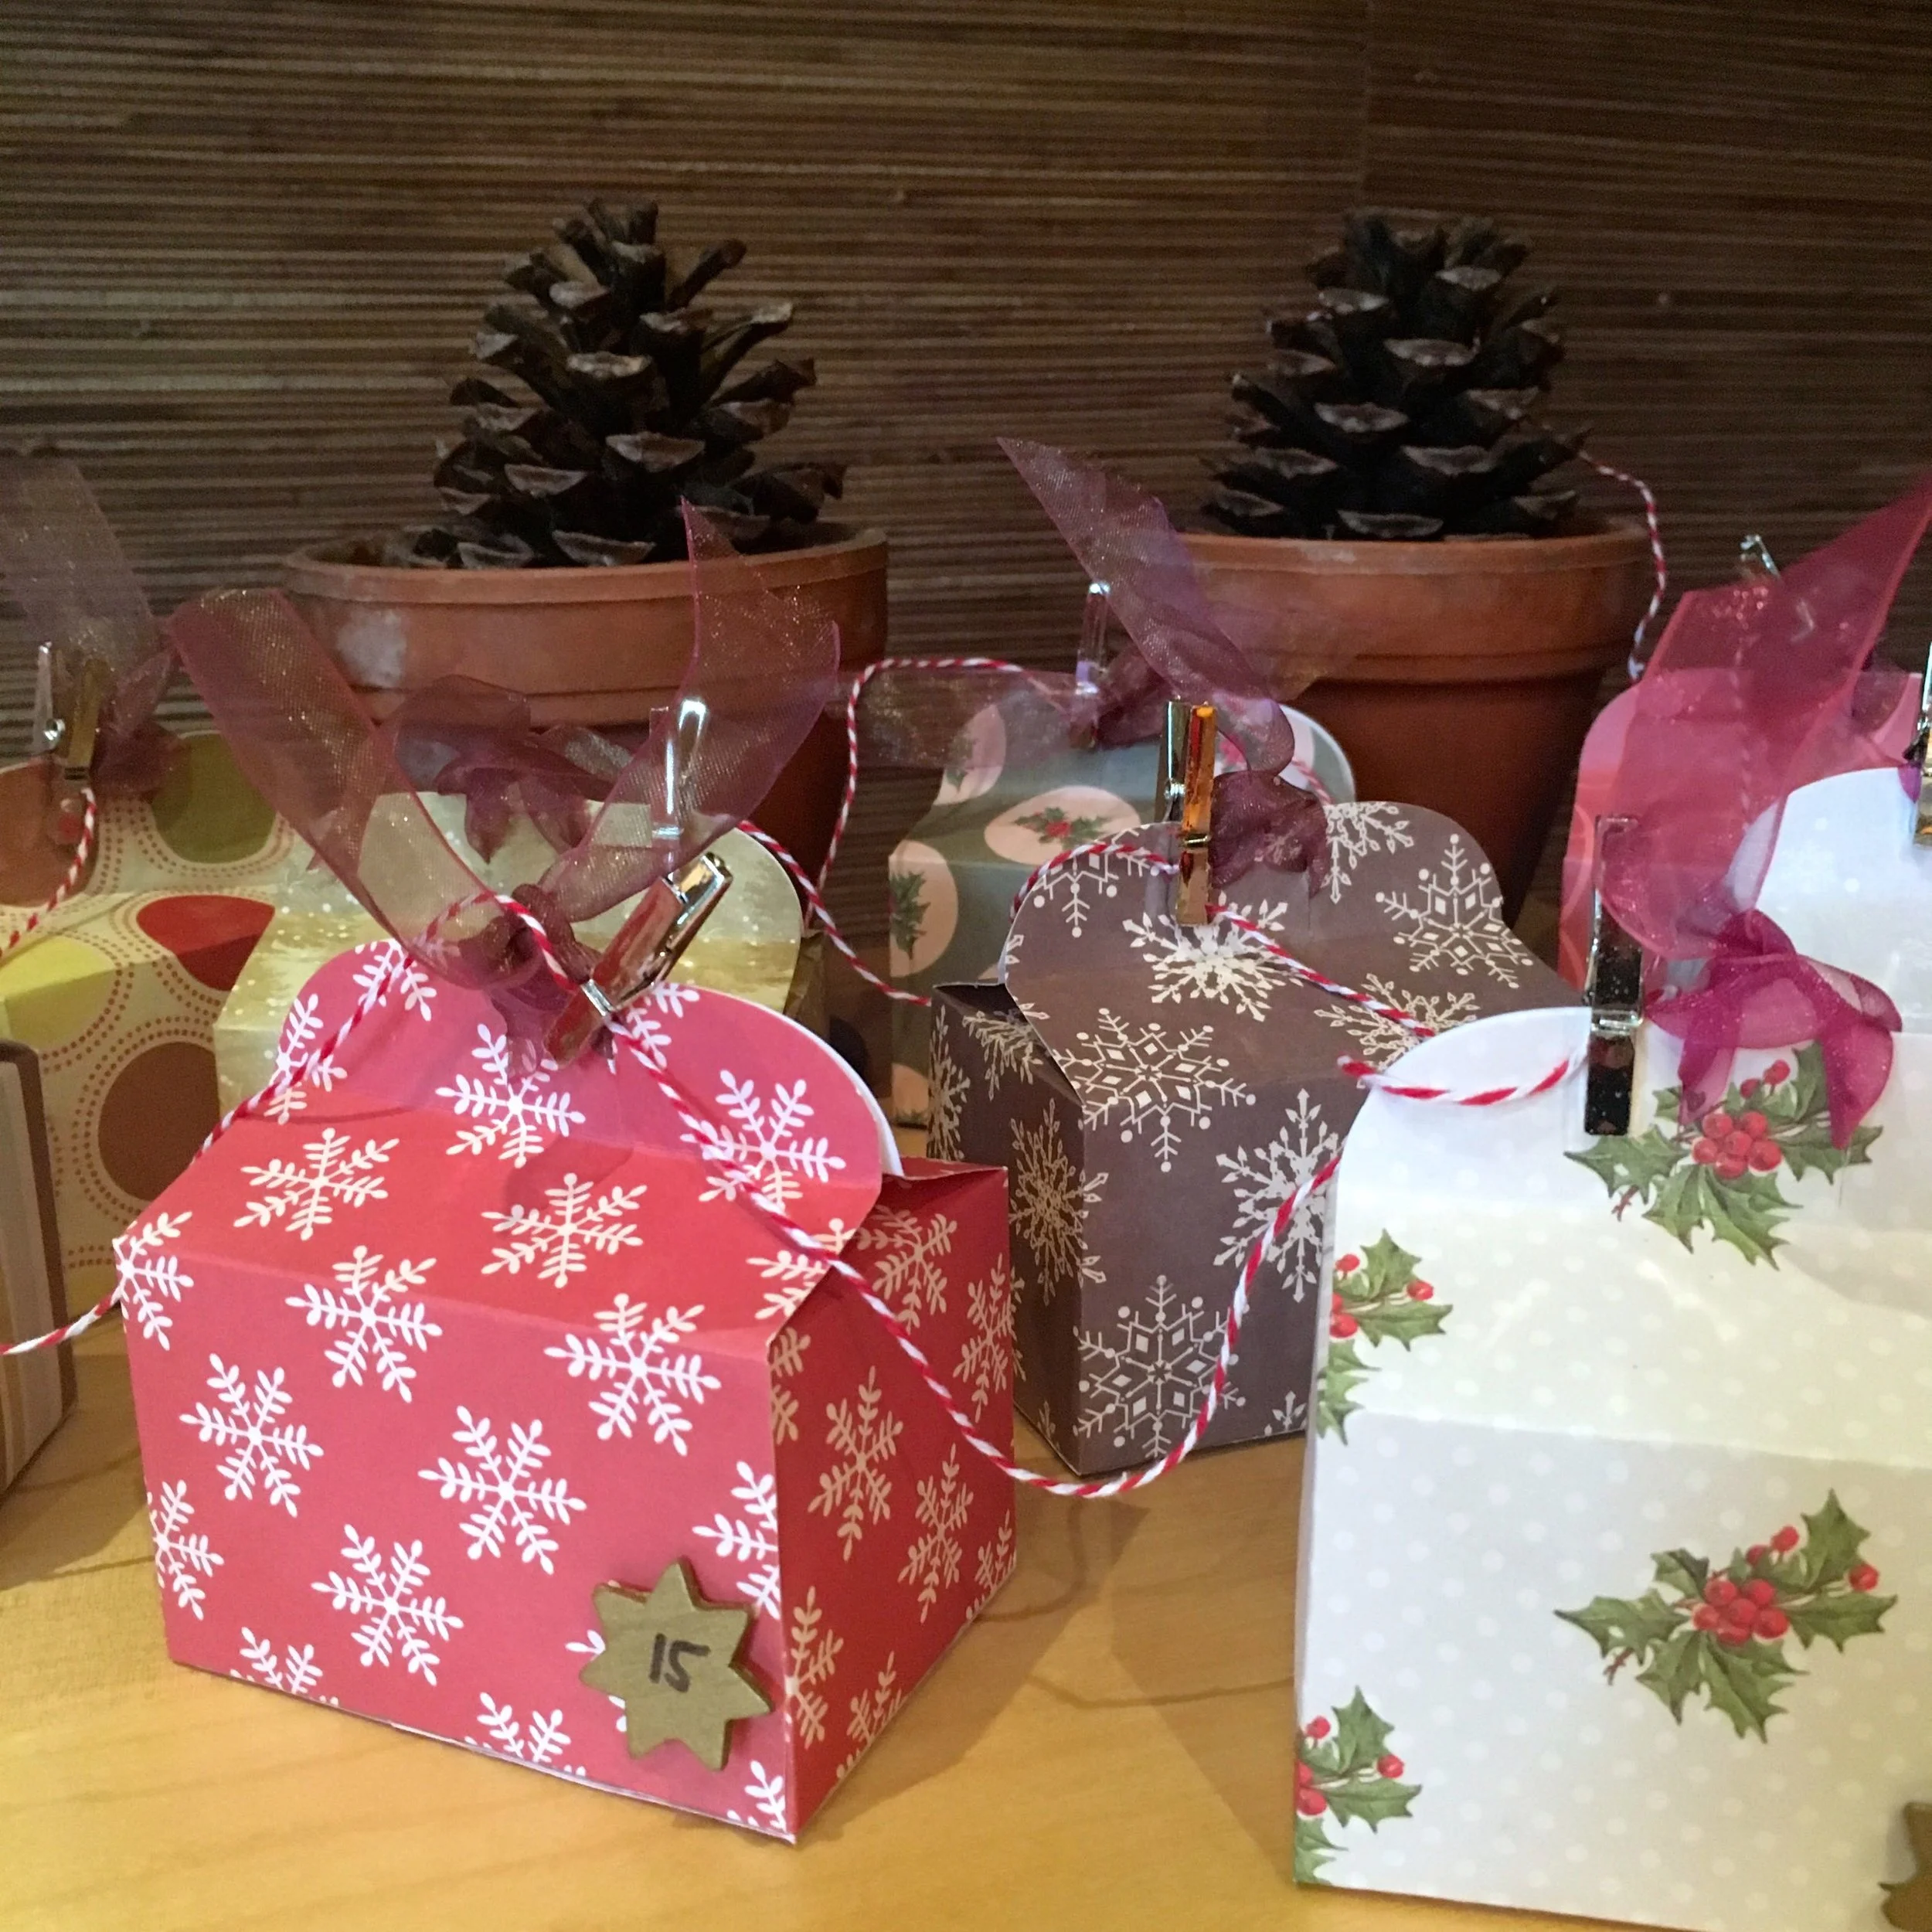
I considered hanging the boxes, and wanted to use the silver pegs - that I've had for ages, and would you believe it there were 24 - and some bakers twine, which I've several reels of. The weight of the boxes though didn't really work for hanging vertically as I planned, and as we don't hang things on our wall, I was after another solution.

In the end I kept it simple and strung them together placing them under our television - the other place I'd considered was on top of a radiator, but knowing the contents that wouldn't work!

Looking from above at our handmade advent calendar

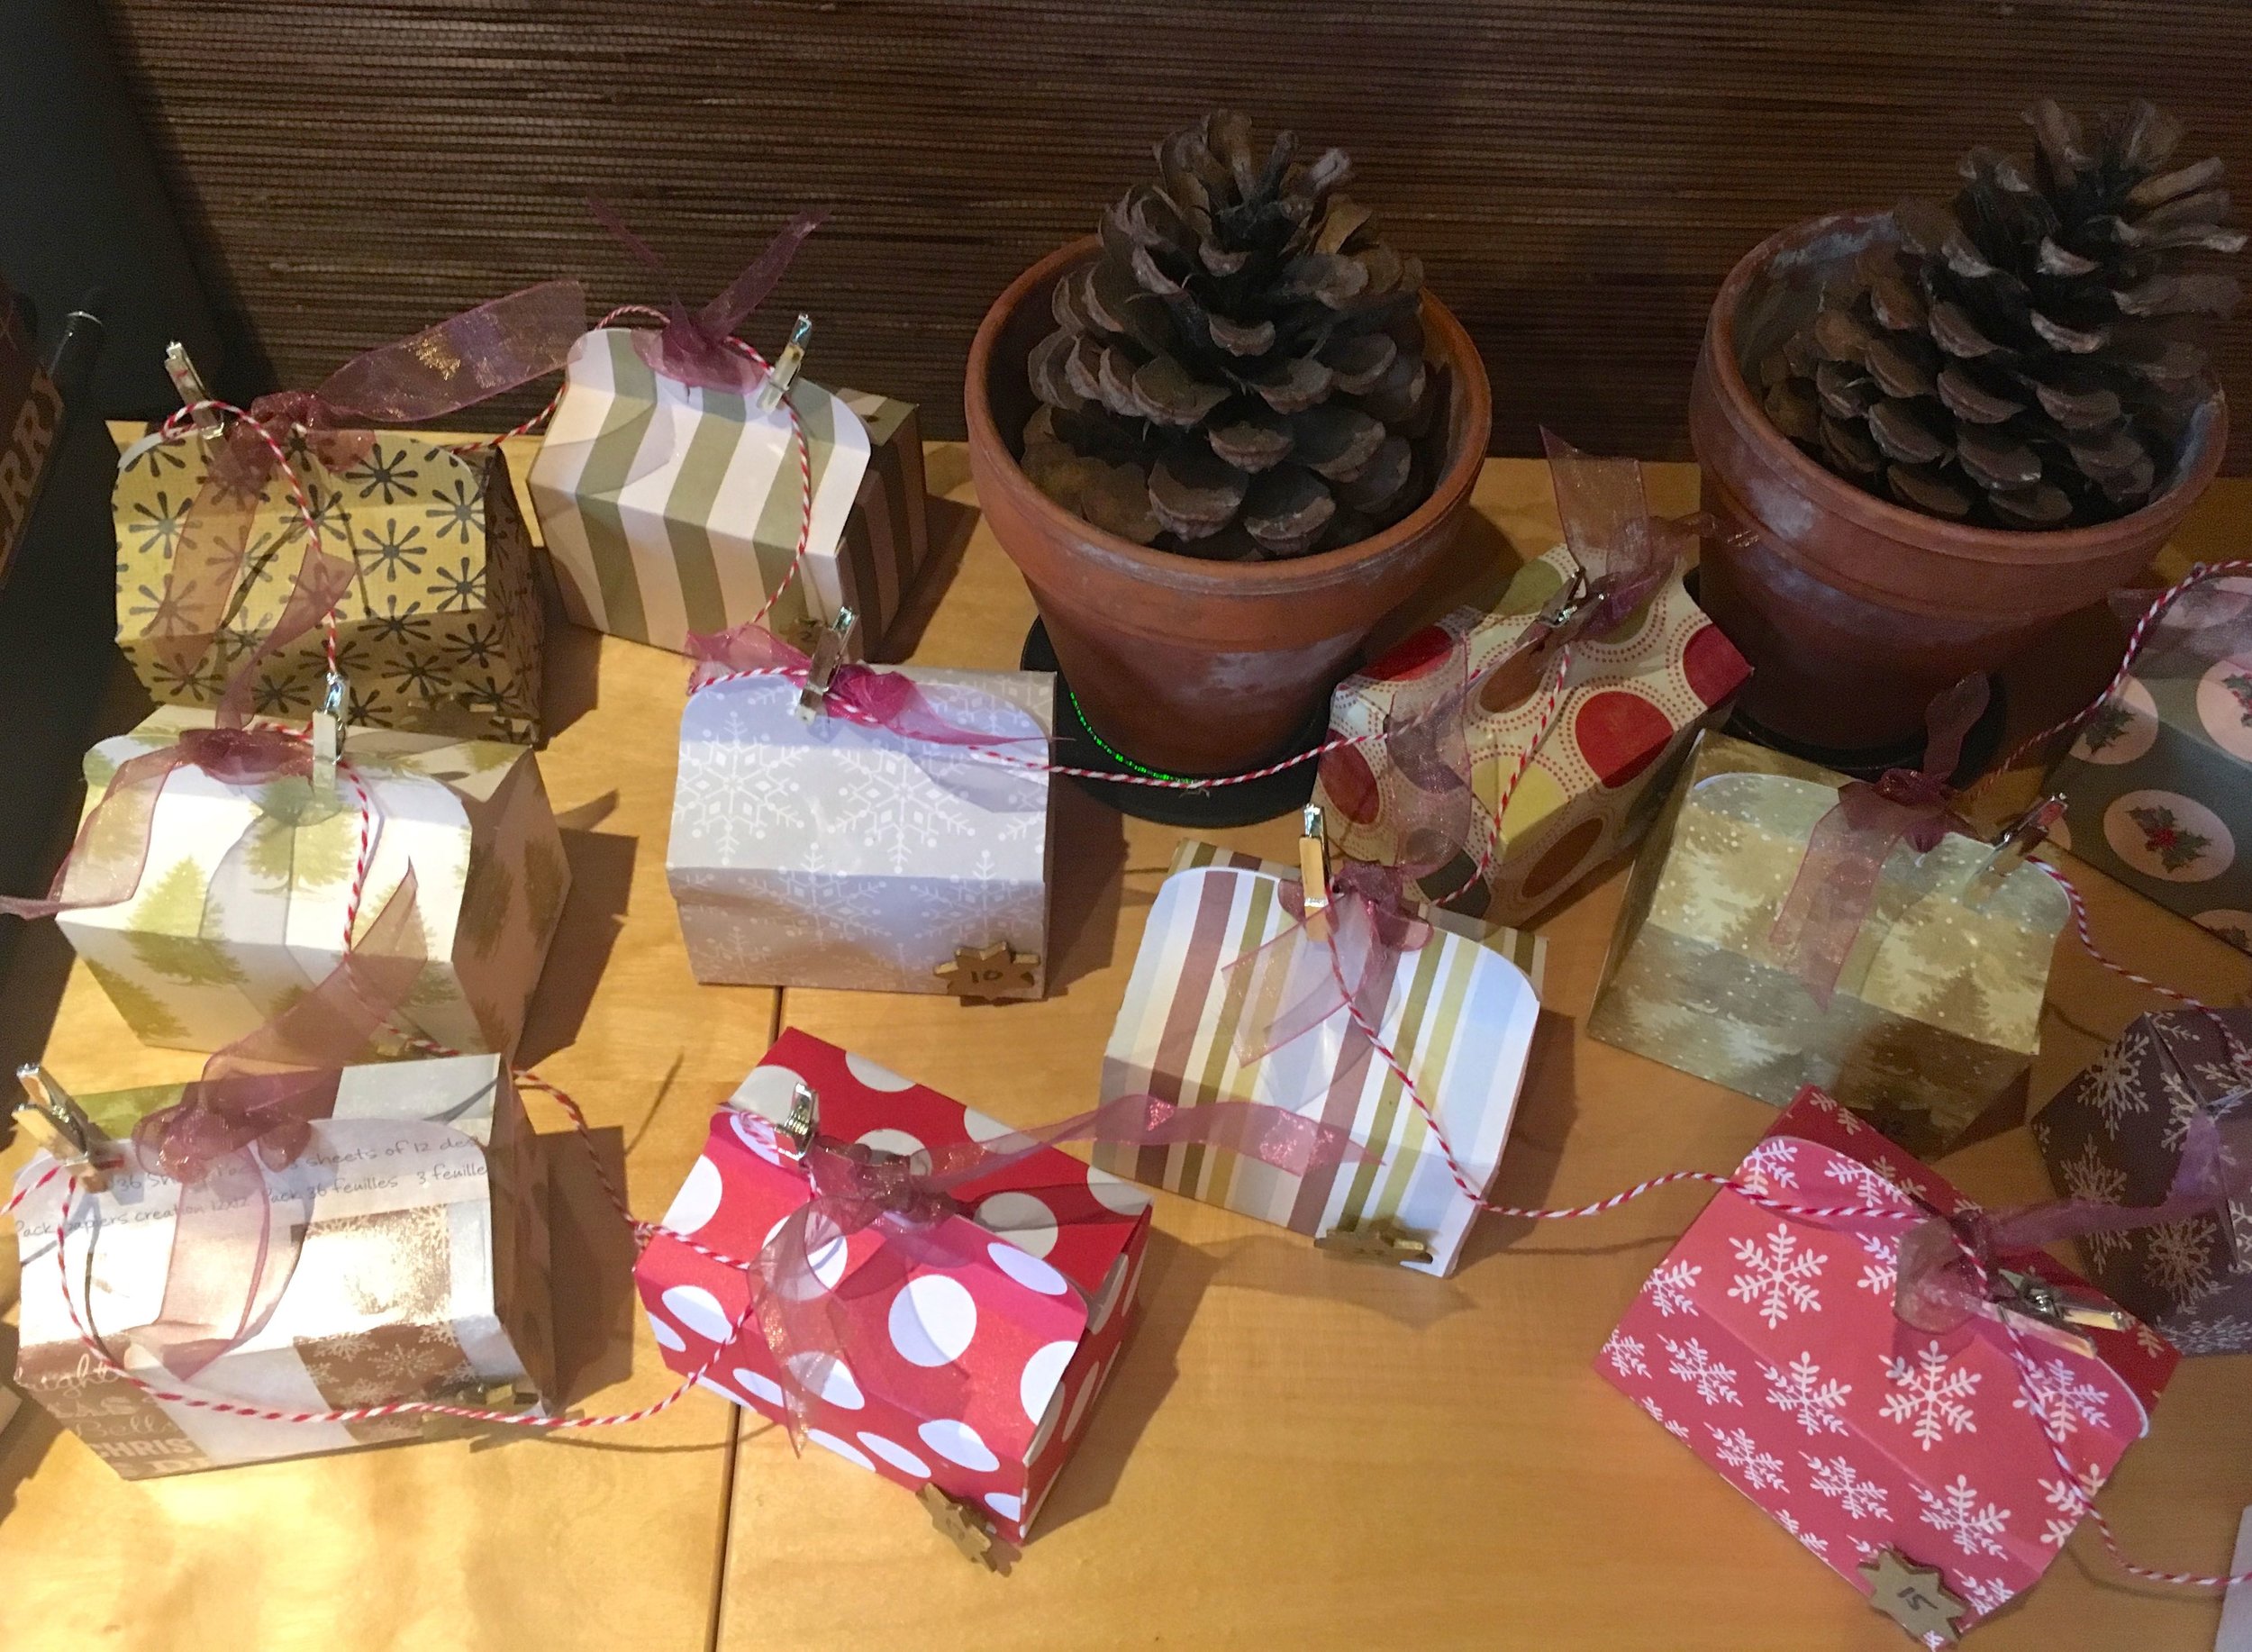
But I'm pleased with how they turned out, and it looks as if we've a village of festive boxes. Although not all of the paper I used was Christmas paper, however it all works together, and you can see the prototype box taking pride of place in the photo below (day 6).

Not all the papers I used were Christmas papers, but they all work together

A longer project than I expected but one that will provide fun - and chocolate - throughout the month. 

I love it - and I even got MOH involved too, as well as buying some of the contents, he was also chief number sticker on, as I thought I'd remember what was in each box, and so would lose the randomness of the contents! 

What do you think - would you make your own?

Getting to grips with Christmas

I don't know about you but since the weather has turned that bit colder and now that the calendar has moved into December, but I feel ready to get to grips with Christmas. As ever I've grand plans, which I'll no doubt review as it looms towards us.

Today I'm joining up with some lovely bloggers as we share our tips, and favourite crafts so we can all get to grips with Christmas. Or at least try...  

I'm sharing some Christmas crafts as I always have craft aspirations at this time of year.  You'll find much more inspiration and Christmassy-ness at the bottom of this post, below my pictures.

1. How to bleach pine cones

This is an easy craft to do, but you need some patience, and time. Last year I started this on December 18 and that was way too late as the pine cones needed longer than I anticipated to dry out. You might be wondering why you should bleach pine cones, but let me tell you they'll look as if they have a frosting of snow on them, and in which case, why wouldn't you?

You'll probably know this, but it's worth mentioning, when pine cones are wet they close up so it isn't immediately apparent if they've lightened. To dry the pine cones I placed them on lots of newspaper, but the process was speeded up by placing them on a shelf above a radiator. The results were some pretty and lighter pine cones.

My tips are:

  • Start earlier than you think you'll need to
  • Choose the more open sort of pine cones as these will give you the best results (see the bottom right picture below)
Place the pine cones in a bucket with bleach and stir with a stick
leave the wet pine cones to dry and watch them dry lighter from the effects of the  bleach
Pine cones float so weigh them down with bricks

2. How to make a homemade Christmas wreath

Making wreaths aren't as hard as you'd think. Florists sell the wire rings to use as the base, and for securing greenery too, but you can also make your own by shaping a wire coat hanger. I discovered that the key to making a wreath is to make up bunches of greenery and to attach those to the wire ring starting on the sides. Once you've mastered attaching the bunches of greenery you're ready to tackle how to approach the top and bottom sections. And remember it's your design so you can make it up as you go along, no one will know.

It's rewarding to see it take shape, especially for someone who was a complete novice tackling the wreath in the photos, and to be honest I still am.  Once the base evergreens are covering the ring, you can start to decorate. I found ivy hard to use so discarded that idea and instead used holly, bay leaves and rosemary, all of which I have growing plentiful in the garden. 

With all the greenery in place, I added small silver baubles - which I bought already wired - by poking them through the evergreens and securing them on the reverse. And I'm still rather pleased with how it turned out.

I bought some christmas tree offcuts and supplemented this with evergreens and ivy from the garden and had way too much for one wreath
continue securing greenery to the wire ring using florist wire
Florists sell the wire rings, but you can always make your own with a wire coathanger
decorate the wreath with baubles, holly, and herbs

3. Inspiration for some gorgeous gift tags

This is another craft that looks more complicated than it really is, and that's perfectly fine with me!  Here I've folded squares of material to create some Kanzashi flowers which I've used to embellish plain cardboard gift tags, you know that craft stores sell in packets of 100s. Each two inch square you cut, is folded to make a single petal, which are then joined together. 

My previous post on this gives a step-by-step guide on the folding needed and how to assemble the flowers. How you embellish them is entirely up to you, but as you can see with trimmings and buttons they can become something very special. And not something to be thrown out with the rubbish, or at least I hope not anyway!

starting to fold material squares to make some gorgeous gift tags
Threading the material petals onto cotton to make the flowers
Creating material petals for the flowers on my christmas gift tags
the completed christmas gift tags, gorgeous aren't they

But that's not all, here's more Christmassy ideas and tips

Catherine at Growing Family is sharing her tips for bringing the outside indoors this Christmas. Find out how to make easy pine cone tree decorations, how to use Spring flowering bulbs to create lovely homemade gifts, and how to choose the perfect real Christmas tree.

After inviting family for Christmas Lunch, Morgan at Morgan's Milieu shares her tips and advice for planning Christmas Lunch for a large number of guests.

Jingle Bells, Christmas smells - it really does.  Nicky at Not Just The 3 of Us is talking about the memories and smells that Christmas decorations evoke.

Jane at Maflingo has great ideas for festive treats to make with the kids this Christmas. Find out how to make Santa Fruit Skewers and Festive Chocolate Pretzels.

Jocelyn at The Reading Residence is sharing some fun and easy Christmas crafts for children. Find out how to create a Christmas centrepiece, a festive arty keepsake and make kids placemats.

Kirsty from Hijacked By Twins is planning every meal including how to use up those precious leftovers. Find out how to make a delicious toppings for the perfect leftover Christmas dinner soup. This recipe will make you want to cook extra just for the leftovers.

Caro from The Twinkle Diaries shares a simple idea for creating edible Christmas tree decorations.

If you're anywhere near the UK capital this Winter, Nell from the Pigeon Pair and Me tells you how to enjoy the festive fun of London - for free. She also gives her top picks of Winter family shows, and explains why Christmas with kids is a magical time of the year.

Have we inspired your Christmas preparations?  Let me know what you get up to!