Industrial open shelving in our pantry and utility room

Coming from a house which had neither a pantry nor a utility room it was exciting (in a domestic kind of way) to have these spaces in our new house. Both spaces had room for, and needed more storage - the pantry especially, which was essentially a large walk in cupboard. We knew soon after we viewed our new build barn that we wanted something that stood out, but was also functional too, and we quite quickly settled on the idea of pipe shelving.

I’d seen a few companies selling shelving that could work, but in the end settled on the Acumen Collection for custom-sized shelving. We also looked at buying the components separately, but decided against that because we could get what we needed for our spaces from a single supplier, which worked better for us - and it also meant that someone used to supplying these checked over our design.

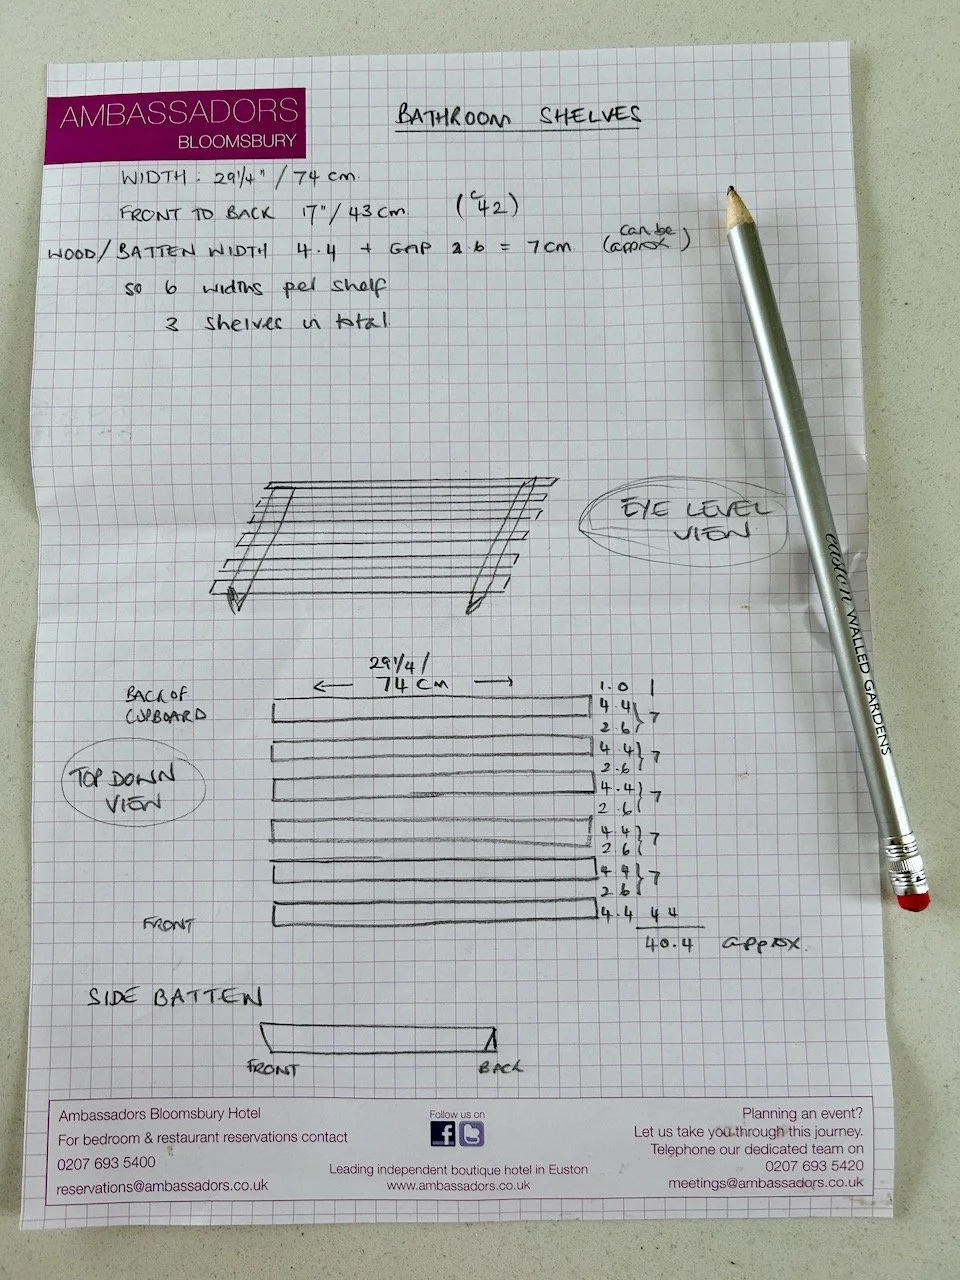
As you’ll know by now I do like a plan, and this was the plan for one of the custom units we sent over for viability checking:

A handdrawn plan of the custom sized shelving unit for the back wall of the pantry

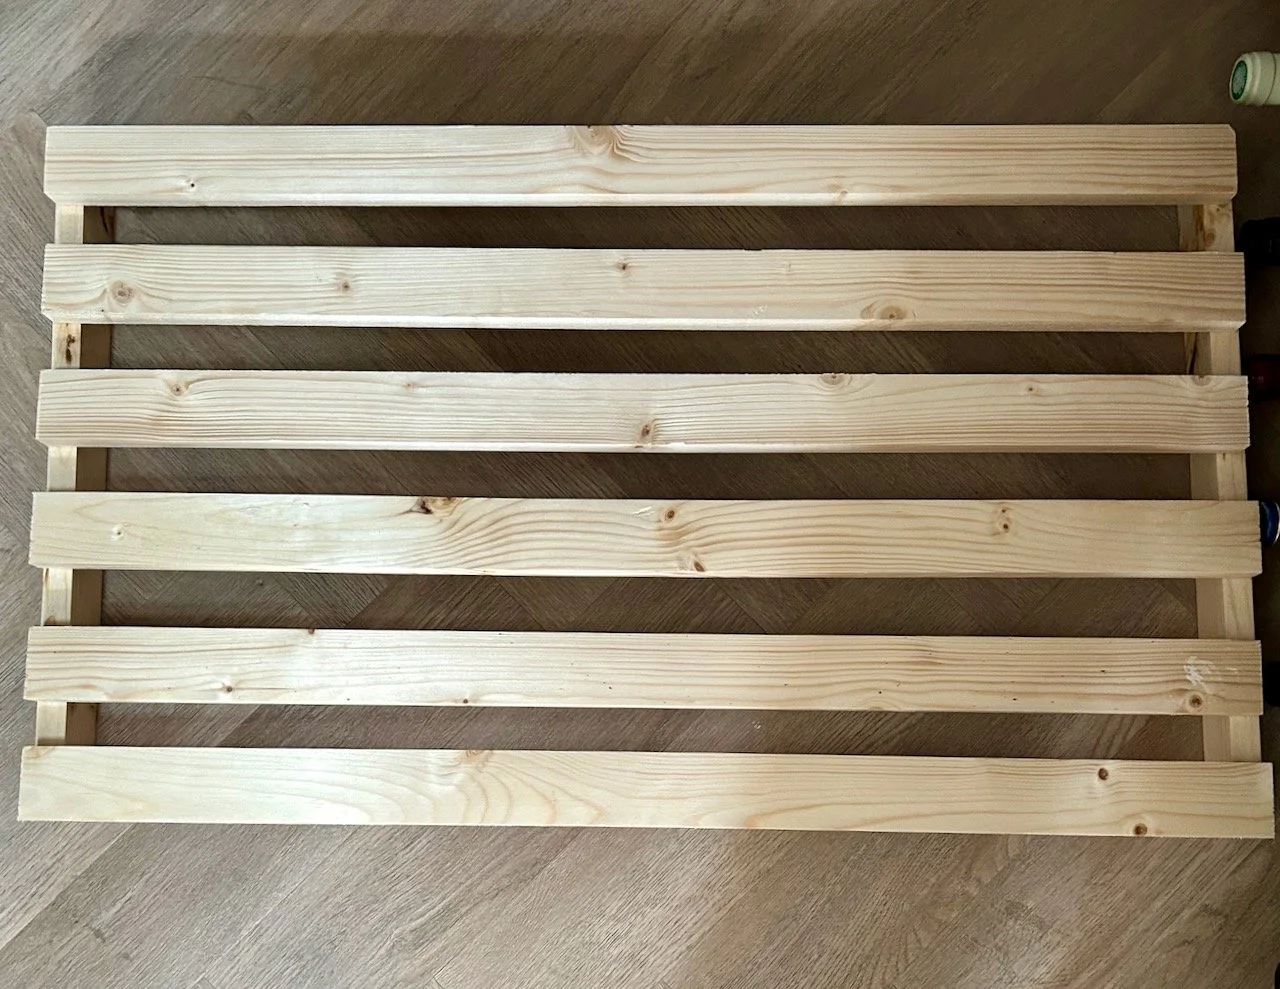
Thankfully this, and the smaller custom sized unit for the pantry came back with top marks, and it wasn’t long before we placed our order. They took a good couple of months to be made and be delivered, and when they did we were stepping over multiple boxes as we’d ordered a lot of shelves. But once they were here we were keen to get started, or rather I was keen for MOH to get started!

Since we moved in we’d used the dresser we’d had in our conservatory and a couple of bookcases as impromptu food storage, and while it worked as a temporary measure it made our kitchen diner feel more cluttered than it needed to be, and remembering exactly where I’d put things was becoming a challenge.

These are the shelves that tested the patience of a very patient MOH, and given this I was so glad we didn’t opt to source the components ourselves - though now the shelves are completed if we were to do this again, I would seriously consider doing that. But as a first-timer, probably not!

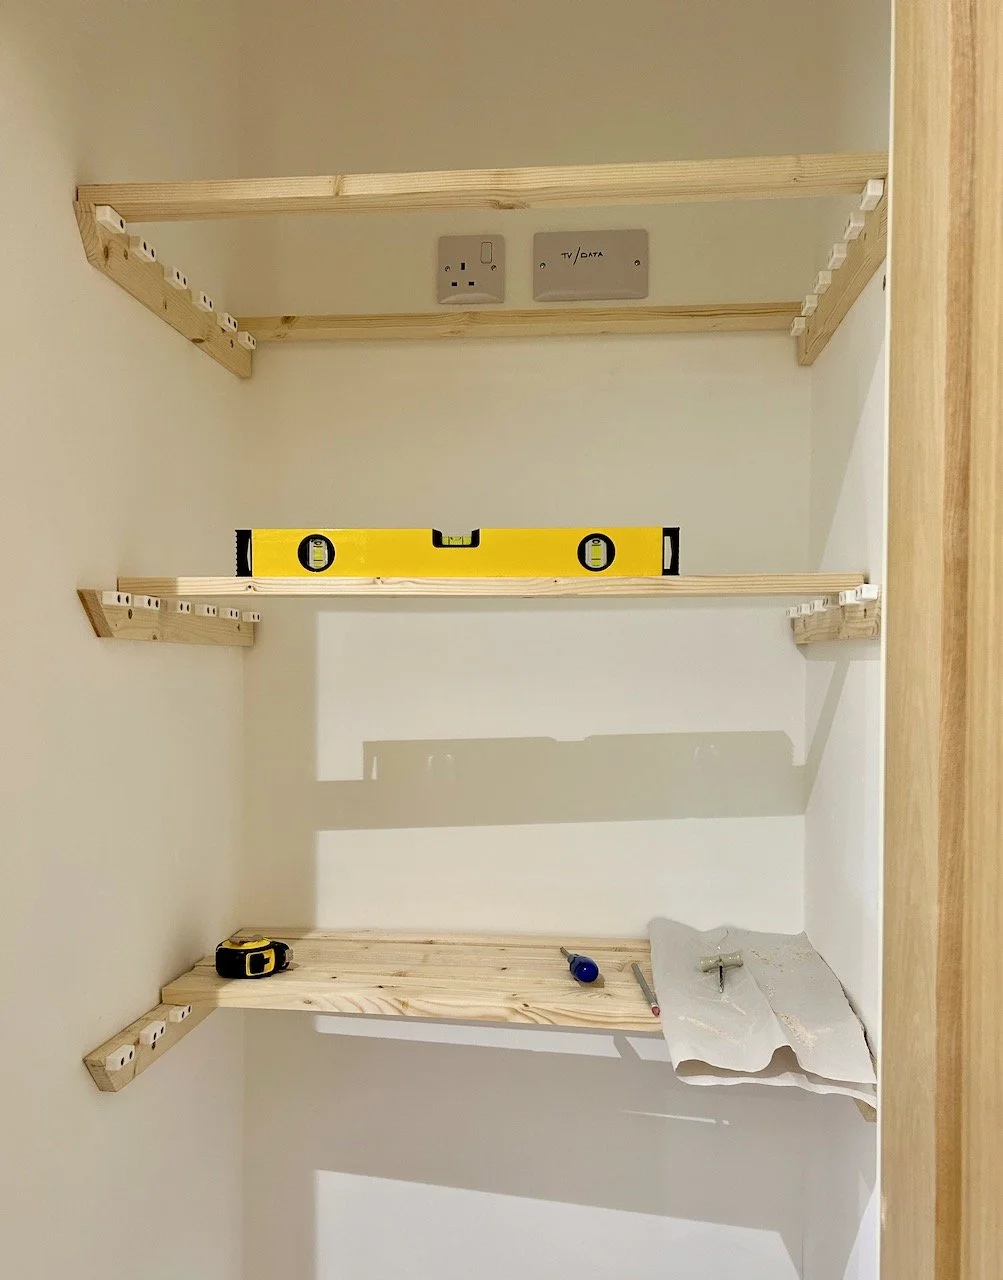
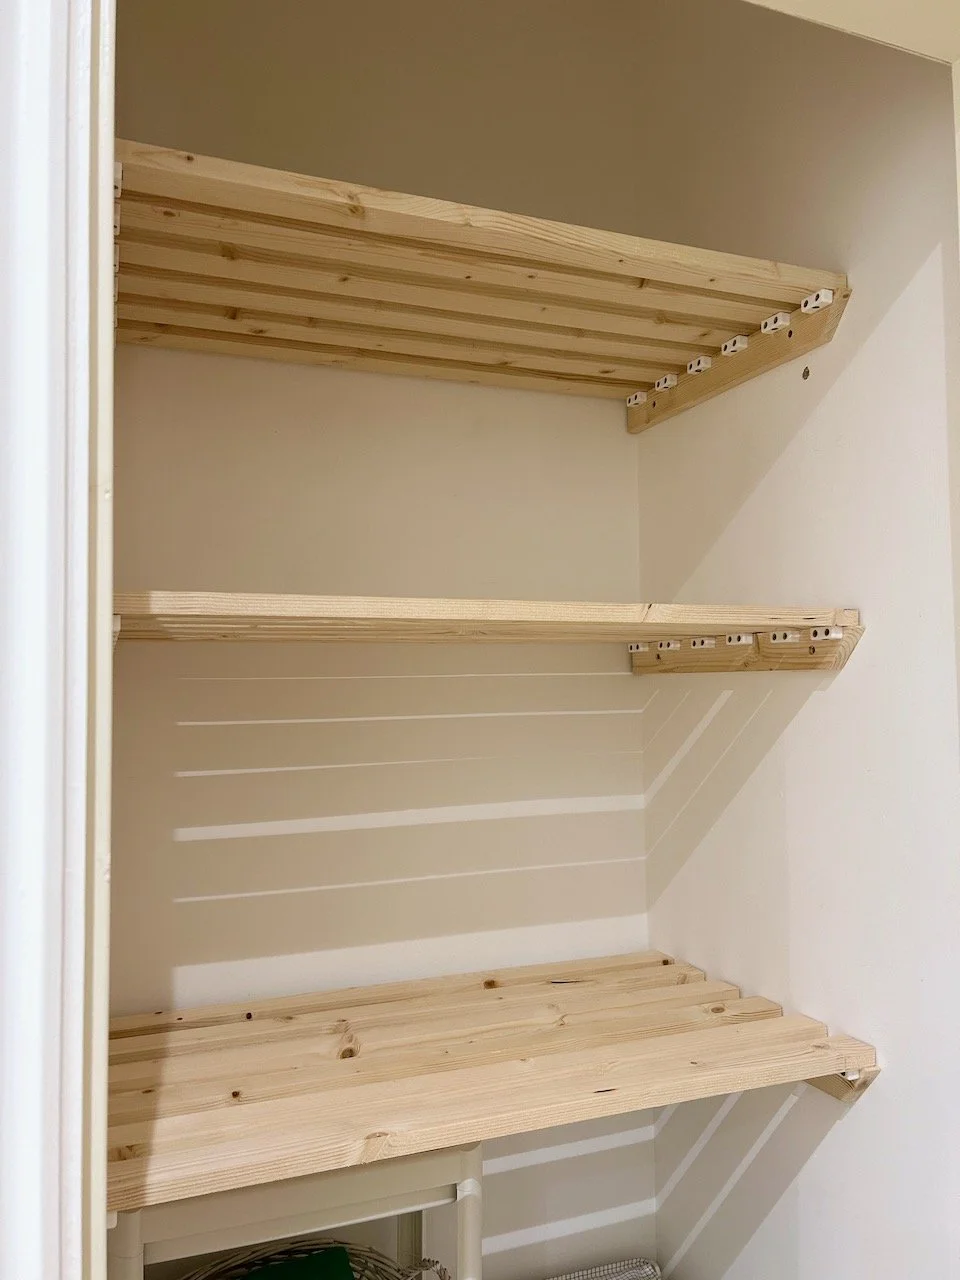
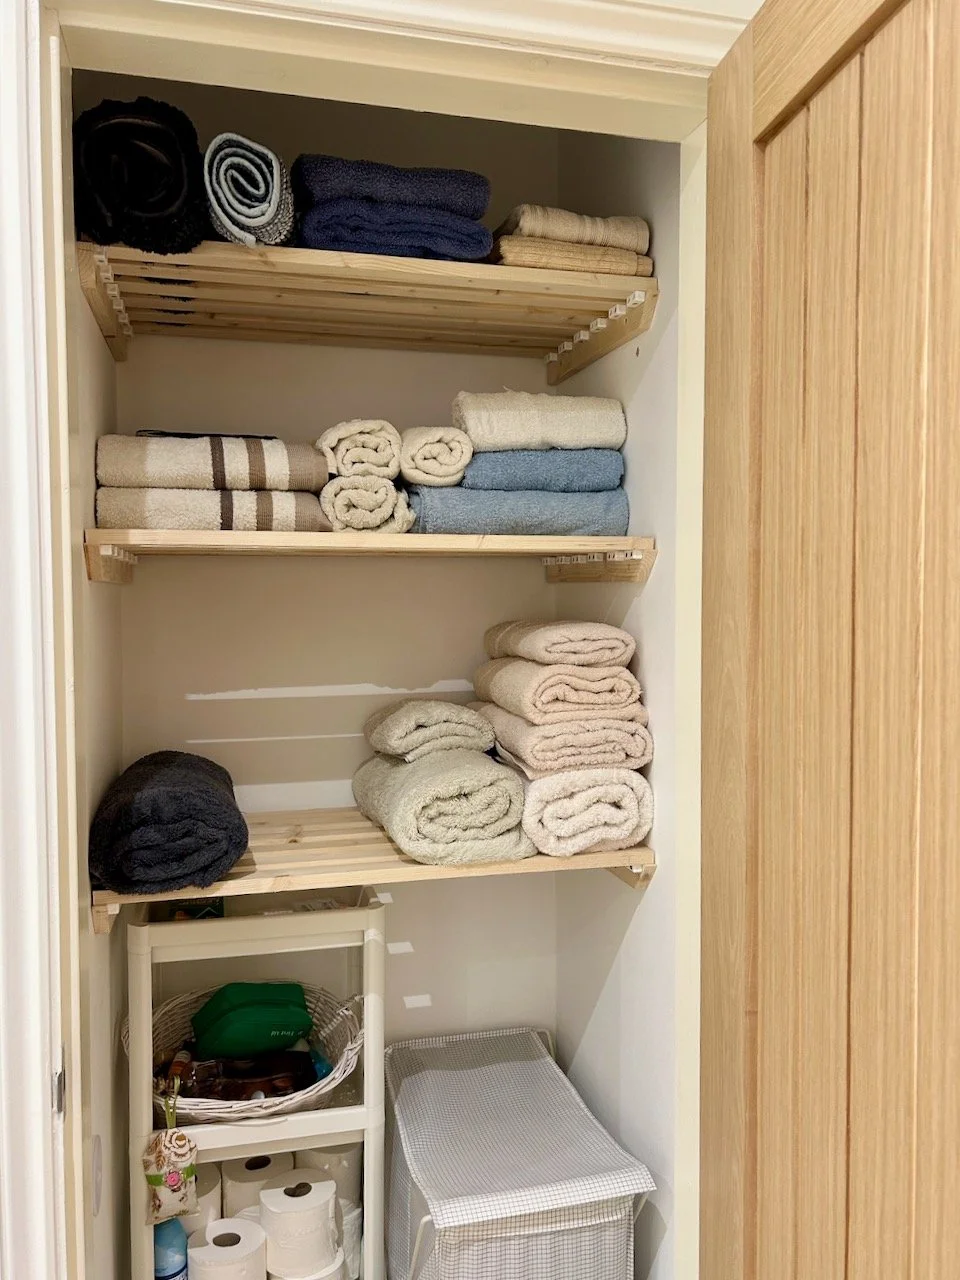
They’re heavy, and tall so had to be built in-situ - and MOH soon (mostly) got the knack of putting them together with a few swear words thrown in occasionally, as is the way with DIY.

They’re up, and they’re fantastic, and we even got them up in time for Christmas so that we could get a bit more sorted before we hosted Christmas in our new house.

A five shelf three pipe open shelving unit with scaffolding boards at the end of the room, with a smaller shelving unit at right angles on the left hand side.  An old enamel bread bin takes pride of place on the shelf, the rest of which are empty

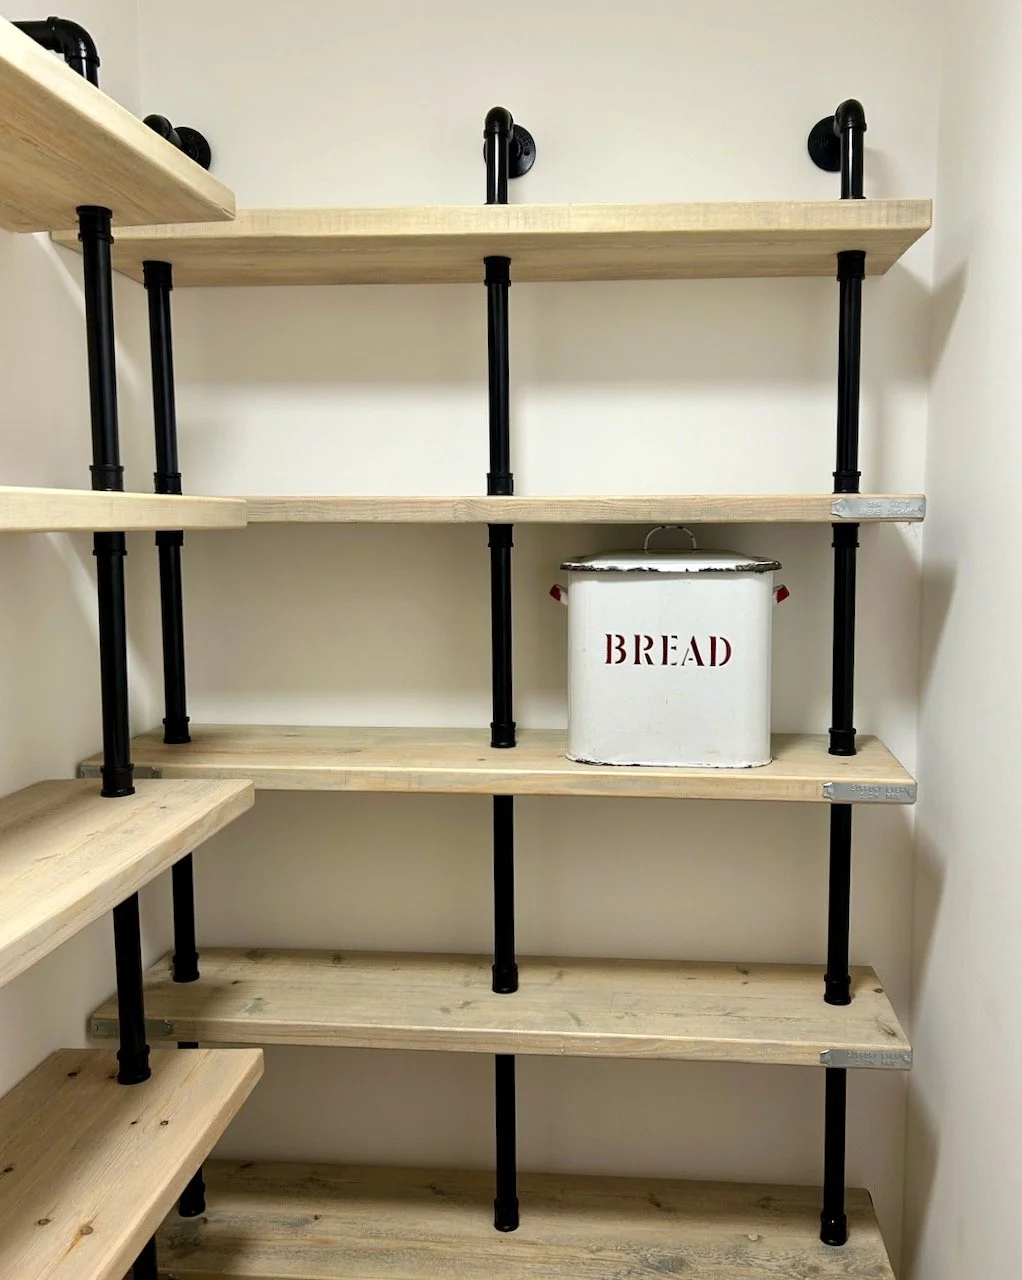
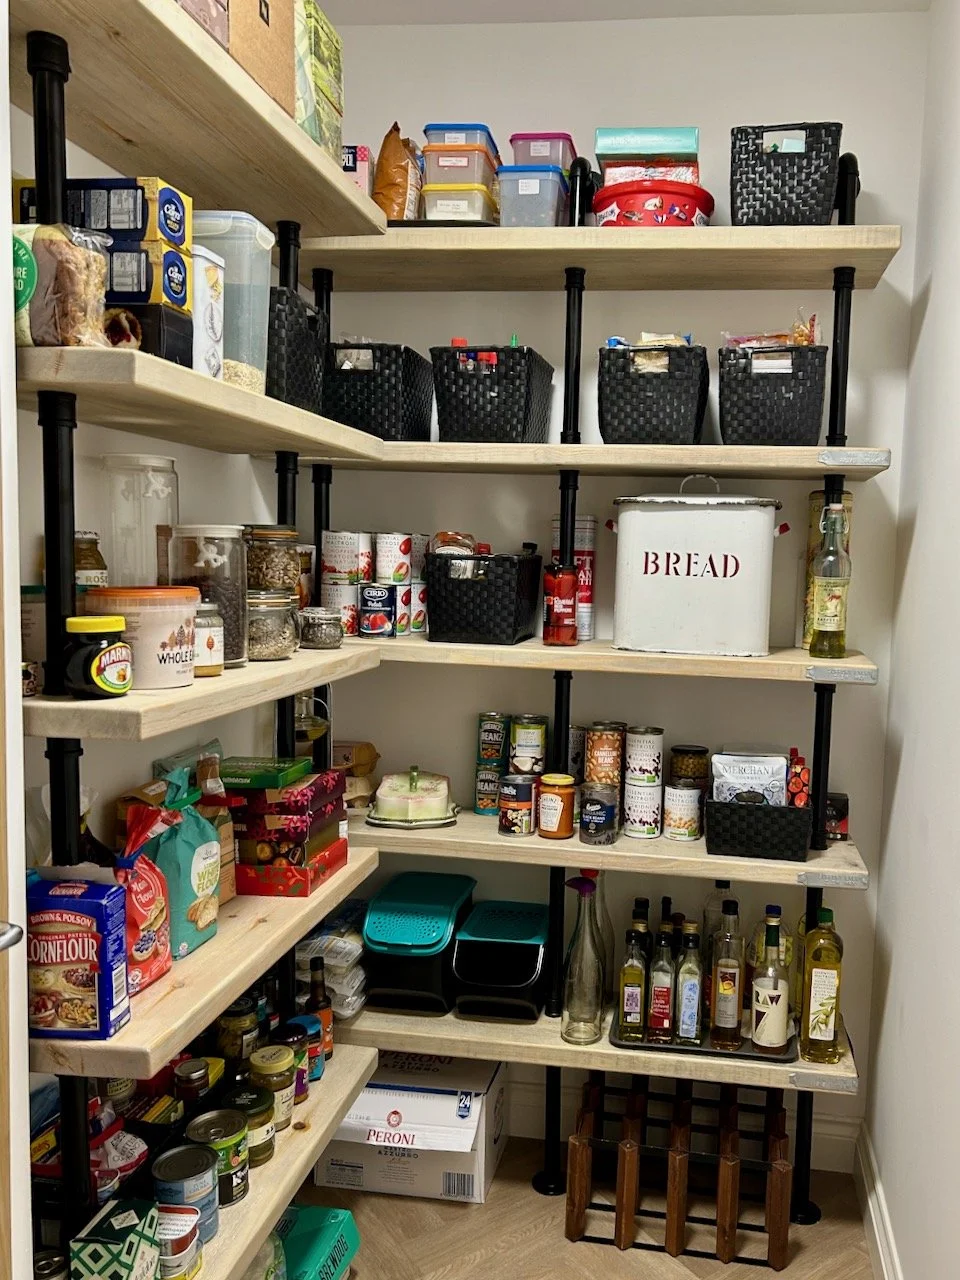
A PLACE FOR BREAD IN THE PANTRY

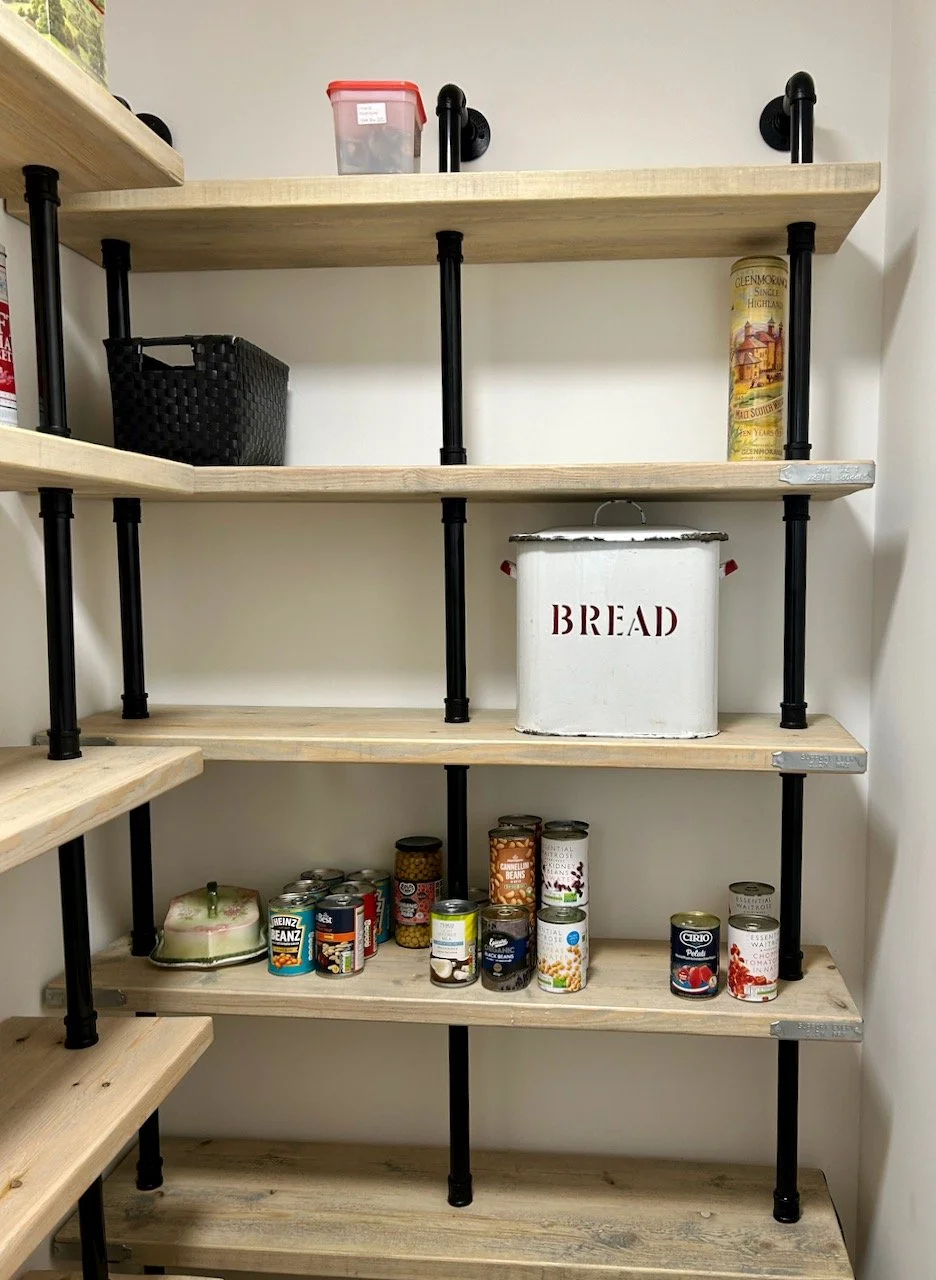
And of course when they first went up it was all a bit daunting - what should go where and so on. One thing I knew was that I wanted my new-to-me enamel bread bin to have pride of place, and so that was the first thing on the shelves. Thankfully it just about fits with the lid on, and instead of bread it houses my pasta. Obviously.

Gradually the shelves started to fill up - tins below the enamelled bread bin, along with a cheese dish and a basket and tin on the shelf above

GRADUALLY FILLING UP…

A fully loaded pantry - baskets which I used in my old kitchen cupboards being reused and items we use the most within easy reach

… AND FULLY LOADED

My aim was to have a mix of practical and pretty, while having the things we used the most within easy reach - and so that meant breakfast things at eye level on the smaller unit, and interspersing the pretty items - the cheese dome, the enamelled bread bin. I reused the baskets I’d used in cupboards in our previous kitchen, hunting around the house as some had been redeployed following our move - and I think the symmetry of the baskets helps bring some order to what could be a jumble of a space.

I always planned to incorporate our old wine rack at the bottom of the unit, and this was easier said than done. The wine rack didn’t want to play ball, it wasn’t square and no matter how much MOH shaved off it still needed more. We got there in the end, but it took a while as obviously MOH didn’t want to take too much off.

At Christmas we added a small fold up table specifically for the Christmas Cake!

ADDING SOME ADDITIONAL POP UP STORAGE

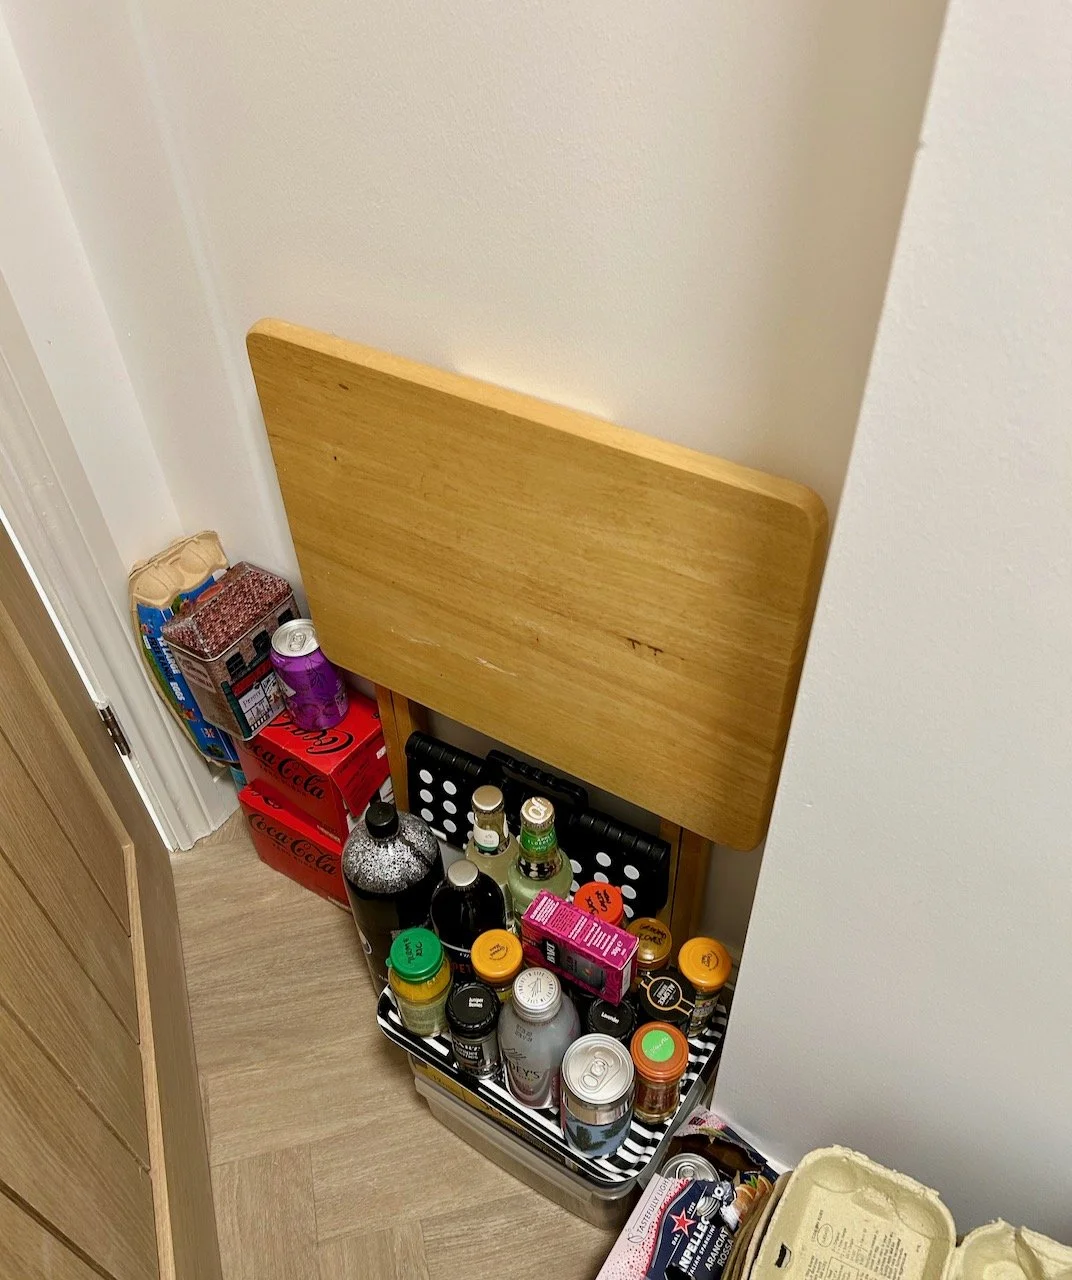
It’s through using a space that you learn what works and what doesn’t. I knew that over Christmas I wanted some more surface space in here, and then I remembered my wooden fold up table which used to hold my sewing machine. That hadn’t been used since we moved and was just the right size for what I had in mind - a space for the Christmas cake!

It worked so well as a temporary solution that the table now lives in the pantry behind the door, along with the new step stool I bought so that it’s easy to reach things on the top shelf. That means I’ve needed to revise my plans for shelves behind the door, which MOH is pleased about as I now want about half the shelves I previously did!

THE NEXT SHELVING PROJECT

Here, at some point in the Year of the Shelves, I’ll have shelves from just above where the table is for spices and random cans of drinks which will tidy up this part of the pantry no end - I can’t wait - we have the wood, so I’m hopeful it won’t be too long…

A similar approach in the Utility room

We opted for the same style shelving units in the utility room to provide consistency, and because we liked them! Here though we were able to choose one of the standard sized units with six shelves. In the end we only put up five of them as while there was space I actually don’t think it needed it.

This is also fits the pretty and functional brief - and has spaces for candles, wax melts and their associated paraphernalia, batteries, our medical kit, flower arranging supplies including vases, shoe cleaning stuff, table linen, light bulbs and my lovely new(ish) preserving pan.

A five shelf 3 pipe open shelving unit in the utility room for other household items including vases, candles, tablelinen, shoe cleaning stuff, batteries and more

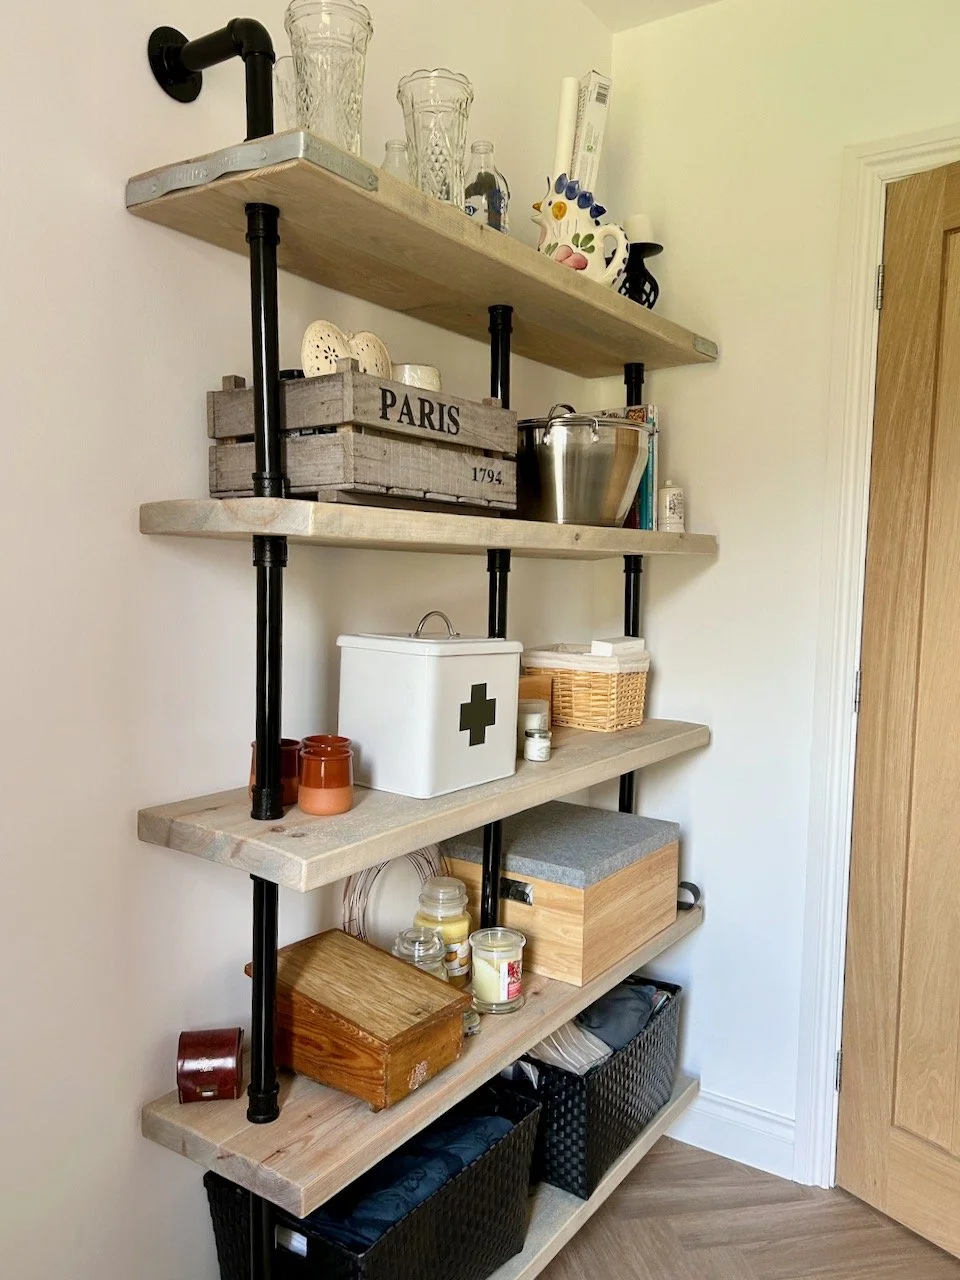
It holds a lot of stuff but still manages to look organised and not too arranged! And in case you’re wondering the light bulbs are in one of the large baskets on the bottom, again previously used in our old kitchen and repurposed for our new space; the batteries are in a wooden wine box next to the new medical supplies tin. And apart from that tin and the preserving pan, everything else we had in our old house, where mostly they were in cupboards either in the kitchen or elsewhere in the house.

I wasn’t sure if either space would stay so tidy, but they have - thankfully, and even more so now I’m (domestically) excited about having these spaces in our new house!

PostCommentLove

The year of the shelves has begun

At the start of the year I unofficially christened 2024 as the year of the shelves. I think MOH thought I wasn’t serious, but actually he knows me well enough to know better, and so it’s good to report that the year of the shelves is officially underway.

One of the things that’s obvious about moving to a new build is that you’re the first person to live there. That means there’s a lot of things you usually take for granted that just aren’t there. I think I’ve spoken before about light and curtain fittings and toilet roll holders, but today it’s shelves.

These aren’t the first shelves for MOH since we moved as we ordered some self-assembly freestanding shelves for the utility room and pantry at the end of year, and which tested the patience of a very patient MOH. I’ll share these here soon, as they look great and have made both of these areas incredibly usable.

MOH’s also recovered sufficiently, so it was time to reintroduce the need for more shelves. We have three spaces identified, plus the shelf above his workbench in the garage, but first up was the bathroom cupboard. It’s a big cupboard and will be great for storing towels but to make the best use of it, yeap - shelves. We’ve already added a open shelf unit for cleaning stuff, toilet rolls and such and a washing bin (both from Ikea) but even so, we weren’t making the best use of the space.

I wanted some simple slatted shelves, which MOH said he could make. When we bought the wood for the hooks for tools in the garage we bought extra knowing that there were more shelves on the horizon, which given the price of wood was a smart move. It also gave MOH enough to get started, but getting started meant nailing down the details, which is where my handy drawing came in.

A working plan for our bathroom cupboard shelves including measurements

While it may seem overkill, it was a great way of explaining what I had in my mind’s eye, and helped MOH envisage the end result. It also meant I didn’t have to answer 101 questions like did you want it like this, or that as he went along. And it meant that I was in for a fab surprise when I got back from my last gelli plate printing class to this work in progress.

A shelf in progress, made from the plan

I perhaps need to get out more, but it was just what I wanted. Sadly though he was out of wood so we needed a trip to get some more, and I found myself pondering life choices after spending way too much time in the screw zone, where you can pick up ‘pick and mix’ screws to fill a pre-determined sized and priced bag.

Shelves of multi-purpose screws - in Zone A

But it wasn’t long before the bathroom cupboard started to look like this.

The startings of 3 shelves inside my bathroom cupboard with the spirit level across the middle shelf

And then this.

The three completed shelves in my bathroom cupboard

Originally my plan was to lightly paint these white, hence the white blocks (which I made MOH buy specially!) - but seeing the shelves in situ I changed my mind. I like the natural look of the wood and so we’re keeping them like that for now at least - there’s an option to paint them at a later date, but right now that’s a long way off.

Don’t they look great?

It looks even better with the towels on, and as well as it being another job jobbed, it’s another space that now has functional, practical and good looking storage, and means our towels are now stored together. It also highlights that we have a penchant for cream and blue towels!

After a suitable shelf-break, next up for MOH is some shelves to maximise the space in our pantry! He really can’t wait…

PostCommentLove

It's back on the wall. Finally.

It’s been one of those things that we’ve been meaning to do. One that wouldn’t take long, but also one that never quite made it to the top of the list, until now. But first let me share how they got on the list…

They had been on the wall since 2016, and looking back at the photos from then, it’s clear that over the years they’ve attracted more and more stuff, both in the cubby holes and on top. So it’s really no surprise that one summer’s afternoon, while I was unsuspectingly on a Teams call, it fell off the wall causing one almighty bang.

A crash so loud that my colleagues also heard and could see that the noise was troubling me, especially as I was home alone. So I left the meeting to take a look, and I quickly discovered that it was these which had jumped off the wall, so was able to rejoin the call and reassure my colleagues too. Phew.

The fall had caused some damage to the shelves, as well as shedding its contents across the room. My plan had been to make these repairs before rehanging the shelves, as the fixings still looked to be secure - and in fact they haven’t needed anything more than a quick once over to double check.

But the repairs didn’t happen (but still will one day!) and finally we got fed up of walking around it and moving it around. So back up it went. Along with a resolution not to overload it again.

And as it goes, I’m pretty happy with how it turned out.

The pigeon shelves hung back on the wall, with craft supplies in each of the 9 holes (but not too many this time!)

A lot of the other stuff it held has since found other homes, and so there was less to weigh it down and off the wall, but it’s handy to get these pieces off the bookshelves and small table. It’s a space that has become a great afternoon spot for a bit of crafting or an afternoon cup of tea.

It’s currently my favourite spot for sewing together my Vintage Sweetheart crochet throw. That has 143 squares and most of those still need attaching to each other, so it could take a while - to keep up my momentum, I’m sharing progress over on my Instagram stories so do pop over there to see how I’m getting on.

A longer shot of the shelves above showing more of the room with an arm(less) chair in front and bookshelves to the left.  A real cosy place to sit and relax (and craft!)

The repairs are still on the list, but thankfully most of the damage doesn’t show. I’ve a feeling that when we move (no details yet) that a repaint will be on the cards, so we’ll be able to tackle both jobs at the same time. That’s my revised plan anyway.

The bottom side edge (nearest the wall thankfully) is a bit dented from its fall off the wall
A close up of the front top corner which is showing some wear and has a missing triangular section
A plastic tub of 'broken bits' including the triangular section missing from the photo above

And thankfully, I have a box of bits that should help with those repairs. They’re staying close to the shelves in one of the cubby holes, so finding them again doesn’t become a separate job!

I was featured on Blogger Showcase