Some triangular planting

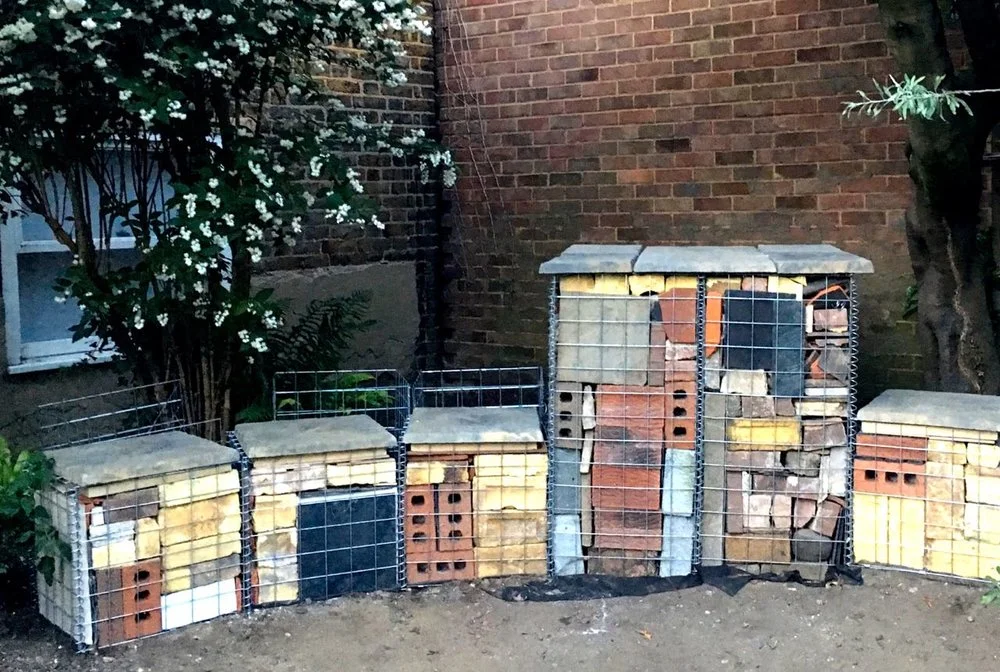
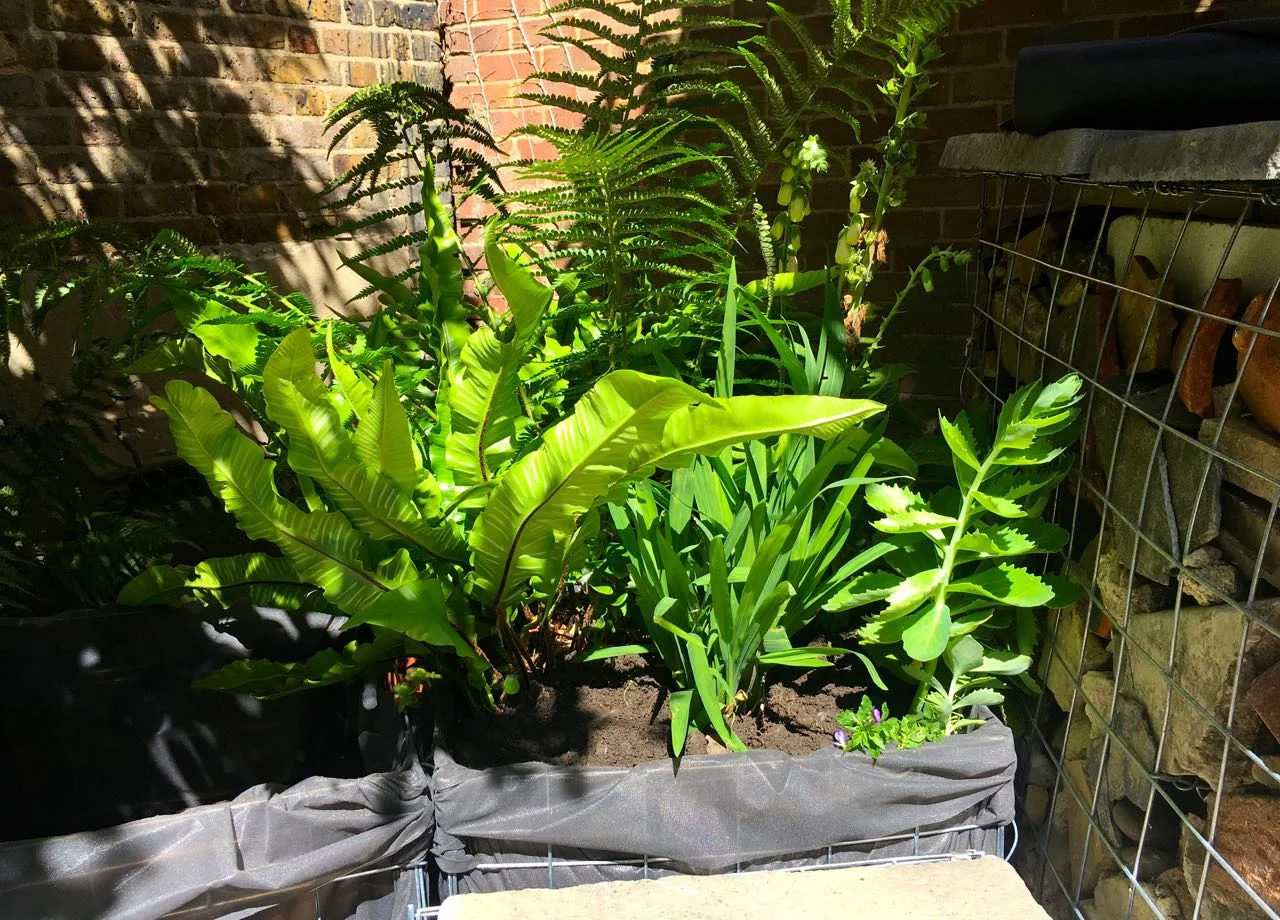
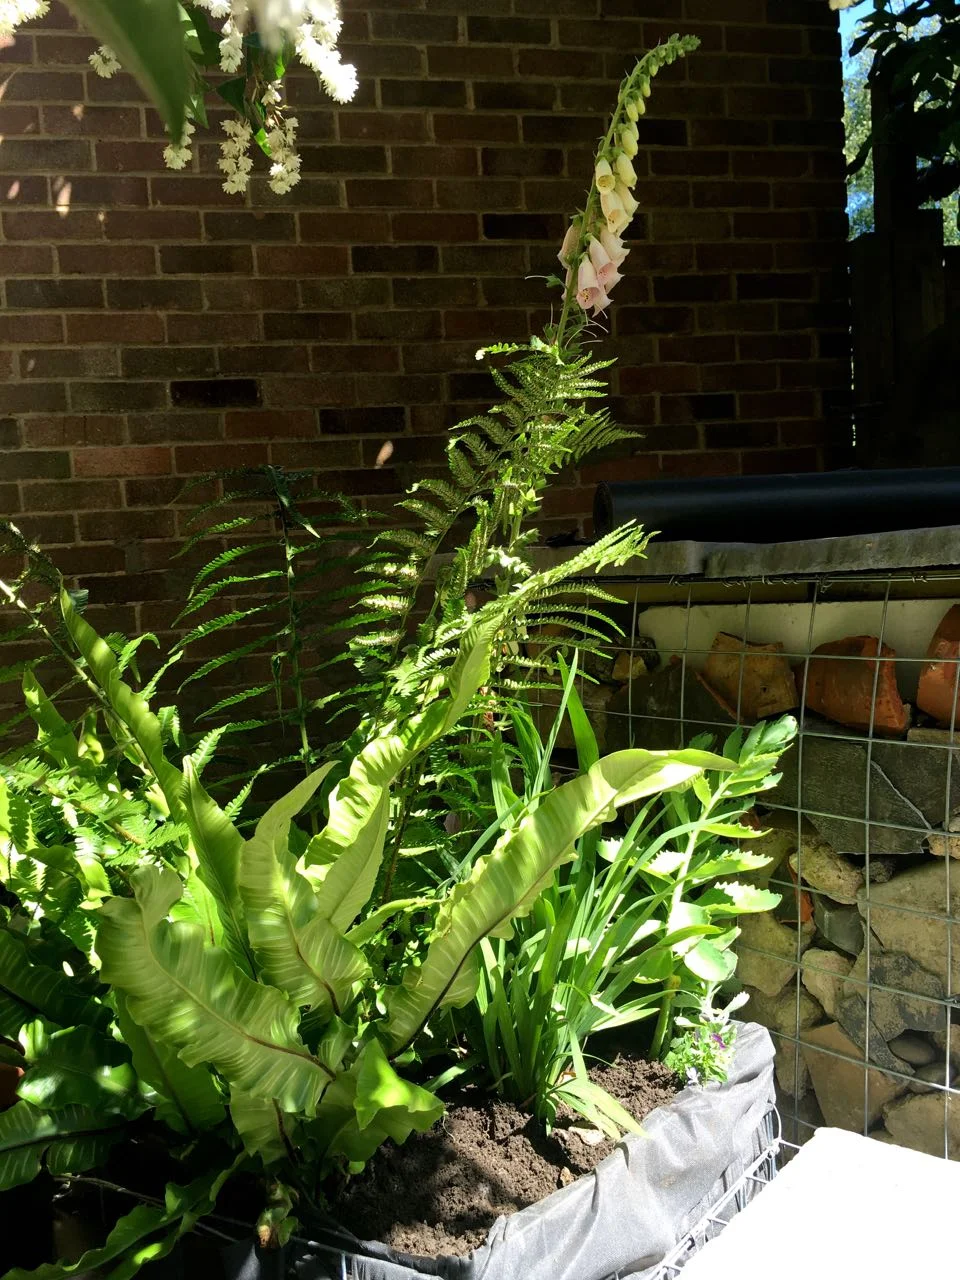
I shared a while back how we’d softened our gabion seating area with planting, and that’s working out well. Recently I’ve moved some self-seeded foxgloves into the baskets, along with some self propagated ornamental grasses, and I had plans to complete the planting, but hadn’t quite worked out how until recently.

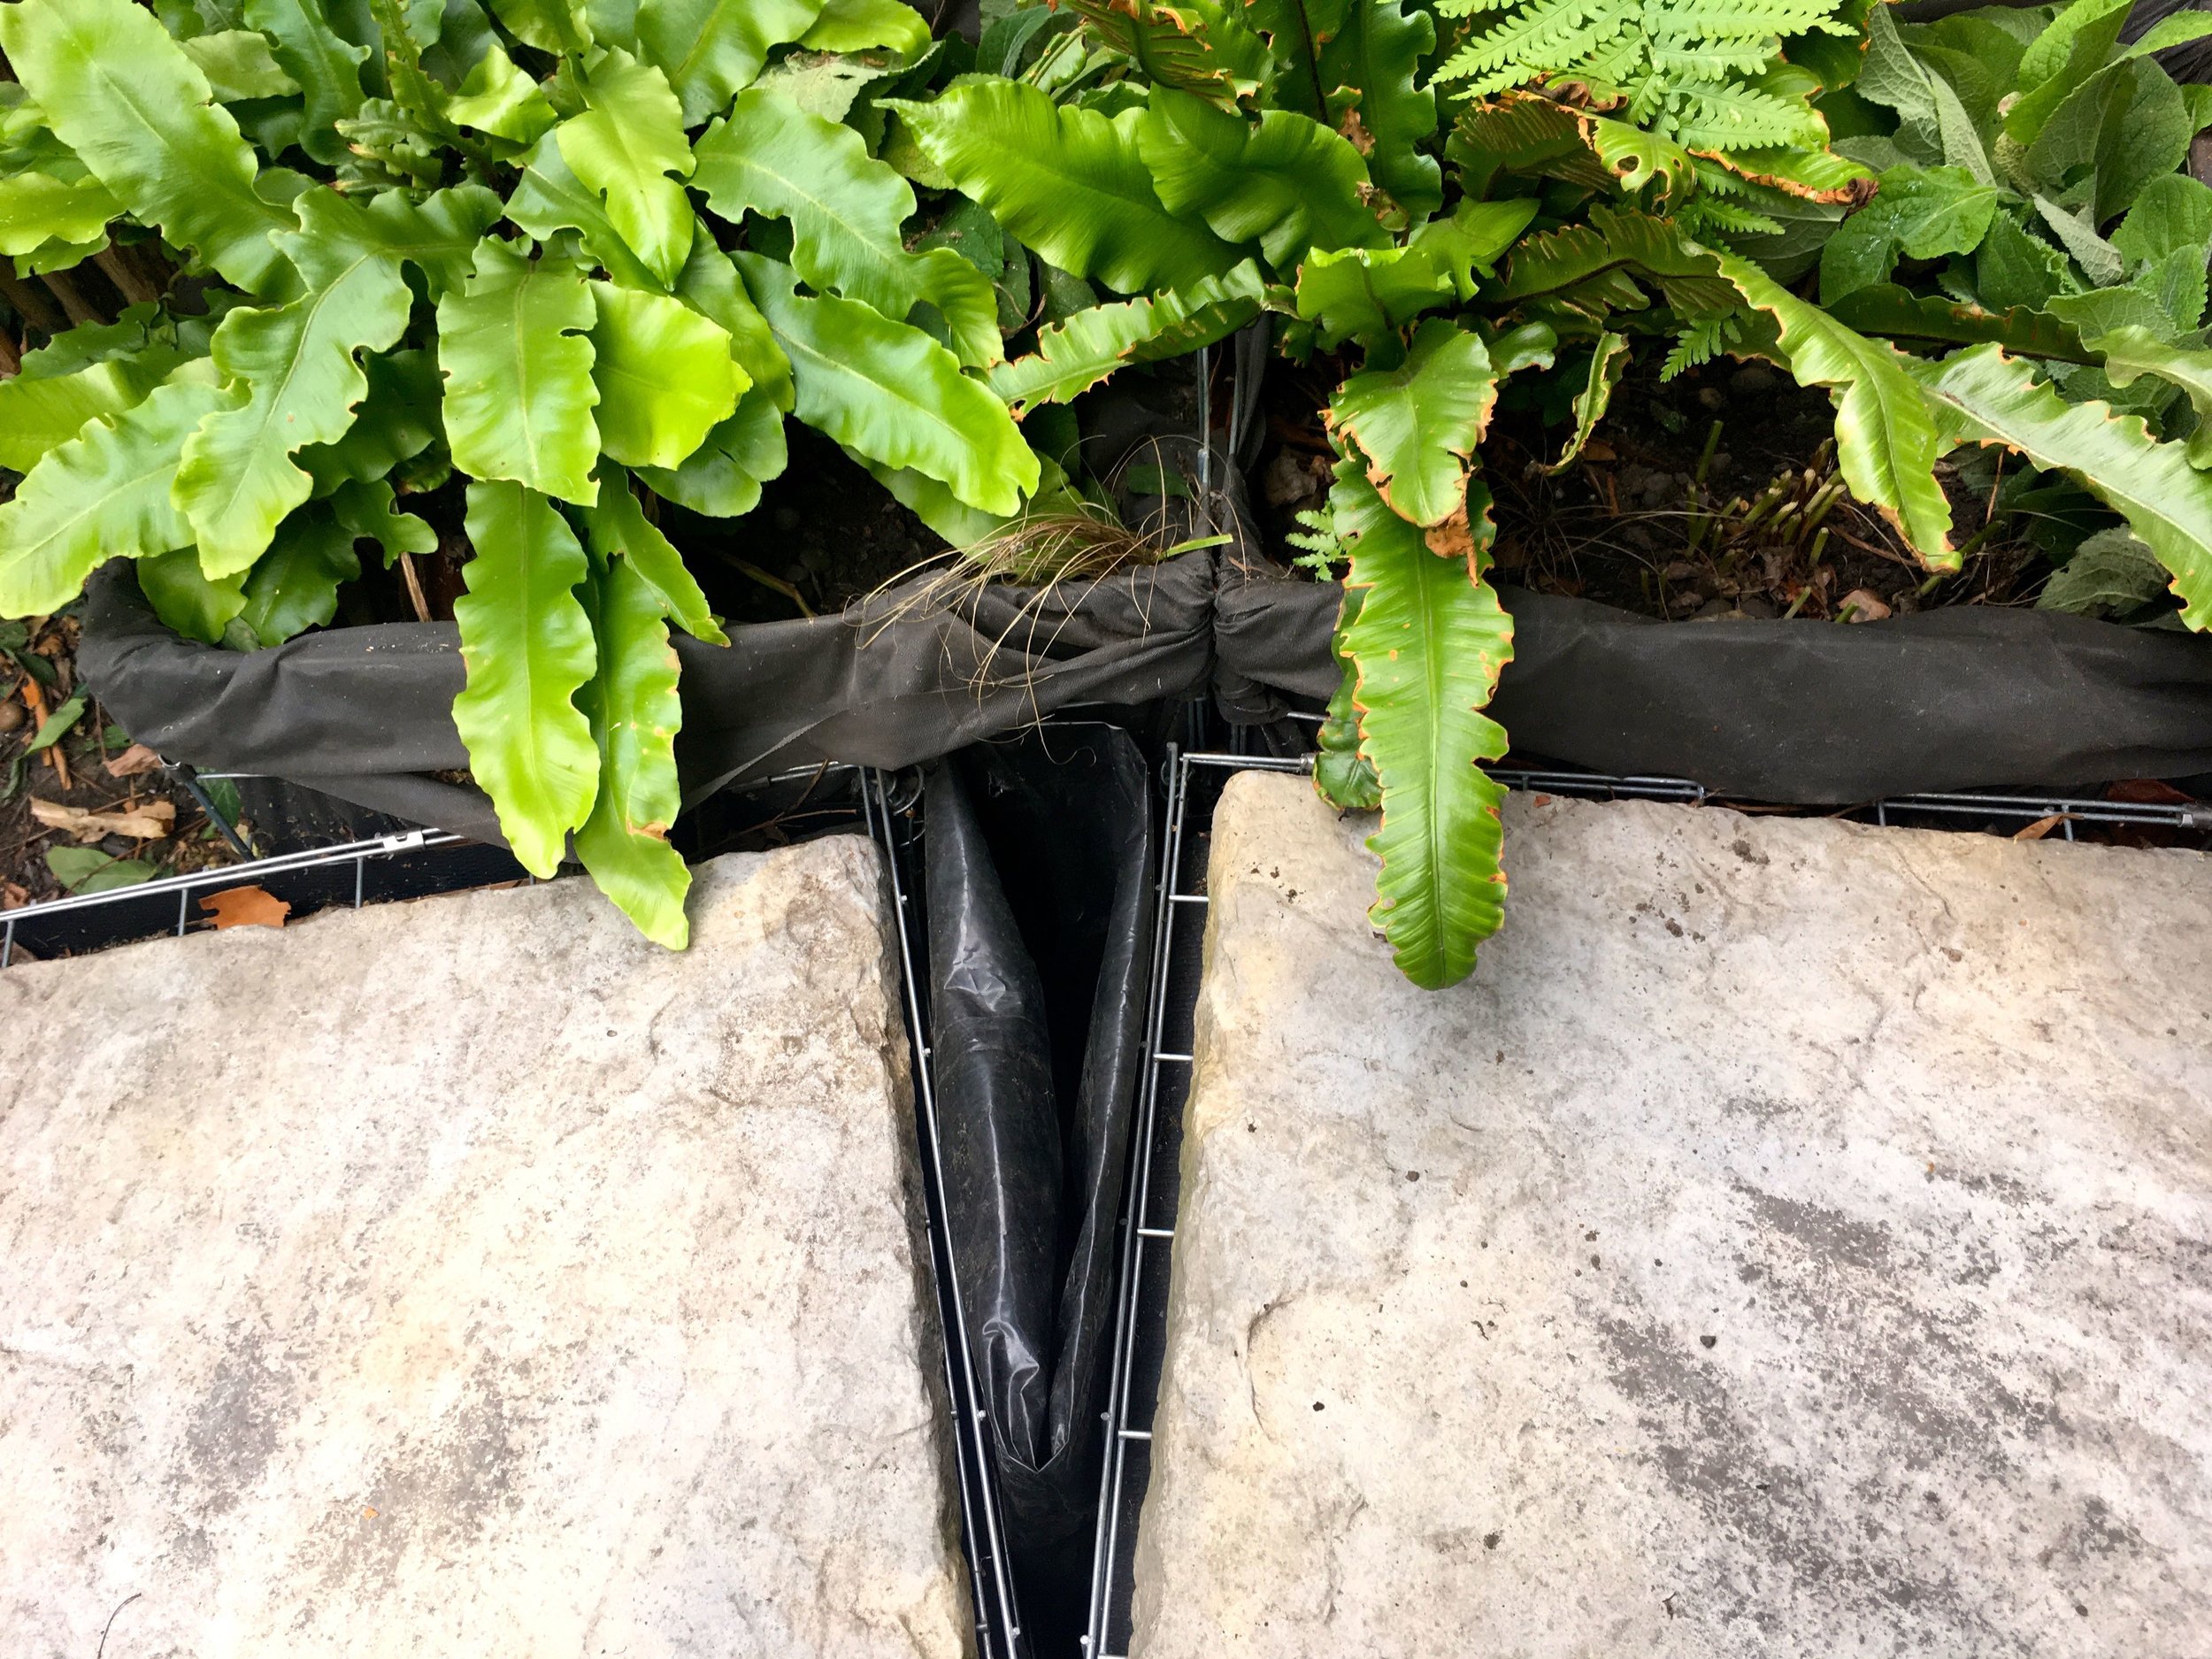
The way we’d placed our gabion baskets in an almost curve meant that we had triangular shaped gaps in between each basket. My plan was to plant this with herbs, to soften the area still further. I thought I’d use the same membrane to line the space, but it was a much smaller space and trickier than I’d hoped it would be.

And so I paused. And thought. For about a year and a bit.

And then inspiration struck.

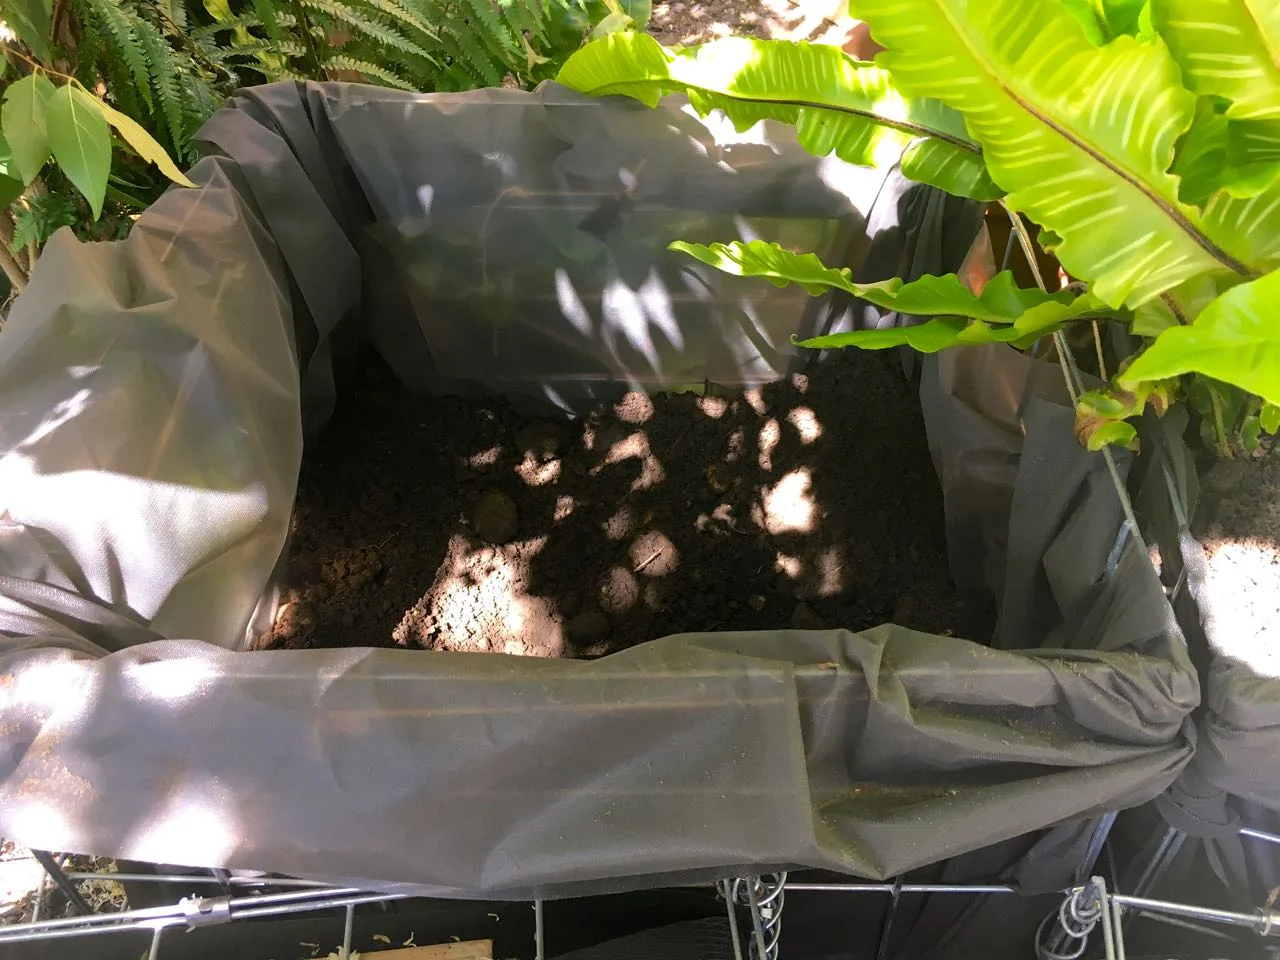
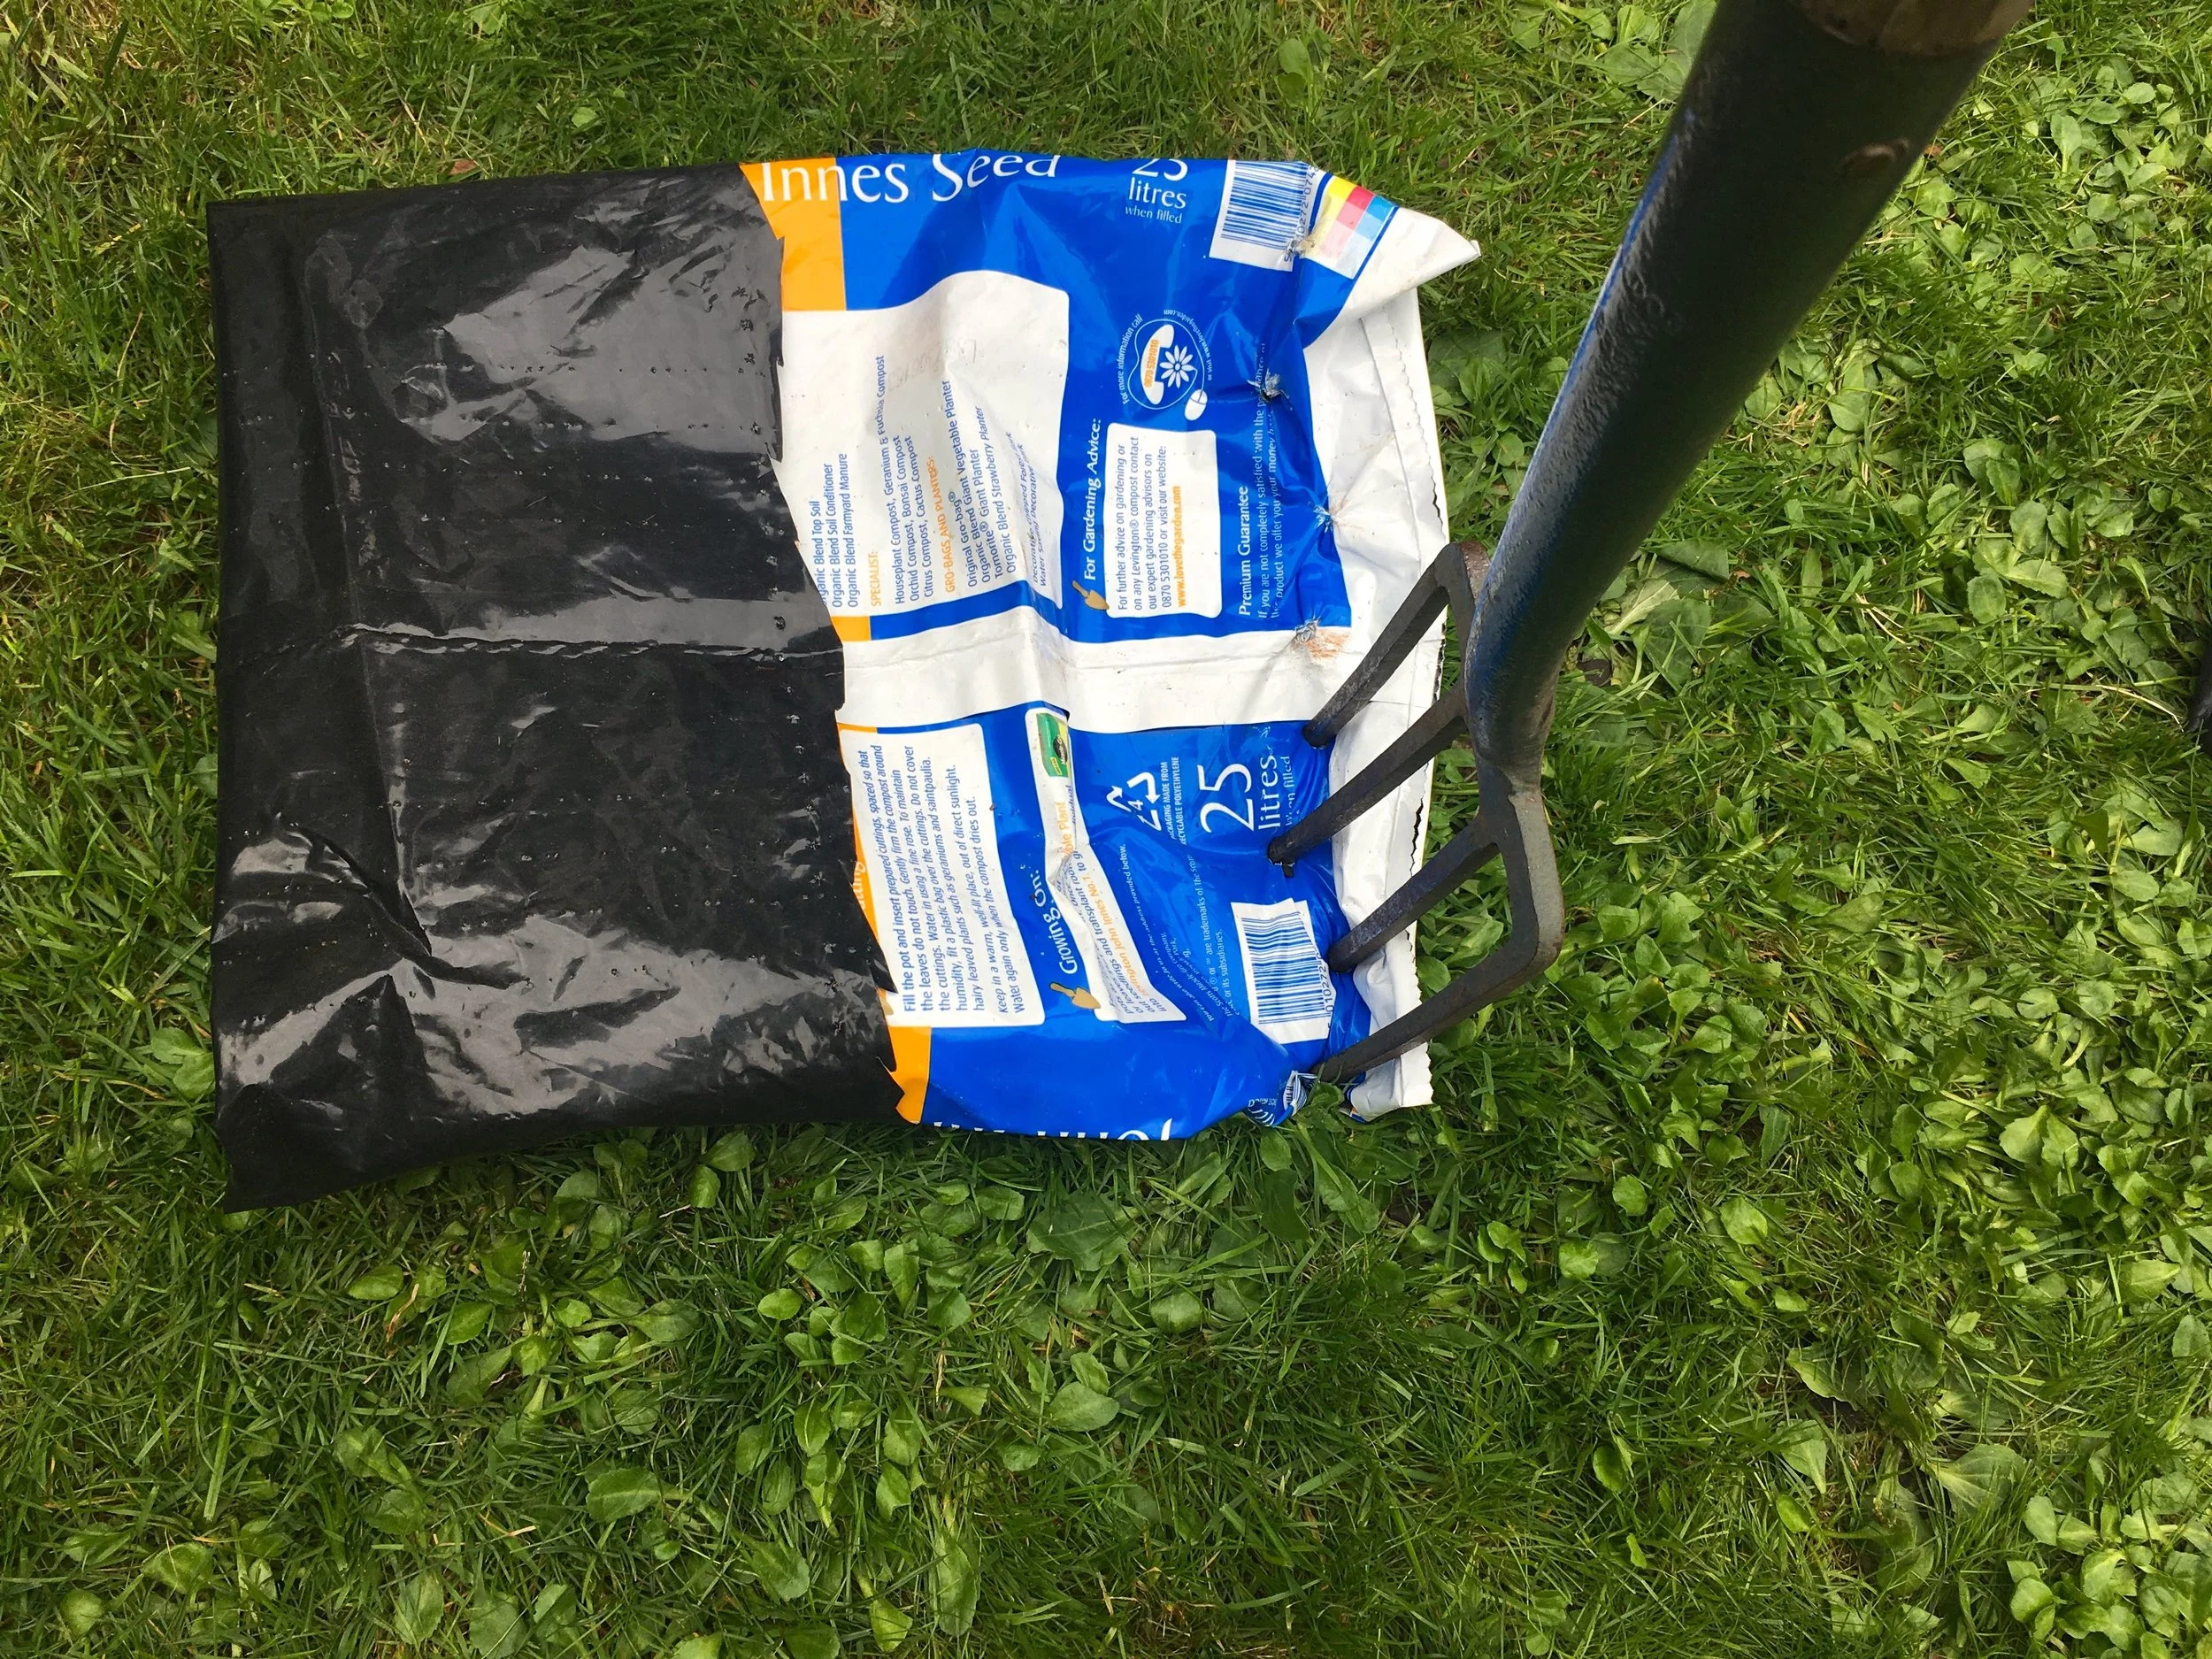
Compost bags, they would work, and so inspired, I tried it. And it was a much easier way to ‘line’ these spaces, look:

A triangular gap in our gabion basket layout

To act as a proper container though, the compost bags needed some holes for drainage. Cue some fun with a garden fork, a compost bag on the grass and my boot. Holes made and I was well away.

making good use of a spare compost bag

The bags were in place, filled with soil - some of the remaining ‘spare’ soil I have in a hidey place in the garden at the bottom, some leaf mould and some of my newly discovered compost on the top. And two, now rather straggly, camomile plants to complete the job.

Getting ready to plant camomile in my gabion basket gaps

And I think this could work.

I'm hopeful for a fragrant seating area

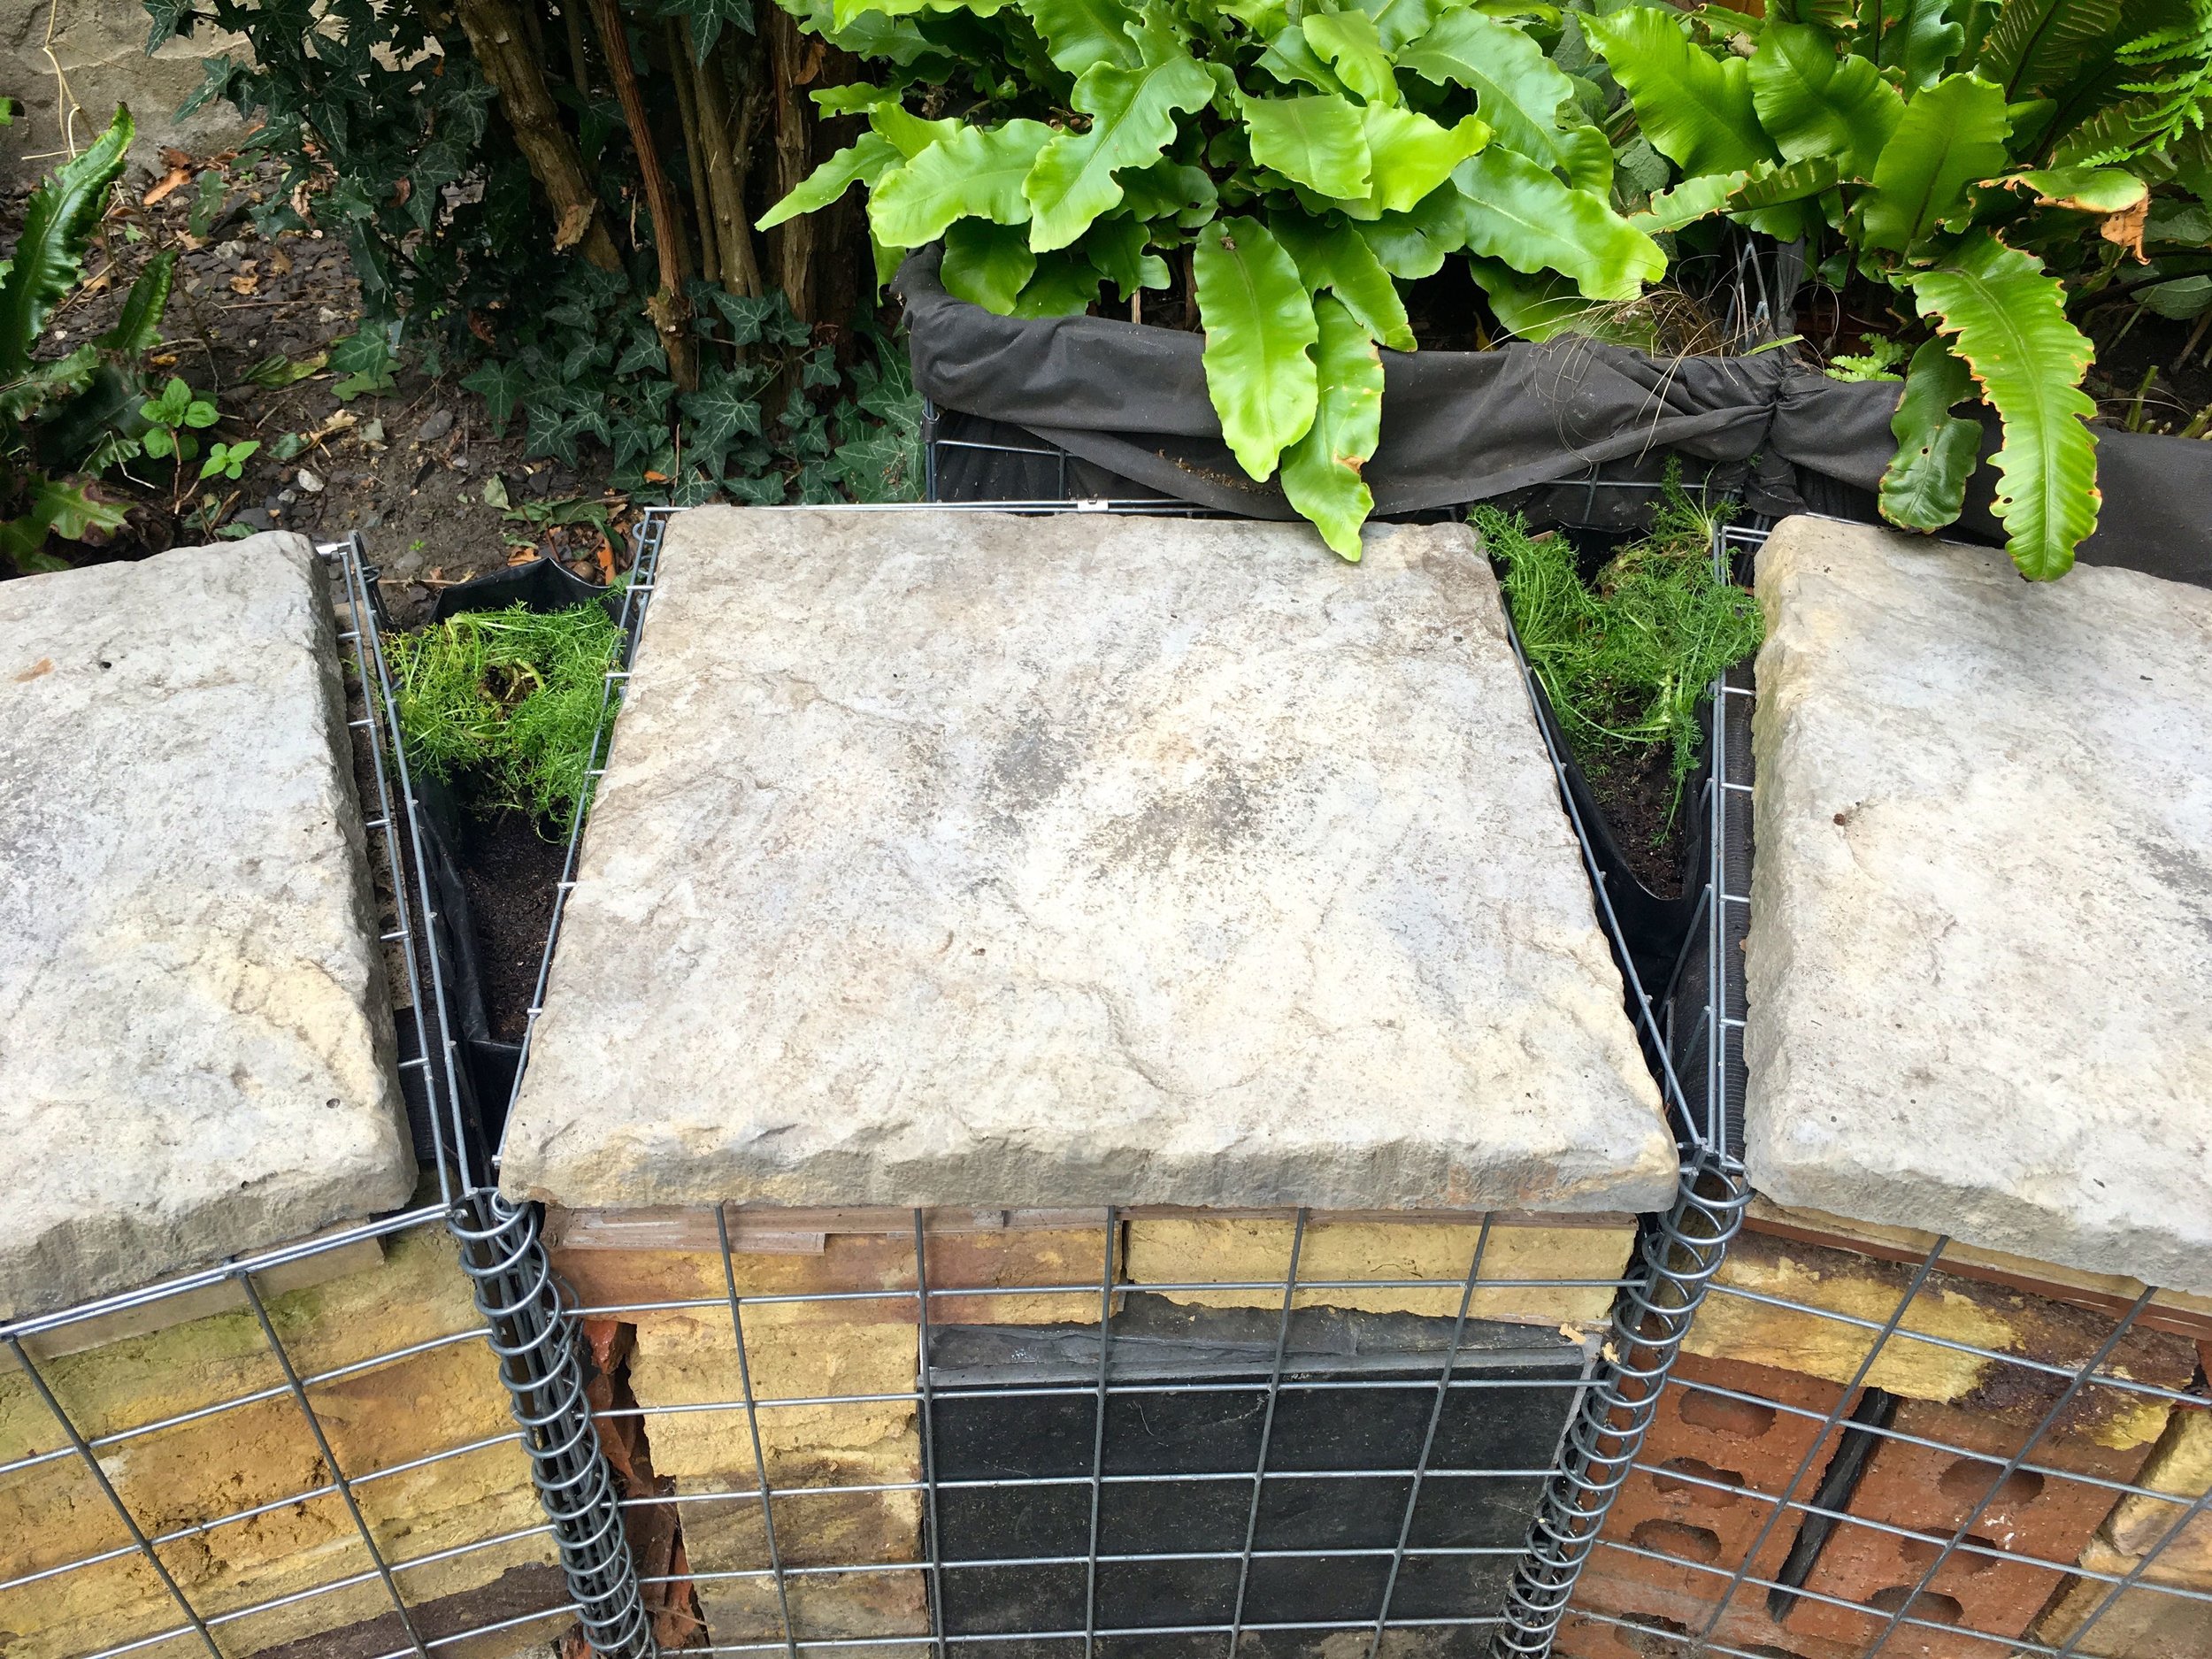
I have just realised though that I haven’t checked on them for a while, so I’m hoping they’re fairly resilient, keep your fingers crossed for the camomile….

Softening our gabion seating area with plants

Right from the off, back in May when our plans were hastily redrawn after just happening to buy a pizza oven, I planned to have a second row of gabion baskets and plant them up with plants from our garden. MOH was less sure about this part of the plan, but as he wanted a pizza oven he went along with it.  I thought that adding at least a tonne of hardcore at the back of our garden would need some softening and I think the two photos below show that I was right.

GABION BASKETS INSTALLED AND FILLED, BUT STARK...

GABION BASKETS INSTALLED AND FILLED, BUT STARK...

 
PART OF THE SECOND ROW OF GABION BASKETS PLANTED UP WITH FERNS, CROCOSMIAS, SEDUMS AND DIGITALIS

PART OF THE SECOND ROW OF GABION BASKETS PLANTED UP WITH FERNS, CROCOSMIAS, SEDUMS AND DIGITALIS

The difference is amazing isn't it? I'm pleased I persevered with this as not only did it help us lose some of the soil we've been collecting but it helps the new structure stand out less, which may seem an odd thing to say but it gives it a more natural feel. 

So how did I turn them into planters?

The answer is membrane. I could have used plastic but that's non-permeable and so they would eventually become like mini bog gardens, that's fine if that's the look you're going for, and if you're planting plants that like those conditions, but I wanted to use the plants that I'd displaced - the ferns, as well as some other plants from around our garden. Crocosmias seem to grow two a penny and I had a pot of those from where I laid some of the old patio paving slabs under the cherry tree. I'd also been collecting sedums and so those were destined for their too.  The final plant I wanted to include was a foxglove that was growing in a pot. Not the usual place for foxgloves but I wasn't sure if it was a weed or a plant (it was a plant) so had moved it there for observation. 

But first things first, membrane.

add membrane to gabion baskets to use them as planters

I cut two ultra-long lengths and used them to line the baskets in a cross form. I found that securing them with string worked well and quickly found a way to do this so the string was out of sight. On seeing them MOH said they looked like waste bins... Hmmmm.  With soil added, less so I think?

In went the plants, and more soil to top up the baskets. And as with any planting they got a good long water.

Planted with ferns, crocosmia, sedums and digitalis sourced from the garden

And they seemed to thrive. Even the foxglove that was moved while it was flowering seemed happy - phew. 

The foxglove was in flower when I moved it - it'd been growing in a pot - but it coped well with the move to our gabion planters

I'm a fan of dense planting and especially in this kind of space it's worked well. Nearly two months later and the plants have settled in really well, filling out and softening the space as I'd hoped. 

the plants have settled in well and are softening the area, just as I hoped
 
sedums growing in our gabion planters

We've still a little more to do, as I want to add a further gabion basket planter on the end so that each of the three seats have plants behind them, but that's just finding the time to level the soil, line the basket and fill it with soil. I've a couple more ferns and crocosmias waiting to go into that space, so the plants are sorted.

I also want to line the three triangular spaces between the seats with membrane in the same way and plant those up with camomile, penny royal (a ground covering mint variety) and thyme, so that when you sit there and brush against the herbs you get a waft of scent too.  This, alongside sorting out the front of the baskets - I think it needs some kind of step - and then I'll happily declare this part of the garden finished.

What do you think?

Home Etc

Storing logs in our gabion baskets

I'm on a roll with these gabion basket posts aren't I? Last week I shared our first pizza and today it's somewhere to store the wood.  And always one to go with an idea and see it through, our log store is also slightly unconventional and made from gabion baskets. When I ordered them I wasn't sure if we'd have a three in a row or a cube of four, that depended on how things worked out. 

As it turned out we could fit in all of the gabion baskets as per my hand drawn plan, with a few refinements along the way, so that left a row of three baskets for the log store.  Instead of clipping the lids off, we've simply folded them back on themselves so there's a double layer of wire on the top. 

Usually wood stores have a small roof to help keep the logs dry - ours don't yet - but they're also under the laurel tree, so they don't get too wet. My plan is to cover the top if we need to, most likely with a paving slab over winter, but we'll see how it goes.

An alternative use for gabion baskets

This was one job that I left to MOH. I had an important date at the hairdressers!  I mean, priorities...

our log store is under a tree and relatively dry so the gabion baskets work pretty well

This no doubt left him in a quandary about getting them in the right place. But he needn't have worried as before I left I cleared a space and levelled it with a flip-flop clad foot. He was umming and ahhing and telling me it'd never be level, but later admitted he wasn't quite sure how I'd done it but it was pretty level after all. 

I'd hoped it was as I'd mostly done it by eye and by shuffling along the area compressing the soil.  Phew.

Stepping back and admiring MOH's work

He'd placed the baskets on the last few broken paving slabs we had, so they logs are off the ground to avoid them getting waterlogged. And when I got back they were all in place, and the logs were ready to be added. That was definitely something he was keen to leave to me, and I didn't mind - it was quite therapeutic to fill and I soon got into a system to make the best use of the space. 

I think they turned out pretty well, and continue the gabion theme in our garden. I've one more use of gabion baskets to share with you, and that's not quite done yet, but I hope it will be soon!

What do you think?