My handmade Advent calendar

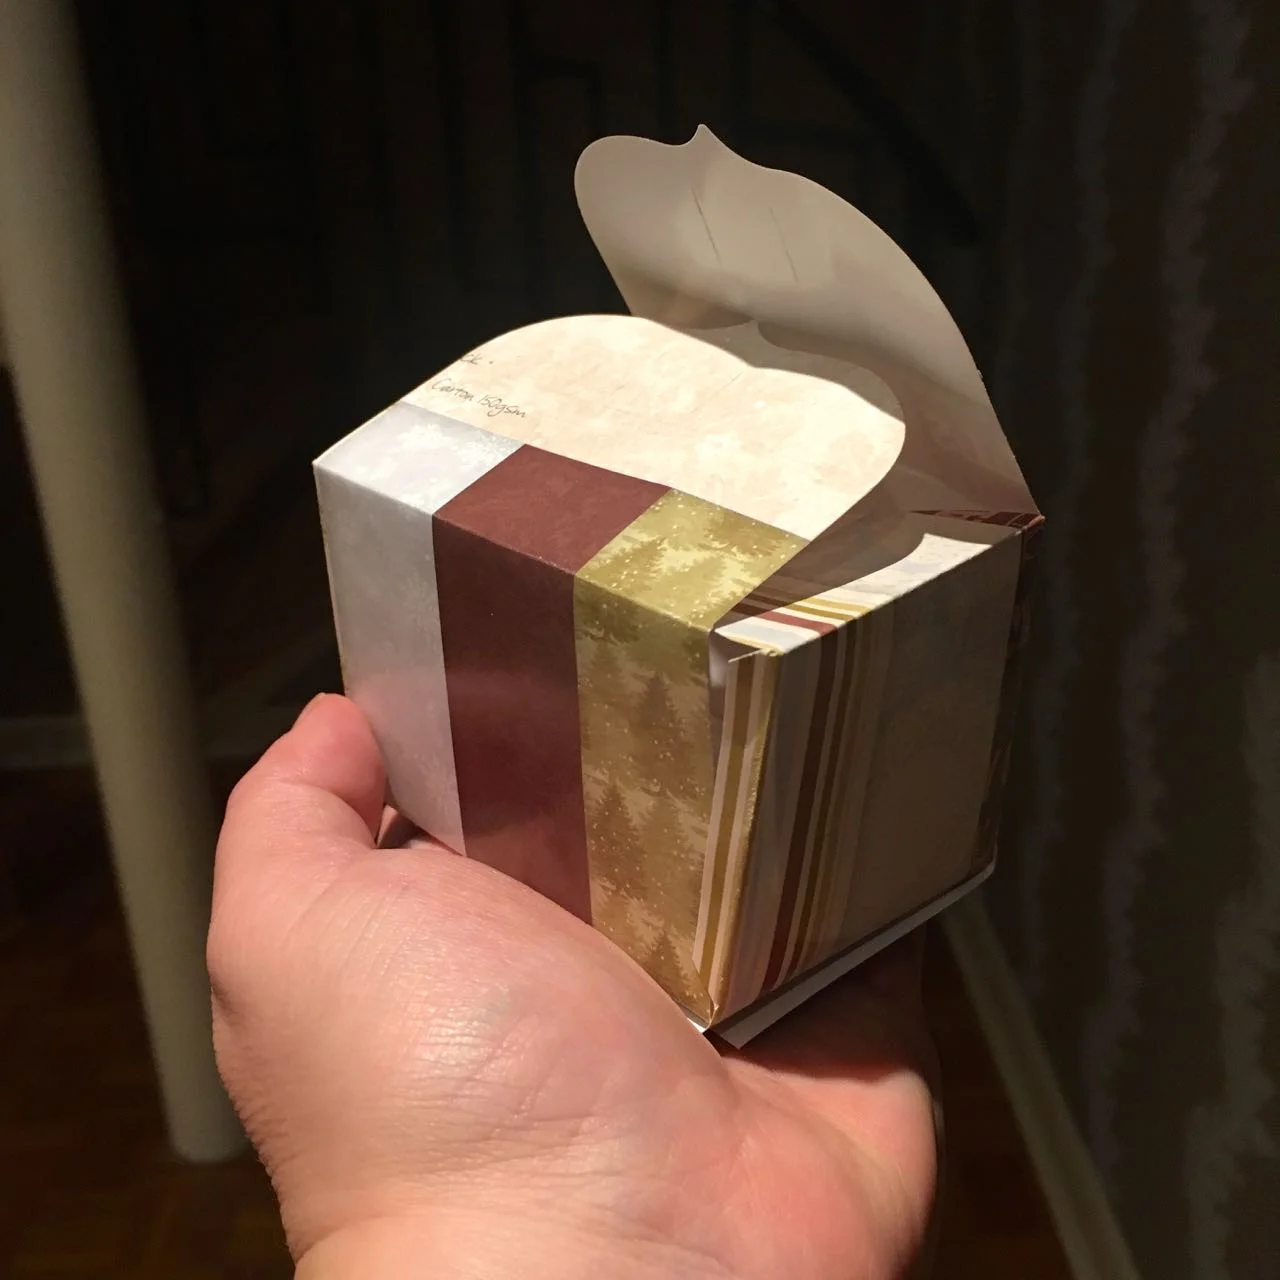
A few weeks ago I shared my prototype box for what I hoped would be my advent calendar.  The good news is that it's finished, but a few days into December. In preparation I'd bought a new die for my die cutting machine from Tonic Studios. Initially I was looking for a pillow box, but when I saw the Marquee Box I realised its potential and my plans changed.

I sussed out how it could work using the prototype, which I cut from the header page of some Christmas scrapbook paper, and as a fan of patchwork and colour, liked how it came out so have kept that in the final design.

The prototype box

Twenty four boxes is quite a few though. Each box needed two cuts of the die, so after a small workout for my arm and forty eight cuts later I was ready to assemble my boxes. The sheer number of these put me off for a bit, despite the start of the month looming. But with some pre-folding and a tray in front of the TV I set about sticking.

I'd tasked MOH to buy contents for half of the boxes, and I set about buying contents for the other half. Somehow all of our boxes have ended up with chocolate fillings, but that's no bad thing.

It did feel like a bit of a production line, and on more than one occasion I did wonder why I'd started, and if perhaps doing something for the twelve days of Christmas instead. But I'd started...

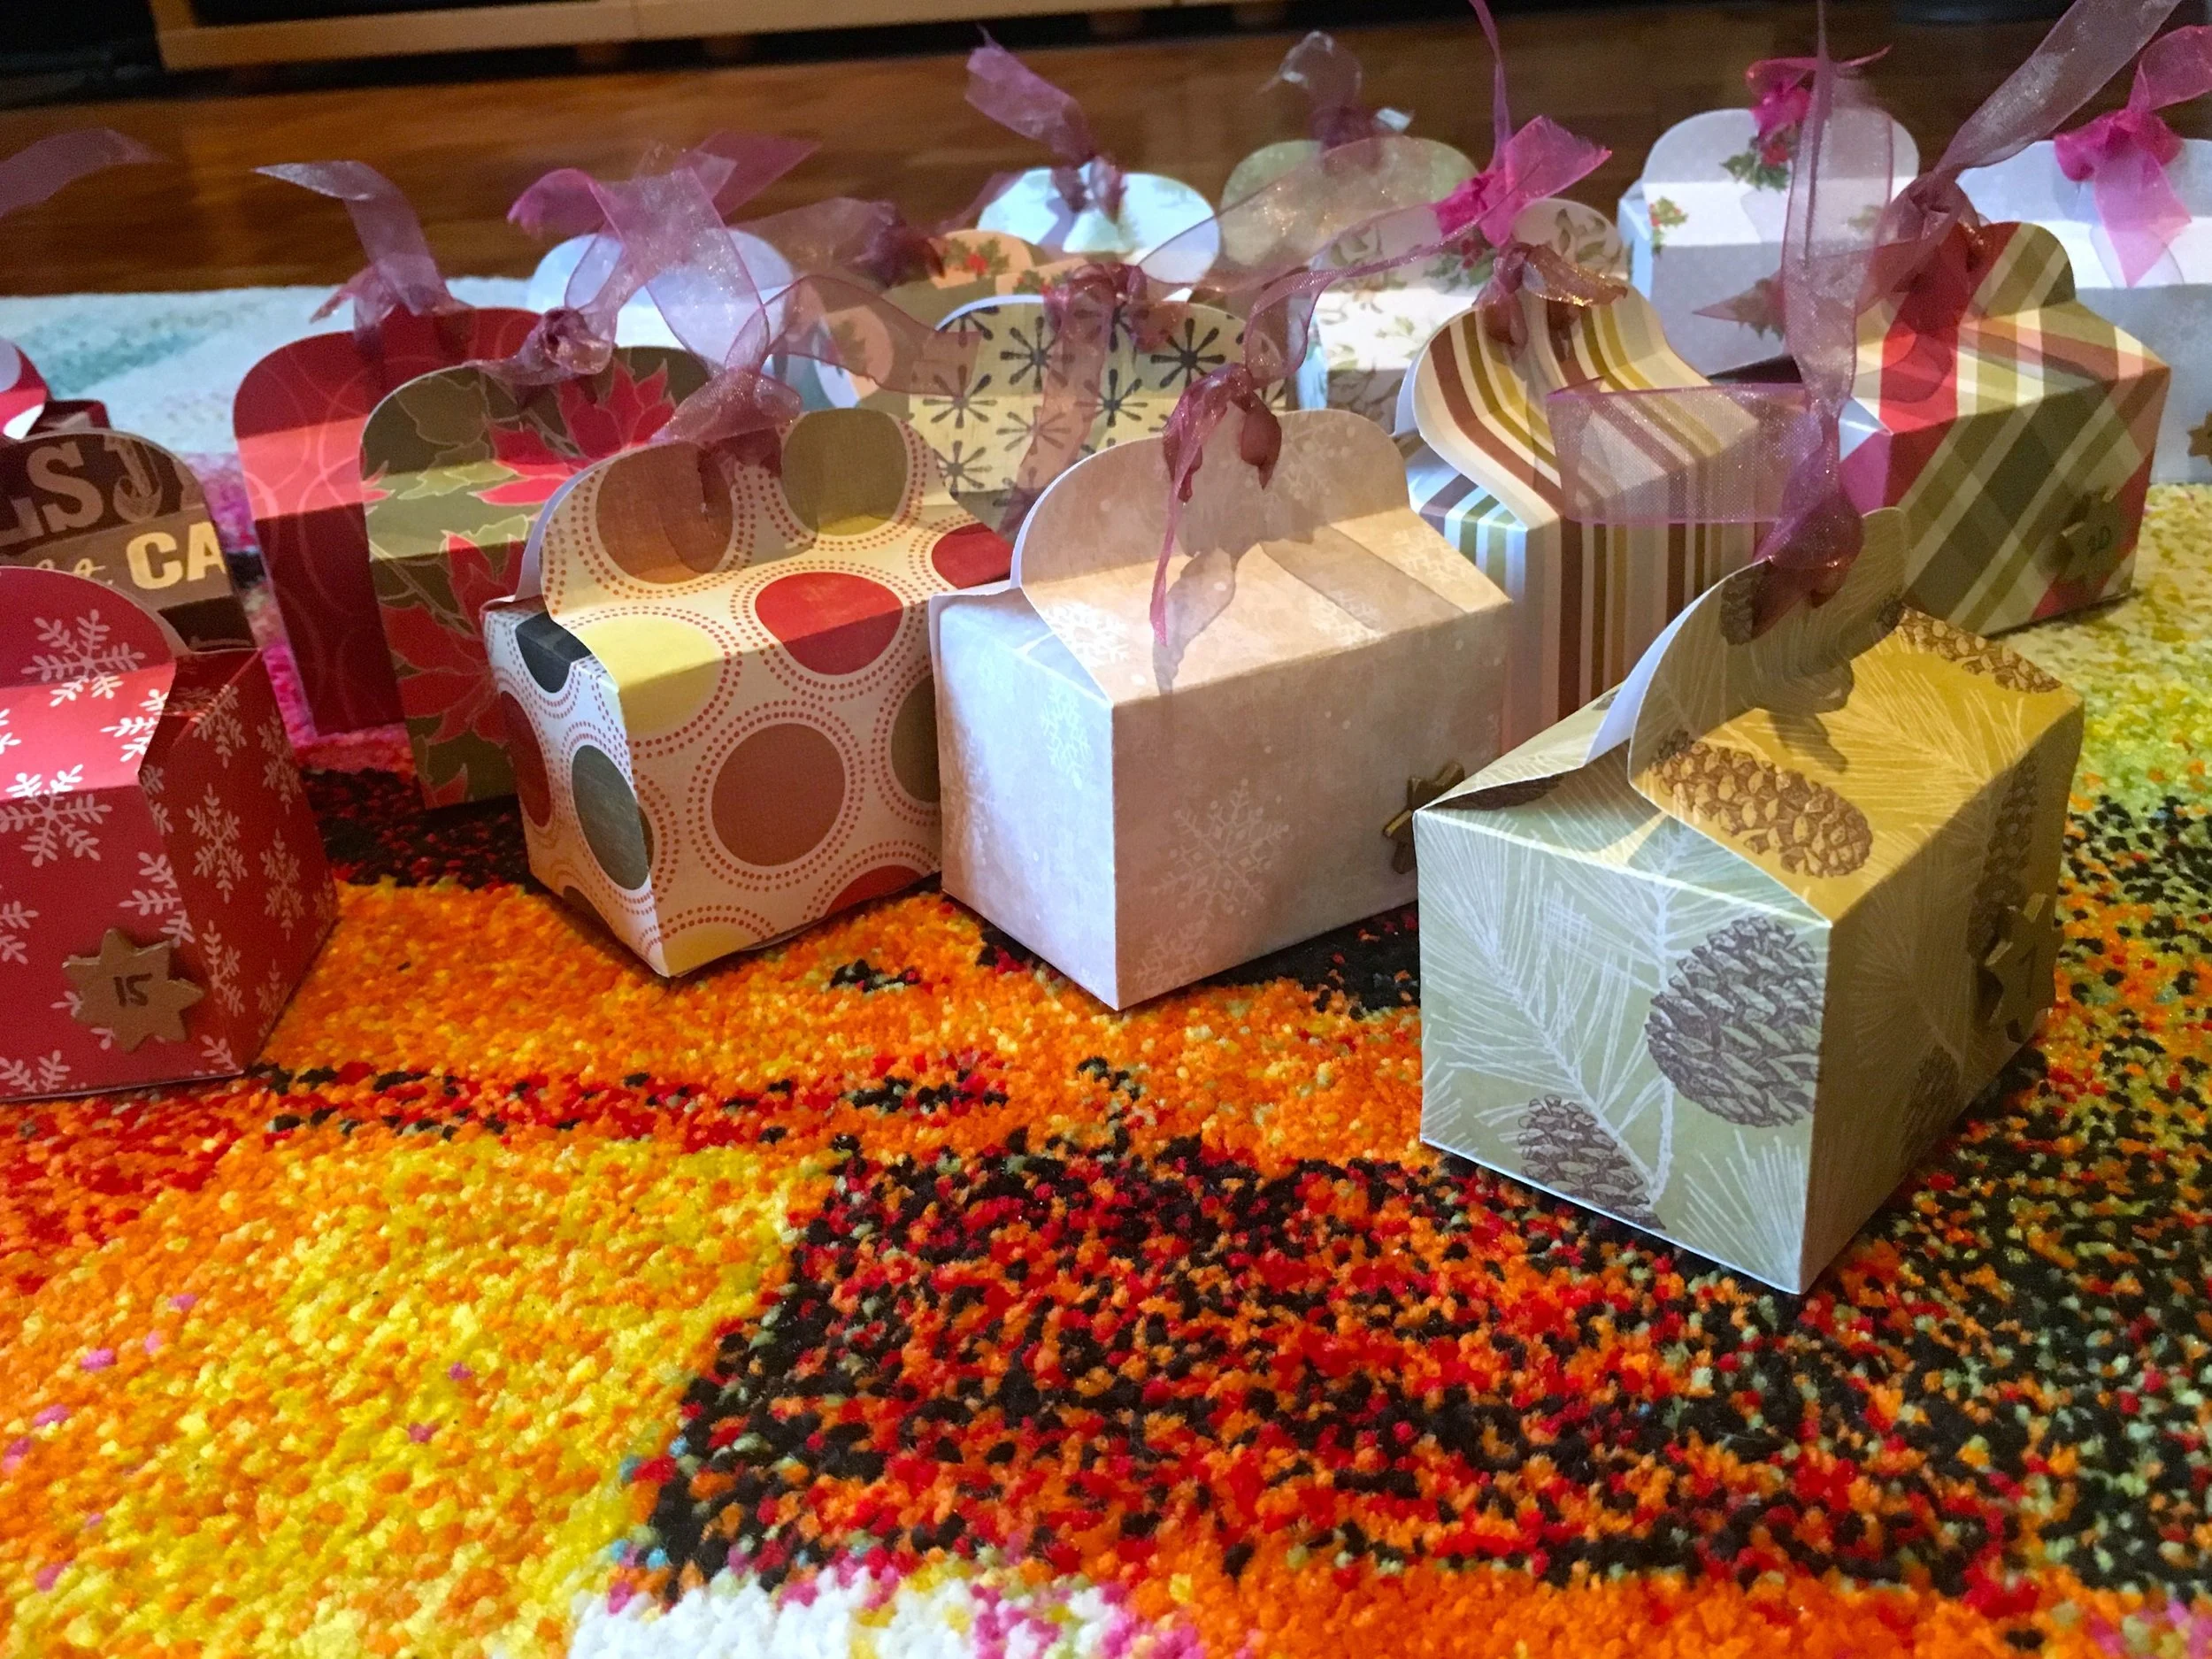
A collection of boxes, assembled and filled

And so I finished. A few days in to December!

I was able to make use of lots of things I had too, which is always a winner for me. I had the scrapbook paper, I recycled tissue paper inside the boxes, the stars which I used for the numbers were from many years before - I'd previously used them as decorative touches on gifts, tags and cards, and the ribbon that I used to close the boxes were left over from an earlier craft project.

So apart from the die cut and the contents it turned into quite a thrifty project. 

Our handmade advent calendar assembled and in place
 
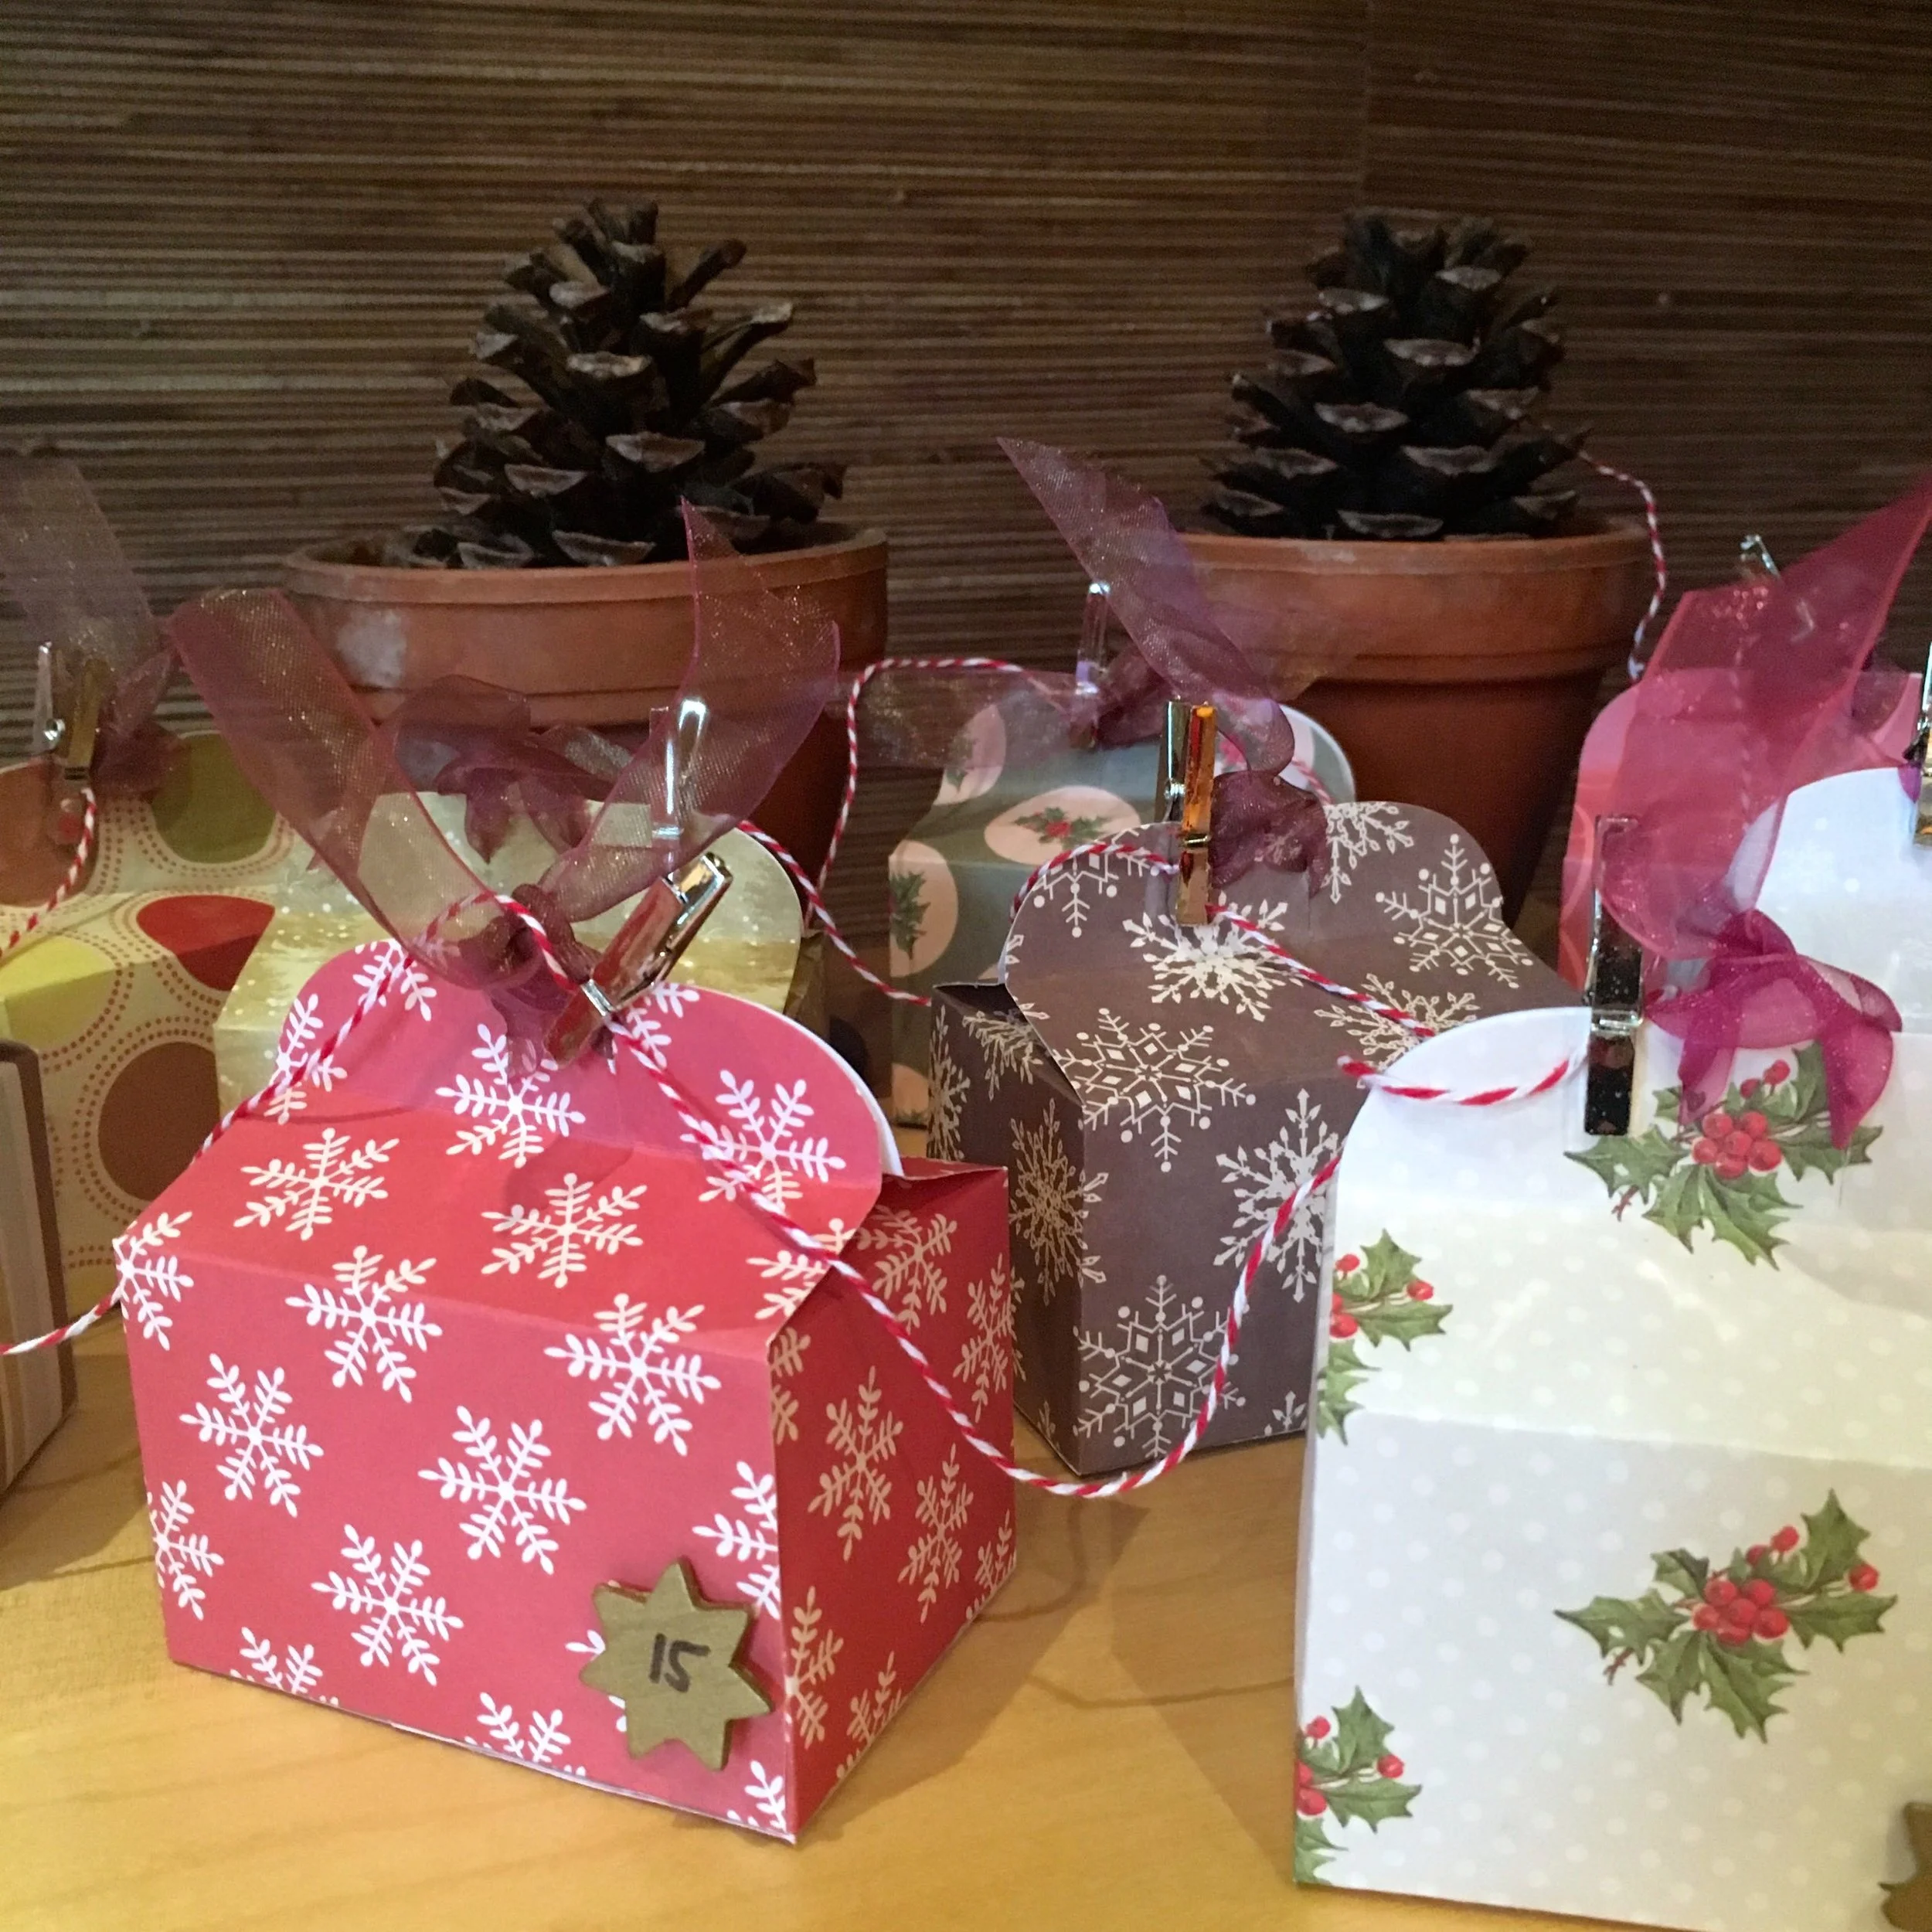
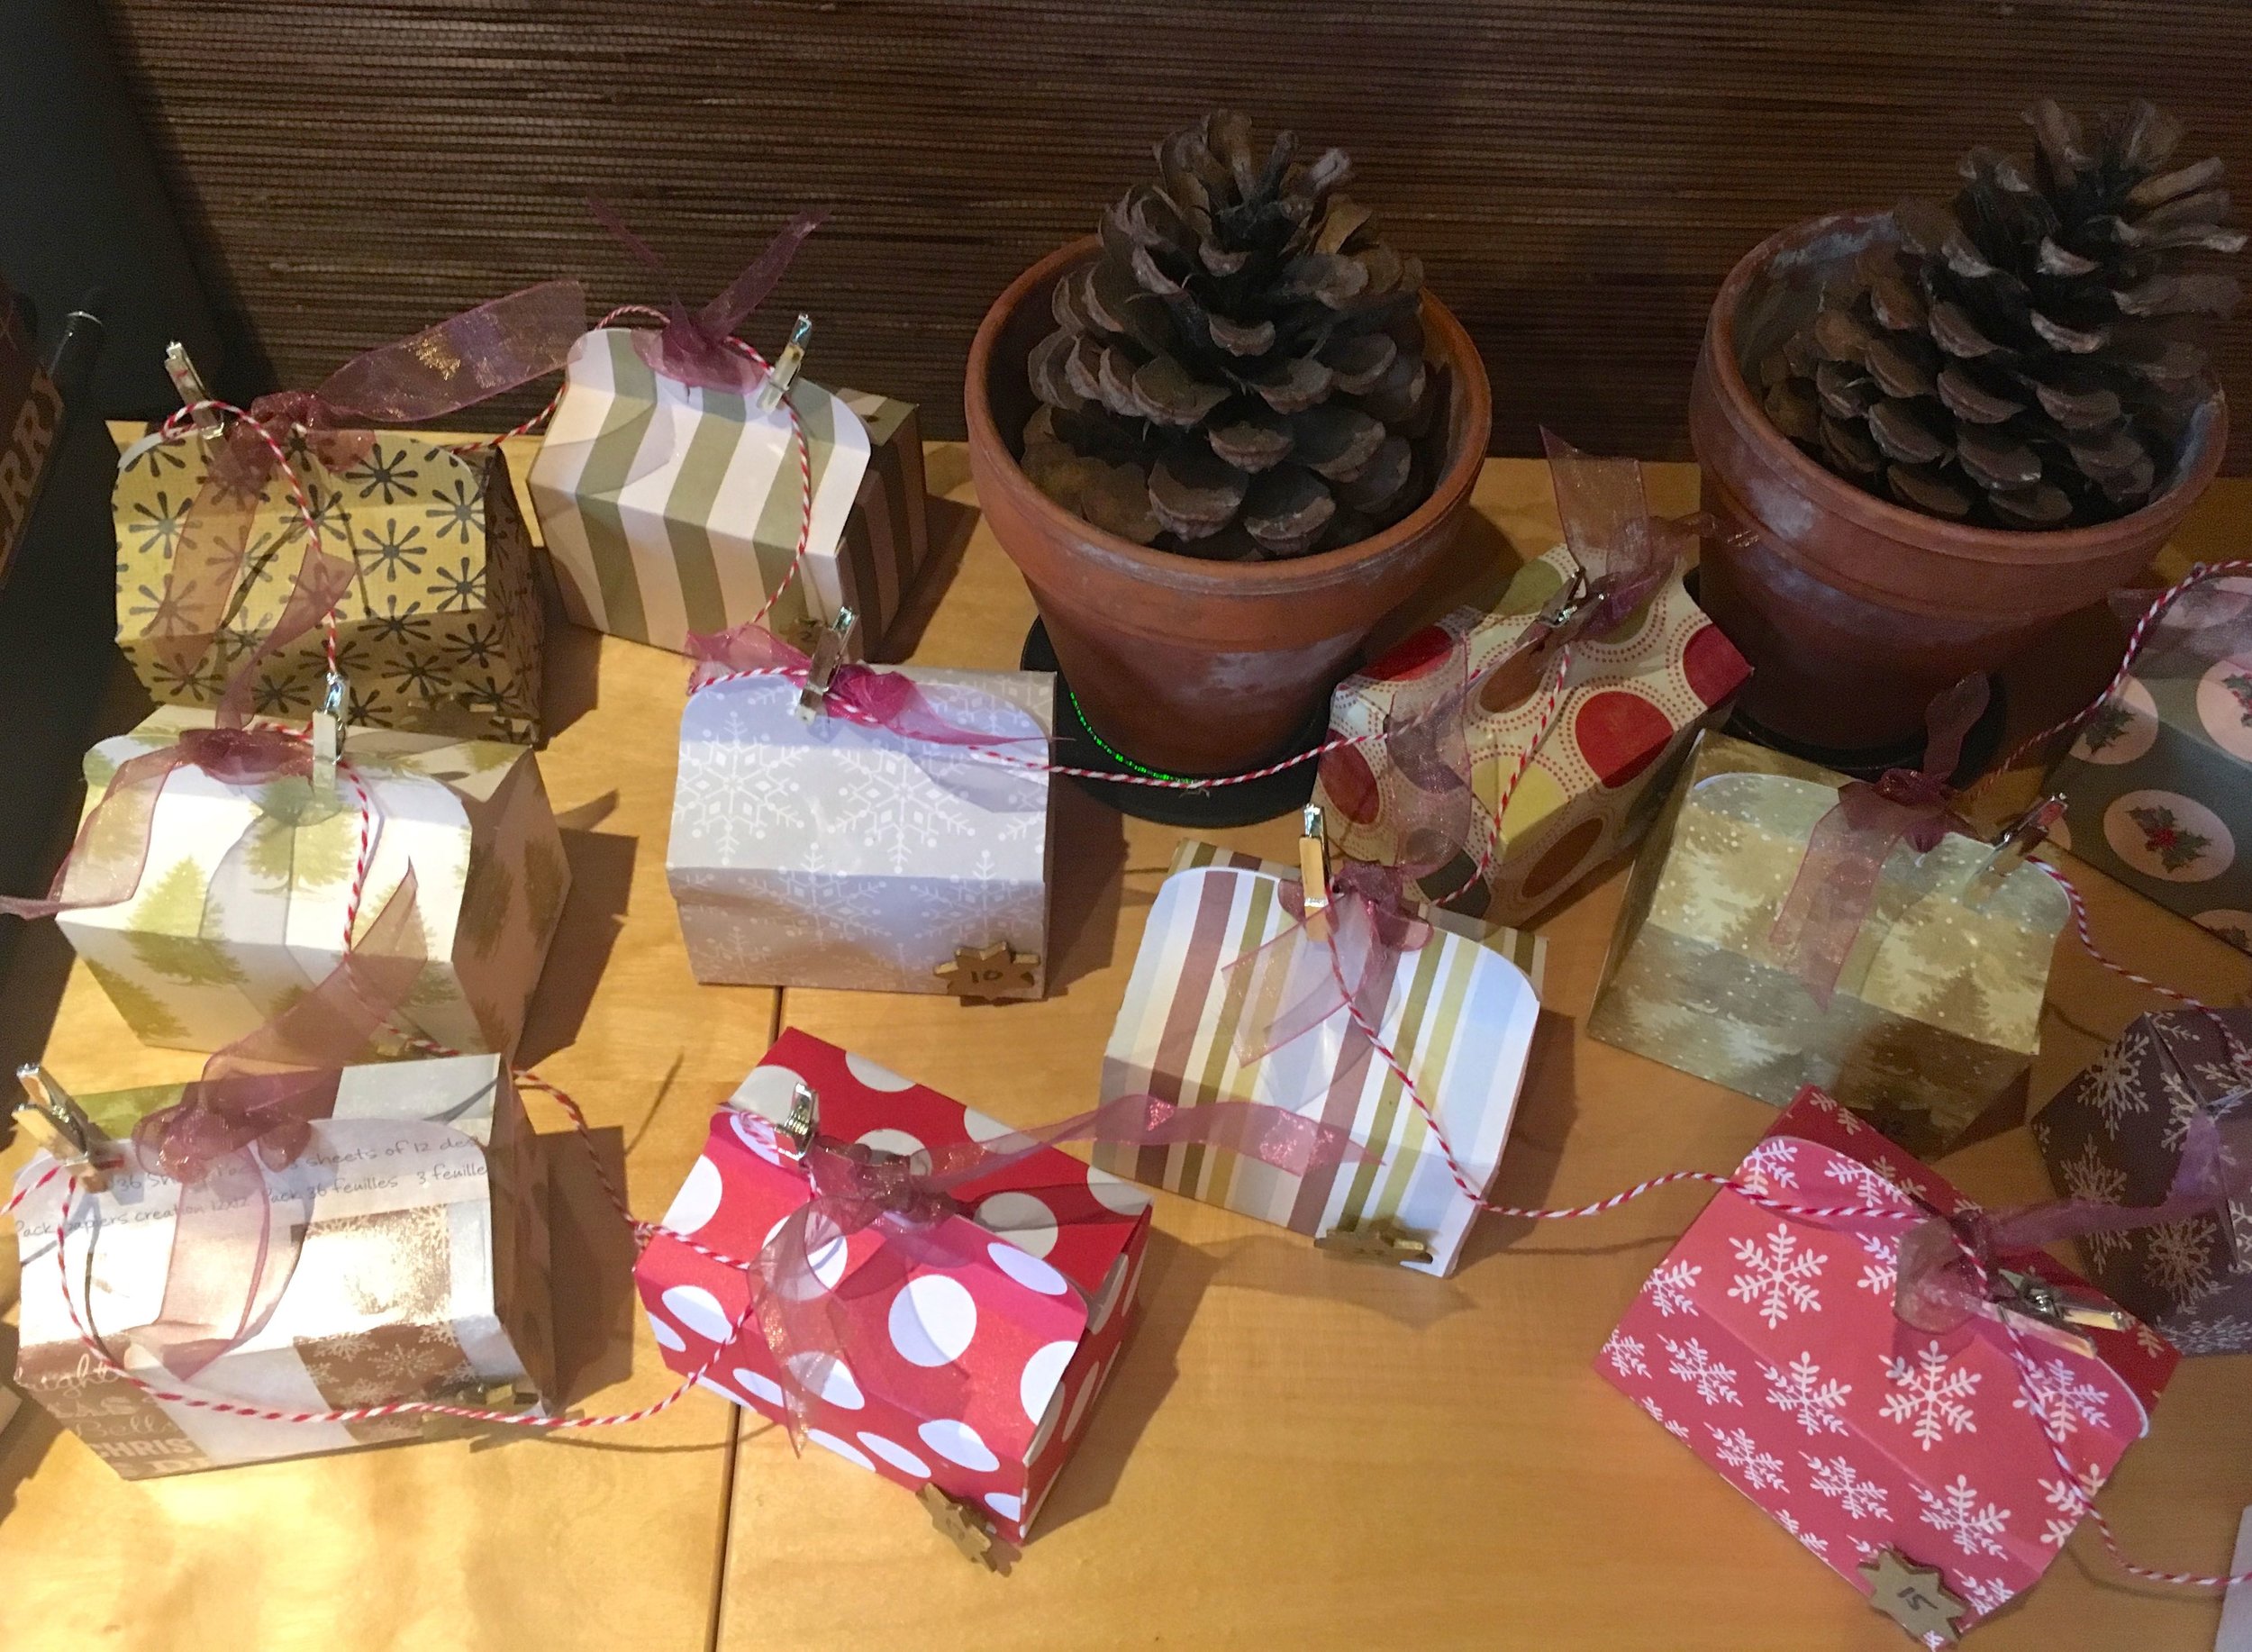
a few more of the twenty four boxes of our advent calendar

I considered hanging the boxes, and wanted to use the silver pegs - that I've had for ages, and would you believe it there were 24 - and some bakers twine, which I've several reels of. The weight of the boxes though didn't really work for hanging vertically as I planned, and as we don't hang things on our wall, I was after another solution.

In the end I kept it simple and strung them together placing them under our television - the other place I'd considered was on top of a radiator, but knowing the contents that wouldn't work!

Looking from above at our handmade advent calendar

But I'm pleased with how they turned out, and it looks as if we've a village of festive boxes. Although not all of the paper I used was Christmas paper, however it all works together, and you can see the prototype box taking pride of place in the photo below (day 6).

Not all the papers I used were Christmas papers, but they all work together

A longer project than I expected but one that will provide fun - and chocolate - throughout the month. 

I love it - and I even got MOH involved too, as well as buying some of the contents, he was also chief number sticker on, as I thought I'd remember what was in each box, and so would lose the randomness of the contents! 

What do you think - would you make your own?

3D pumpkins, geometric baubles and the cutest ghost

Today I'm sharing the printables for the halloween and Christmas crafts from my visit to Fellowes in Doncaster last week. But before we get to those, don't you think pom poms raise your spirits in much the same way that bunting does?  I mean, anything adorned with pom poms (or bunting) has to be good doesn't it?

Exactly, so imagine how pleasing it was to be presented with this sight on arrival. And even better, soon after there was a great cup of tea and some pretty fantastic cakes. And of course the crafting and good company.

Photo credit: Fellowes

Photo credit: Fellowes

If you don't know much about Fellowes, they're celebrating a 100 years this year and the Banker's Boxes originated with them. They often provide the original kind for film sets and such like. But they also have a huge range of office equipment, and our tool of choice for the day was the laminator.

And what a clever thing it is. Addictive too, I found myself looking around the room for more things to laminate, and I've some ideas to try over the coming weeks, but first onto those printables.

Photo credit: Fellowes

Photo credit: Fellowes

Halloween Bunting

You can download the printables to make your own Halloween Bunting from the Fellowes Ideas Centre.

First up was the Halloween bunting, with hardly very scary ghosts, black cats, pumpkins, a magic tree (not the magic money tree sort sadly), bats and a witches hat to choose from.  The ghosts threaded onto twine against a black wall looked super effective, and you can choose which motifs you opt for.

The big debate, is of course whether to cut out first and then laminate, or to laminate and cut out after.  If you want to use your bunting outside then cut out first as the laminator will seal the edges and keep them watertight for longer. If you're limited on the number of pouches you have then cut out first to make effective use of your pouch space, or laminate the whole sheet and cut out afterwards.  As a novice laminator that's the approach I took, but either way works.

Photo credit: Fellowes

Photo credit: Fellowes

I was drawn to the cats - no surprises there - and as I was cutting out my second one, inspiration struck and I went a bit off piste, and aided and abetted by Maggie from Red Ted Art who was leading the crafting session, quickly created a 3D pumpkin. It is really cute - it's about hand-size - so will be a good addition to any halloween decorations, or table setting.

LUCKY BLACK CATS, AND POM POMS!

LUCKY BLACK CATS, AND POM POMS!

MY OFF PISTE 3D PUMPKIN

MY OFF PISTE 3D PUMPKIN

While we're not big Halloween celebraters here, I think this technique is one I'll use again.

Geometric Christmas baubles

You can download the printables to colour your own geometric Christmas baubles from the Fellowes Ideas Centre.

These were my favourite item of the day. Armed with brightly coloured felt pens I set about creating bold geometric patterns and once again experienced how mindful colouring, crafting and chatting can be. You'll notice I've coloured over the lines, and that's on purpose, and so my colour will be up to the line I cut, which meant my cutting didn't have to be quite so precise. There is method to my madness (at times).

colouring in christmas baubles - and yes I went over the lines on purpose

In fact I enjoyed creating these so much I pulled out another sheet and created a second colourway, and once they were together they all seemed to just 'go'

geometric baubles ready for my Christmas tree

I've punched a hole in the "bauble top" and threaded twine through that so they're easy to hang. These might end up on our tree, or if I make several more I may just have another use for them. But Christmas is months away yet (and yes I know it'll be here before I know it) but even so I'm going to ponder my creativity some more, and hopefully find time to pull out my felt tips at least once more.  And if that creative idea takes shape you can be sure to read about it here.

If these aren't the crafts for you do head over to the Fellowes Ideas Centre, as they've some fab ideas there and whether you're coming at these from a mindful perspective or a rainy day activity for the kids, I'm sure you'll find something there to spark your inspiration.


This is a collaborative post, but all views and opinions, cutting out and colouring in are my own.


Overcoming my overwhelm and letting inspiration strike

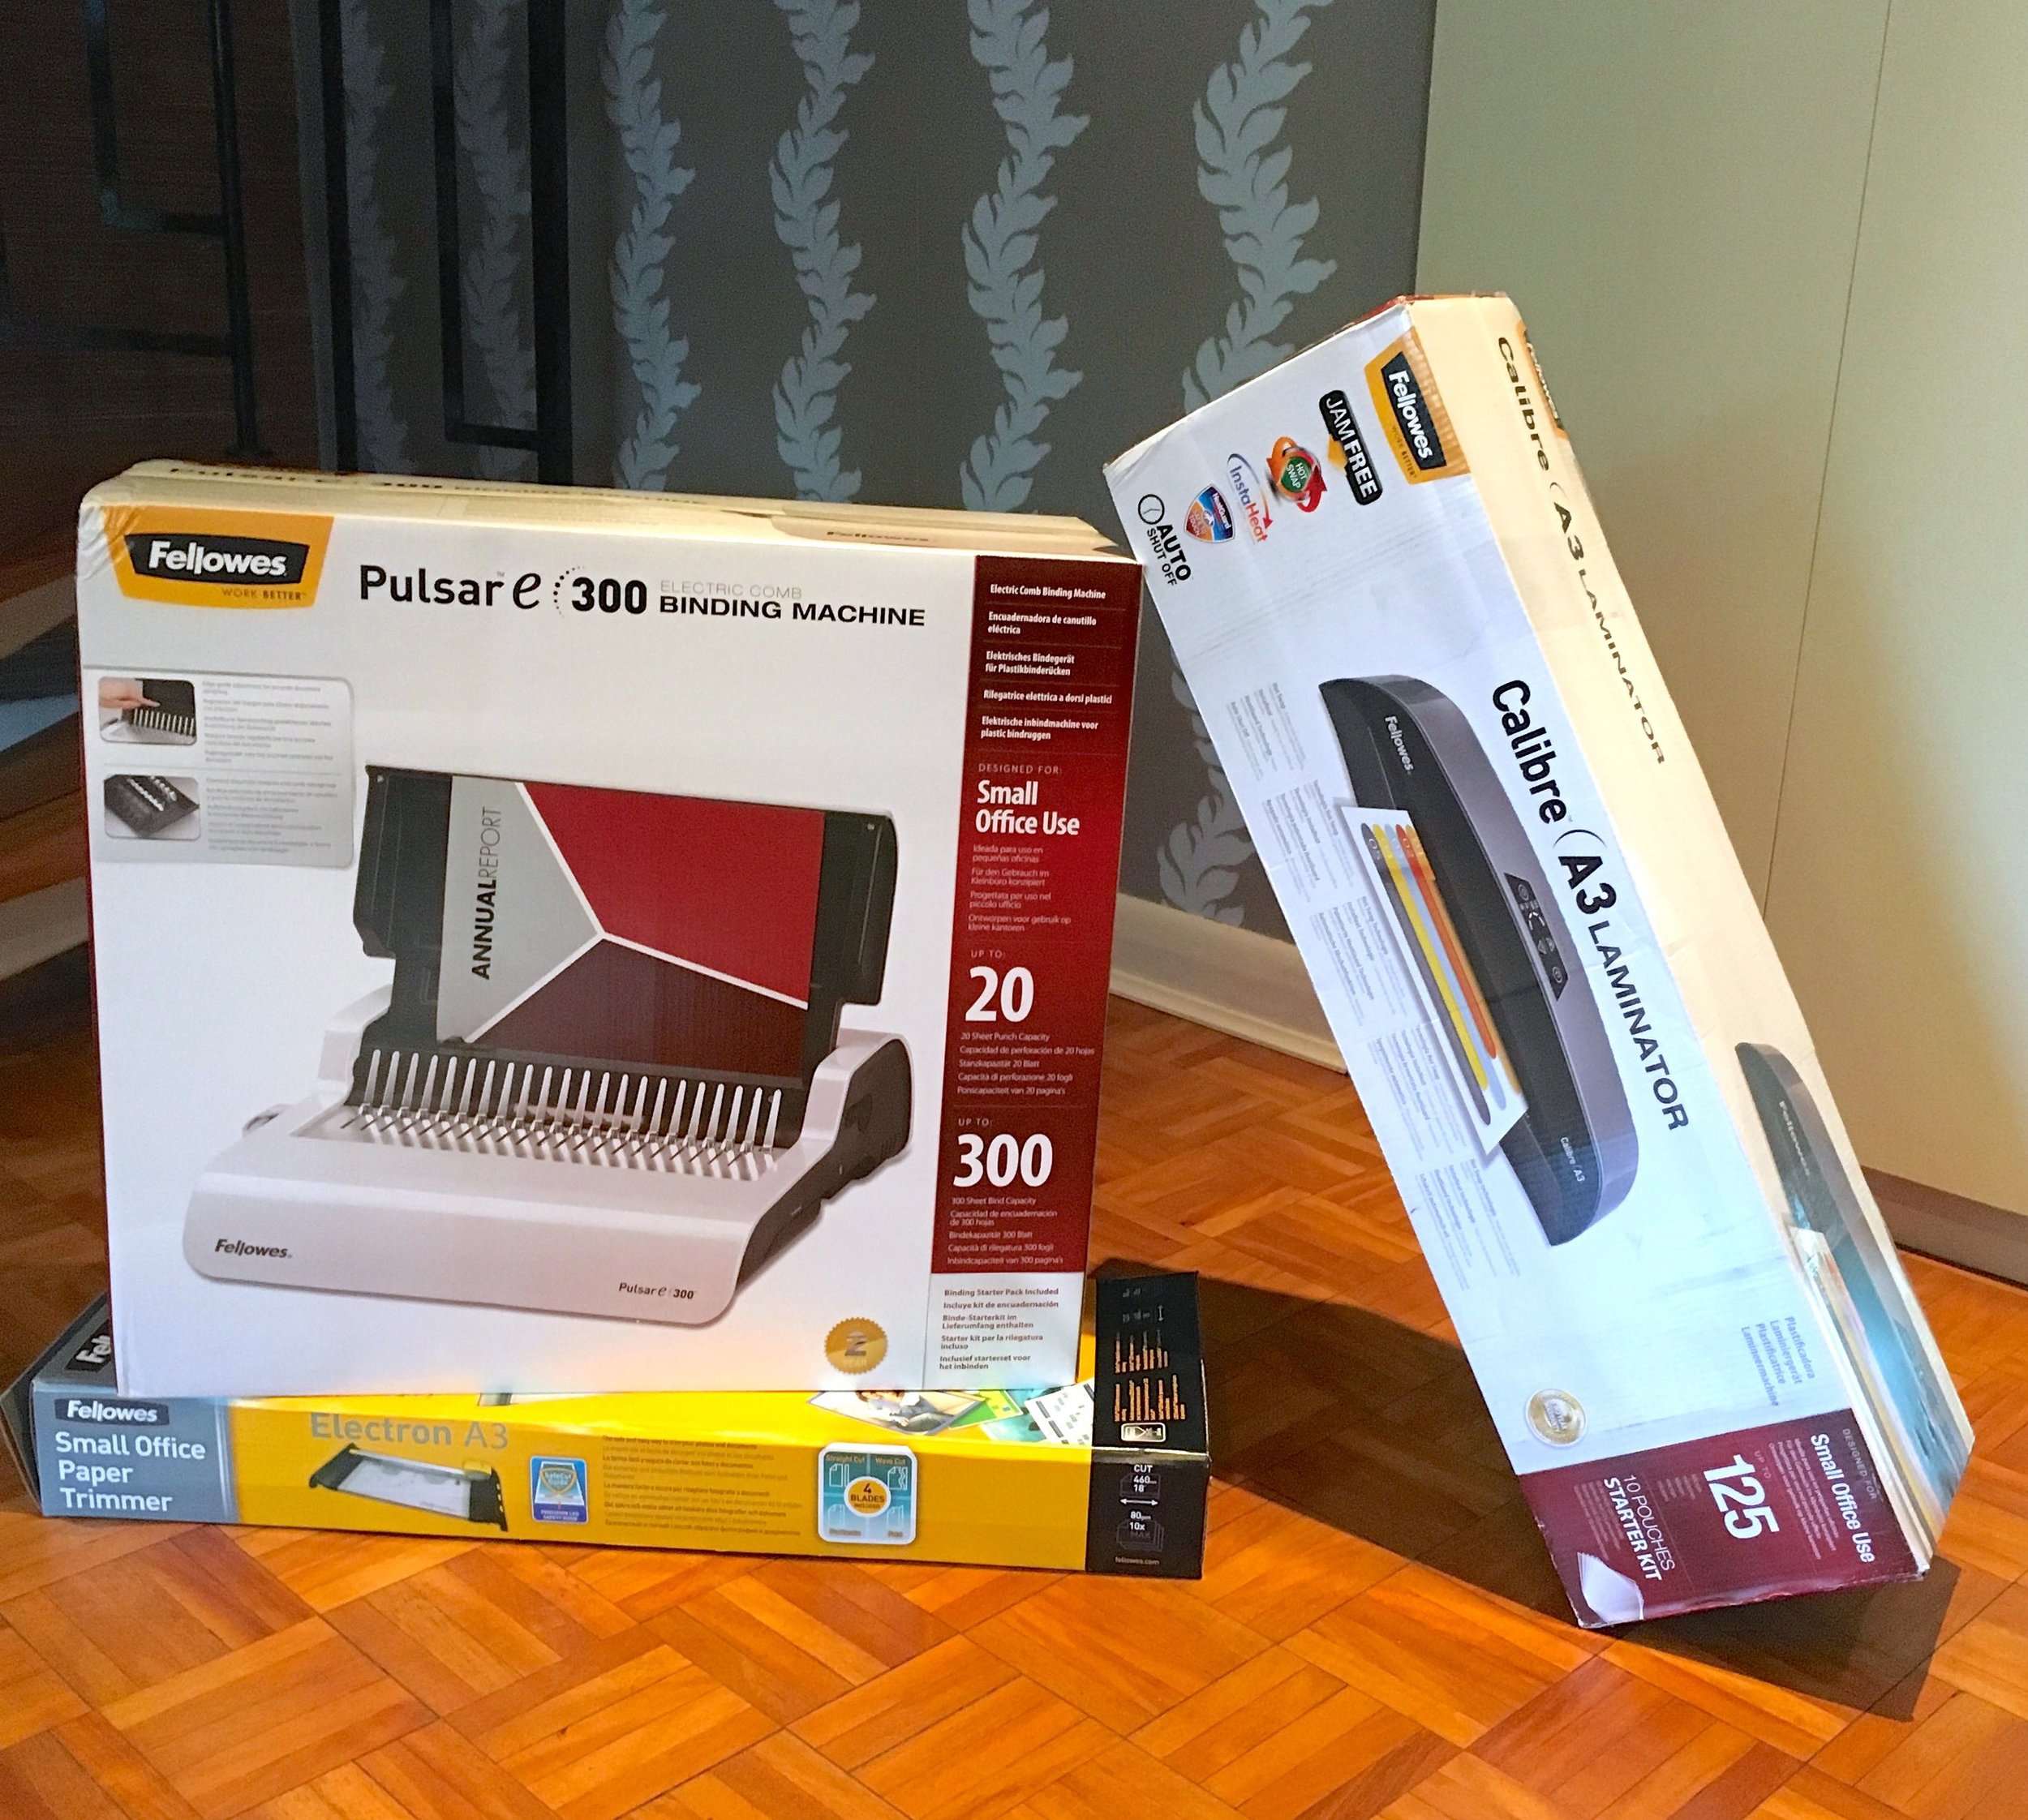
Now that may seem a strange title but let me explain. In August I received a delivery from Fellowes of some small office equipment to review. My neighbour's house sitter took in the parcels and then when I popped round to collect helped me bring them home as the largest of the boxes was, he said heavy. He wasn't wrong and later that evening I unboxed a binder (the heavy box), laminator and trimmer along with accessories to get started with the laminator and binder machine.

A delivery from Fellowes taken in by my neighbour's housesitter
unboxed and wow

It's fair to say I was pretty overwhelmed. Not only by the kit in front of me and where I would store them, but also how I could use them. I wanted to do something more creative than organise MOH's shed, labelling where he should put things (although I will do that at some point) but what exactly, I wasn't sure. The Ideas Centre on the Fellowes site helped with the inspiration, and after a little percolation I started to have some ideas.

First though I needed to address where to store them, as MOH kept saying he was getting fed up of walking past them.  I knew I had to have a bit of sort out in our study-cum-craft-room which had become our dumping ground. On the face of it the sort out looked like I'd just moved stuff into the top bedroom (and I have) but I've also rationalised what's in the study.  And the things I've moved out are in a "to be sorted" pile. 

CLOCKWISE FROM LEFT: BINDER, LAMINATOR AND TRIMMER

CLOCKWISE FROM LEFT: BINDER, LAMINATOR AND TRIMMER

Out of their boxes the items looked equally impressive; the laminator and trimmer are A3 size, which I know will be handy as often scrapbook papers are larger than the smaller A4 size. The binder - which is the heaviest item looks sleek and I think will fit inside one of the Ikea Corras units we have in the study.

I was intrigued to see inside this machine, as while I've seen many bound documents, I've not actually done any myself. It had the look of a typewriter (without the keys) if you looked quickly. If you're not sure what I mean, you're probably too young to know, so please just humour me.

The binder machine by fellowes was fascinating - I've not seen one before

A hive of activity

With space in the study almost sorted, and renewed vigour to finally tackle the collage wall that I've been collecting frames and pictures for, this weekend we set about making it happen. It seems my frames to pictures ratio is slightly out and we have many more frames than pictures. My thinking is that if we're going to go for the informal collage approach, then all the frames need to be on the wall at the same time, especially as I've pictures ranging from A2 size to A6 (postcard) size. 

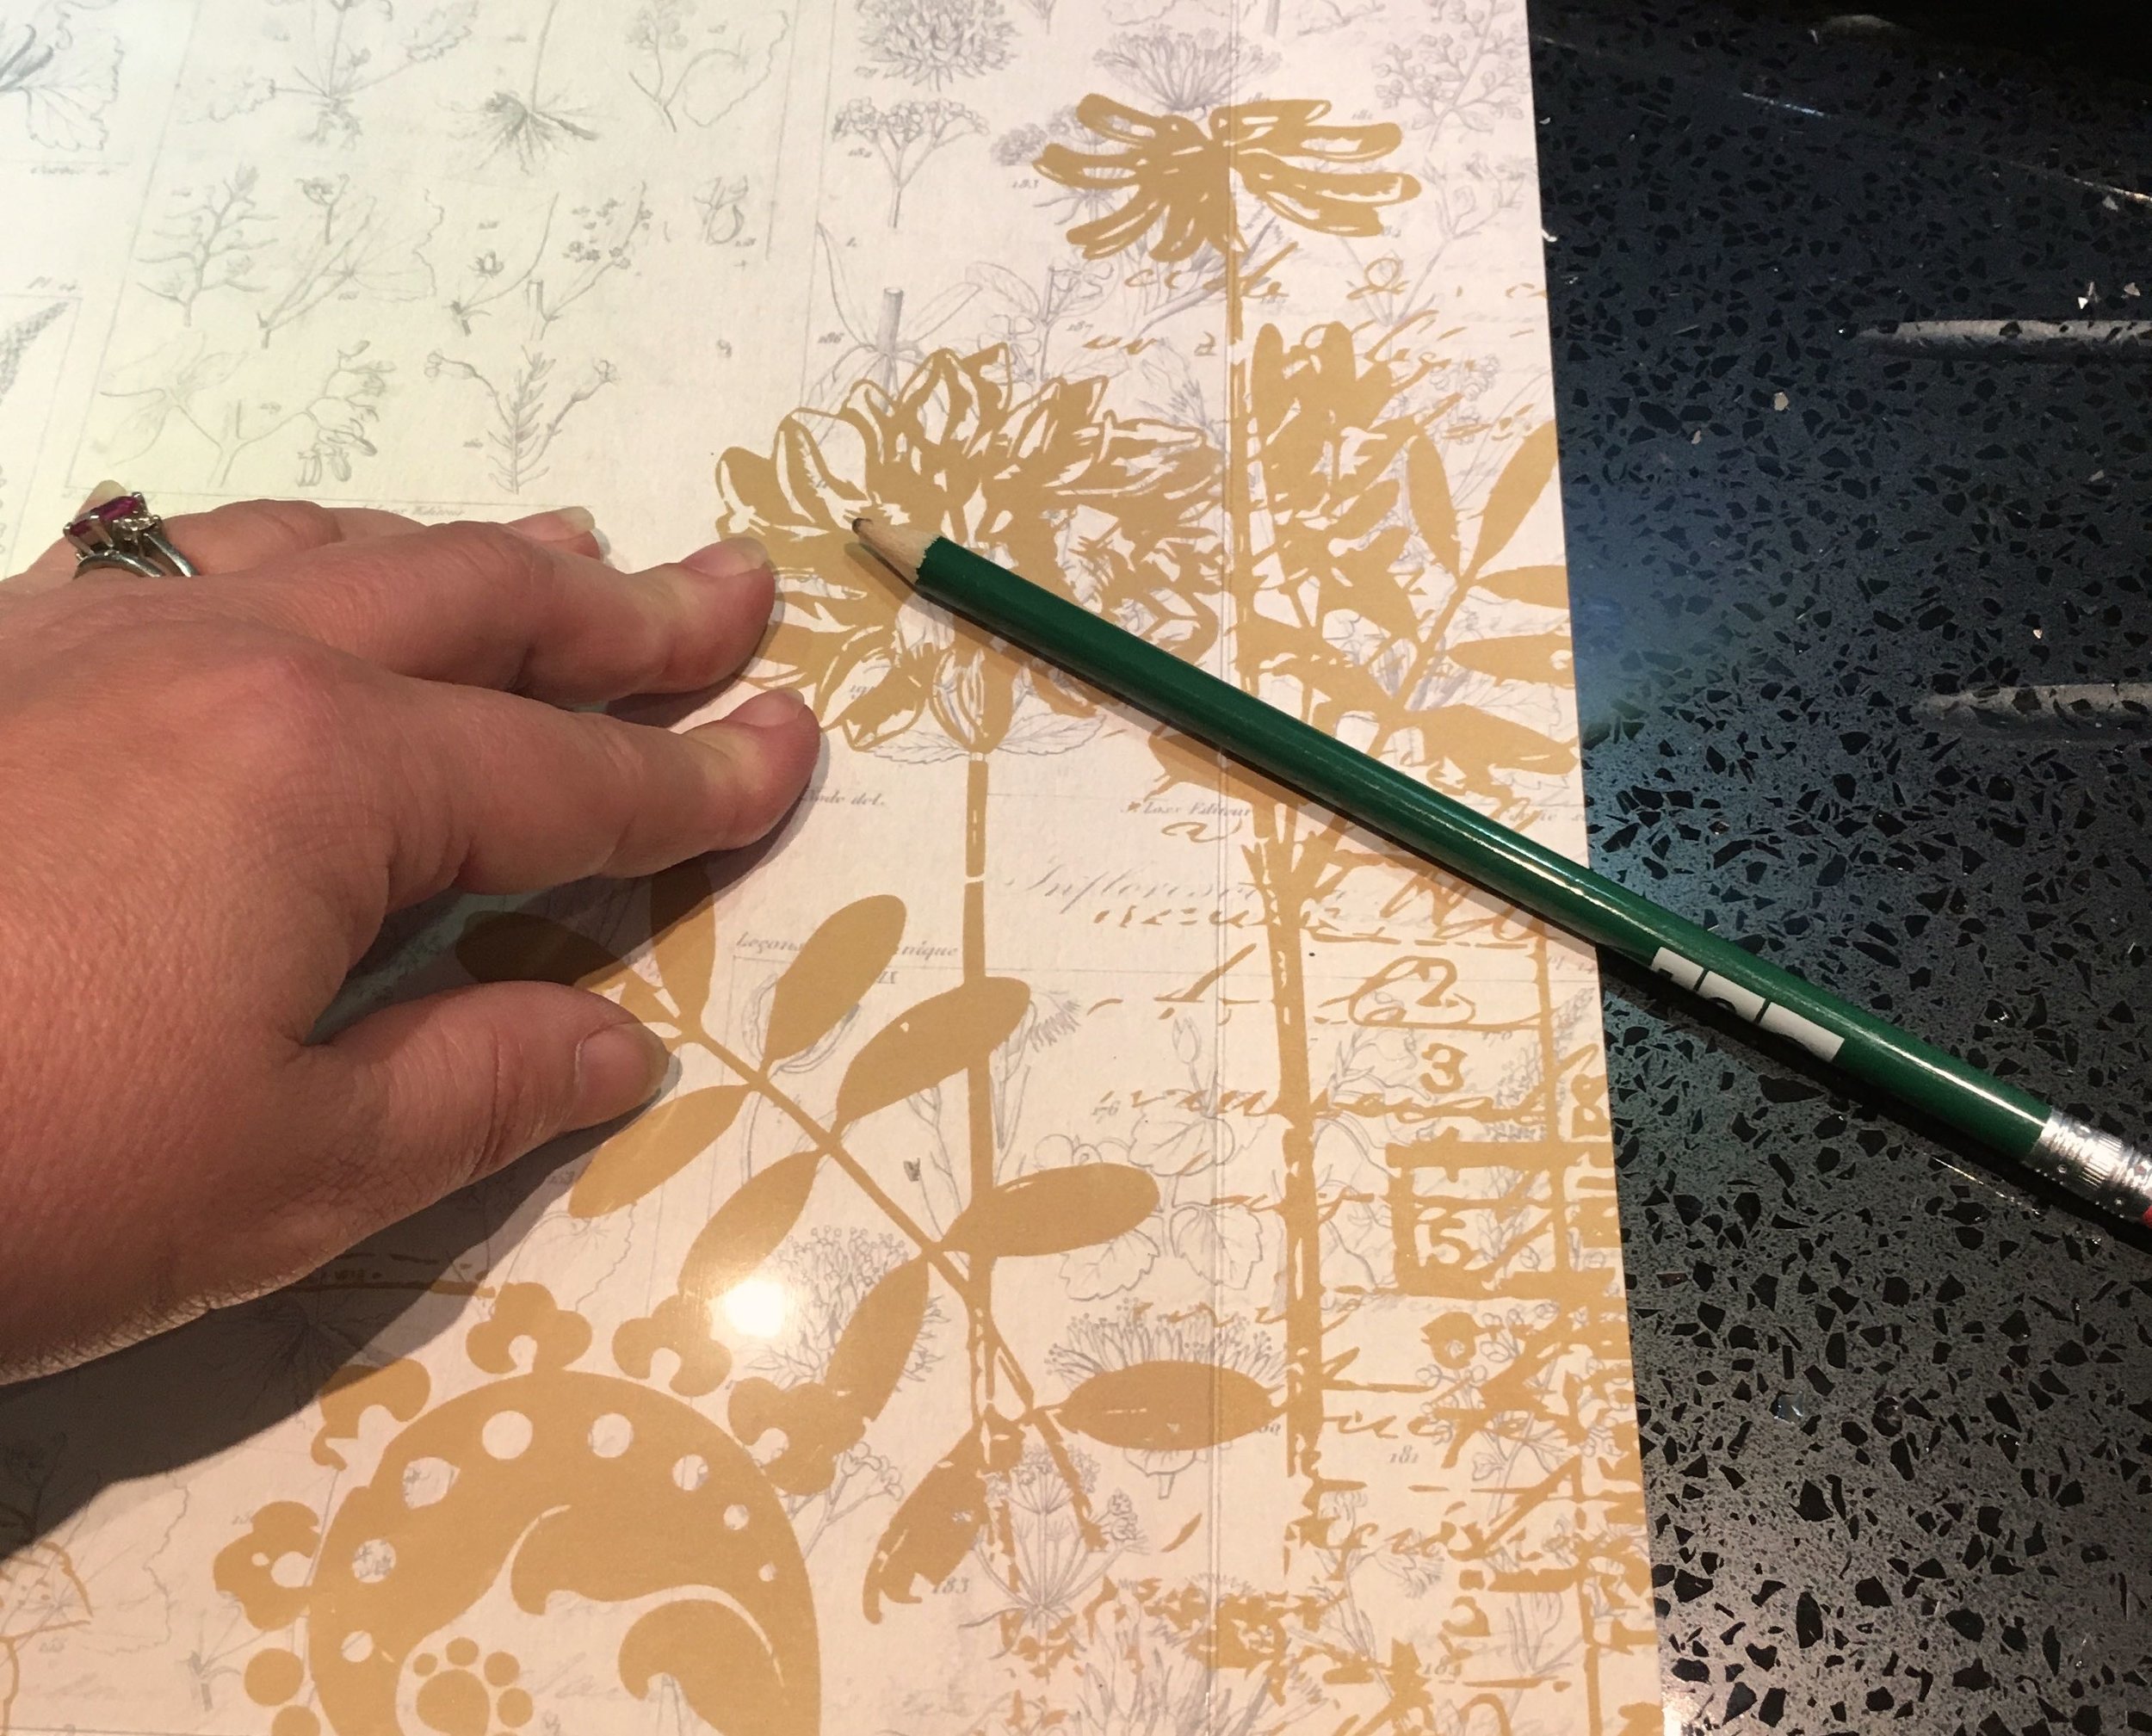
I wasn't keen to have empty frames on the wall, so while I find the long-term pictures I decided to fill the frames with scrapbook paper, and so, in came the trimmer.

Trimming scrapbook paper using the Fellowes trimmer
 
Marking out where to cut using the perspex from the frame

After marking where I should cut in pencil I lined it up on the cutting line of the trimmer, which has a LED guide to help you cut just where you expected to.

Lining up the paper along the LED lit cutting line on the Fellowes trimmer

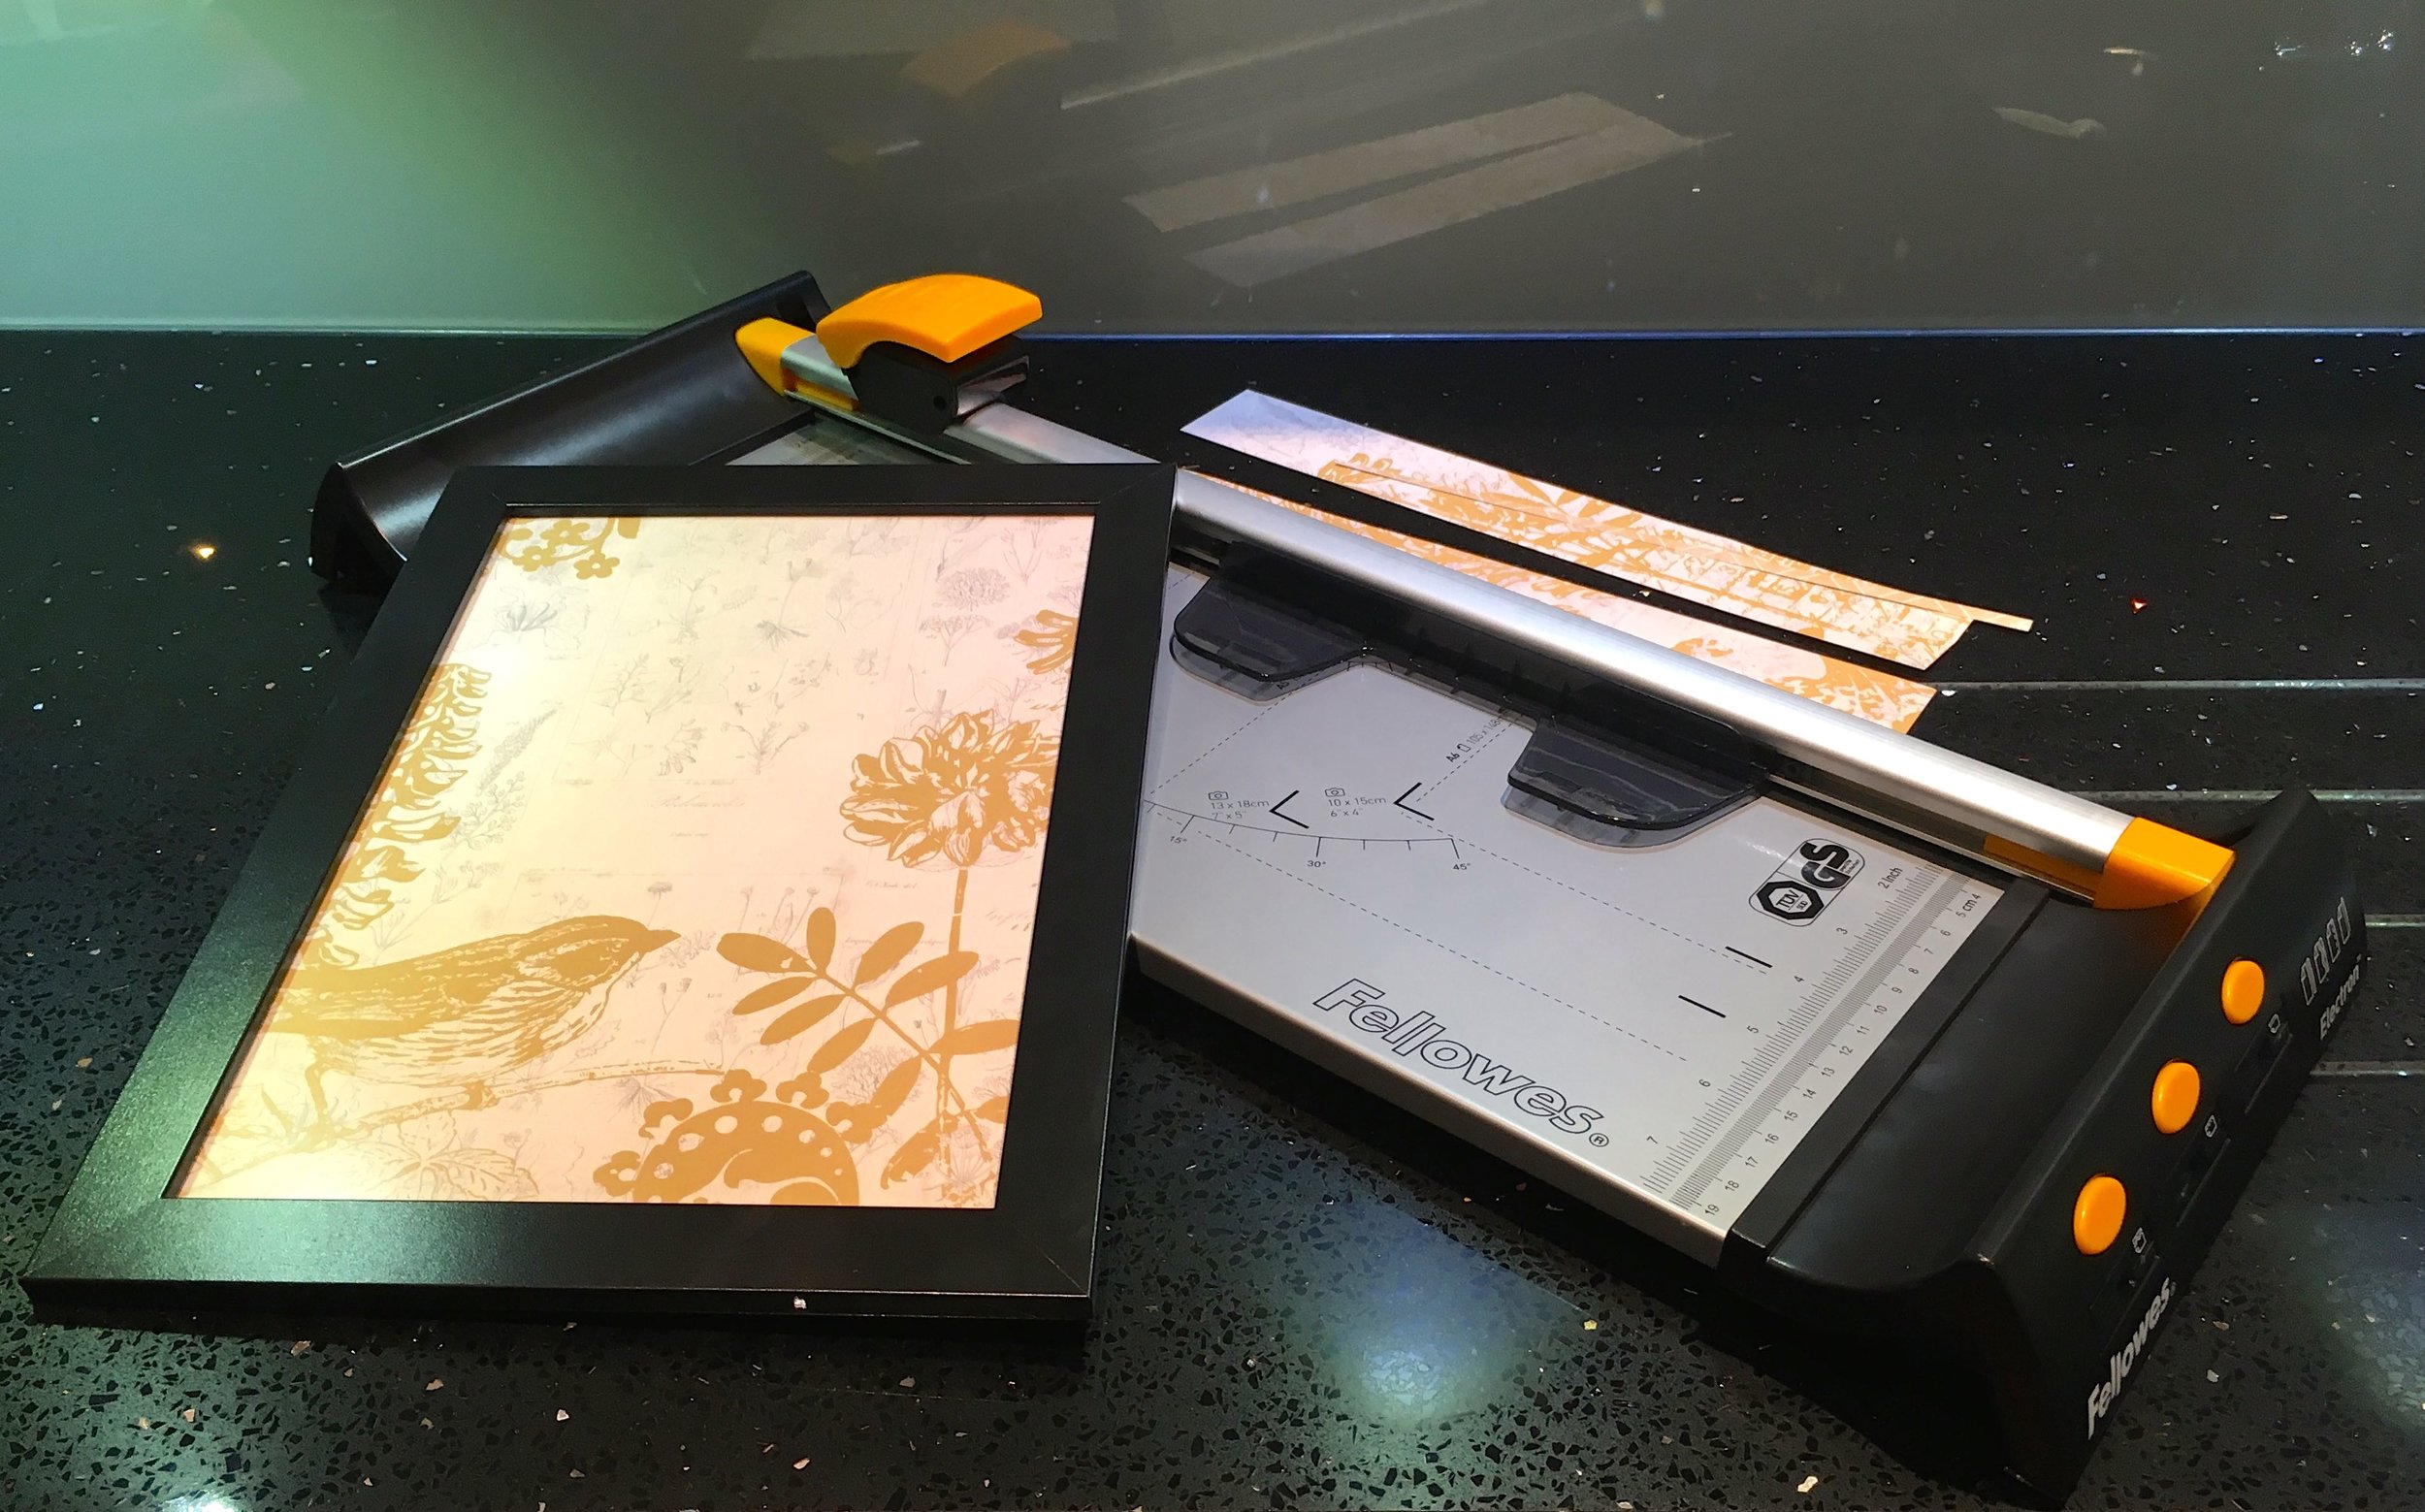
The trimmer was easy to use and easy too to trim small amounts from the edge. As well as the LED guide, the other really handy part of the trimmer was the gripper (the smoky plastic "flaps" to the left of the cutting line in the picture below) which worked well keeping the paper in place. 

trimmings cleanly alongside the trimmer by Fellowes

With my paper cut to size it was easy to add to the frame. I'm quite pleased with how it turned out, and with how the trimmer performed. The trimmer itself is lightweight and there's some additional cutting blades that I still need to try out. What I like about those is their integral storage - those three orange buttons in the picture below are those blades. They're easily inserted into the cutting head too, I'll let you know how I get on with those.

My completed filled frame with help from the small office trimmer from Fellowes

And isn't it always the case, that once you get started it's hard to stop?

That was me on Sunday too. 

Like many crafters - tell me I'm not alone - I have a collection of paint charts and paint strips, and an idea was starting to form for my next project, and it would make use of the laminator and the binder too. 

Trimming paint charts using the Fellowes trimmer as inspiration struck
 
With my paint chart trimmed and ready to laminate I'd overcome the overwhelm of my new office tools from Fellowes

With my paint chart cut ready, I was ready for the laminator.  But what's my project? Can you guess?  

I'll share more soon, I promise!

* This is a collaborative post, I was sent the small office equipment in this post by Fellowes for use in my creative projects in return for sharing my views and opinions. 

Post Comment Love