Firing up our pizza oven

So once we'd filled our gabion baskets, we needed to lift the pizza oven onto the top of it. Something that was easier said than done. It comes to pieces - the base which is very heavy, the interior dome which is less heavy and then the outer dome, which is heavy and an awkward shape. 

It wasn't something I was looking forward to, even though I knew it was essential. The bruises we'd both encountered carrying it through the house (oh how we wished we had side access!) were still there, but healing and I wasn't that keen on adding to them.

As it turns out having the smaller gabion baskets to the side of the larger metre high one was a good plan as lifting kilos worth of a clay oven a metre off the floor is hard work. Less hard work if you can clamber onto a half-metre high block in the process. After a lot of sweat and tears, it was in place. Actually there were no tears, but a lot of the other stuff and some effing and jeffing all round. 

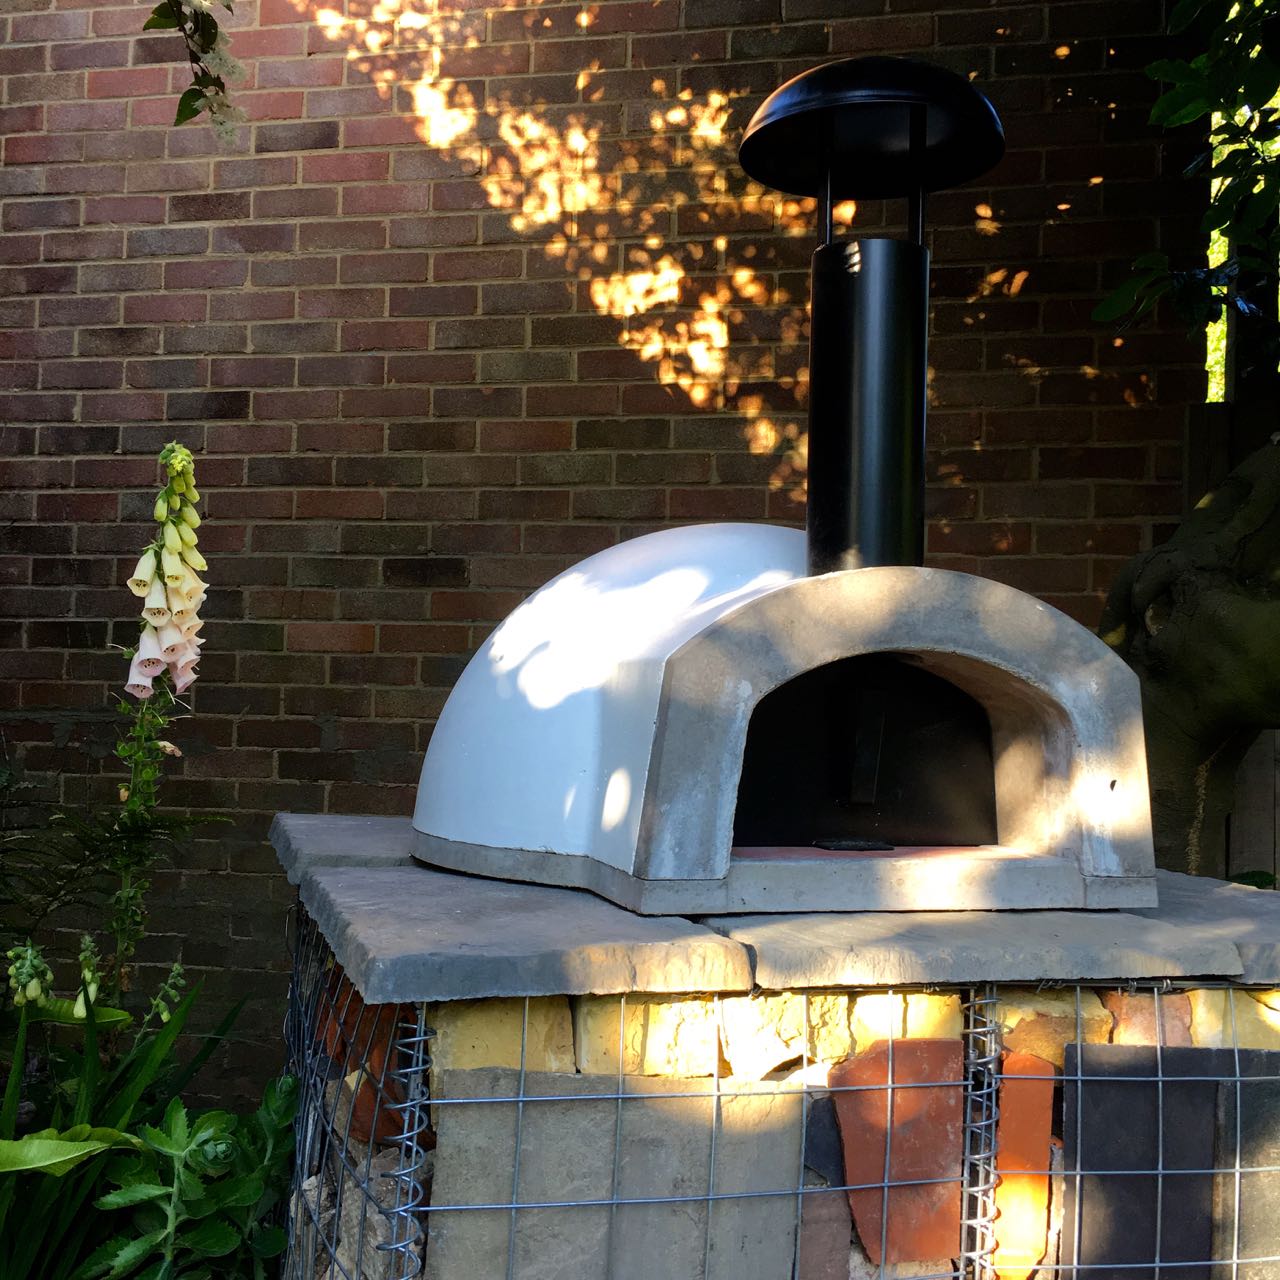
And it looks great, but it needed to do more than just look great.

Our pizza oven on top of the gabion baskets

It seems we've put it in a great spot, it gets the evening sun but is sheltered enough by the laurel tree to avoid the rain. That's brilliant as there'll be no excuse for MOH if we fancy pizza in the rain, well apart from having to get to the end of the garden!

It's heavy - and lifting it a metre into the air was hard work

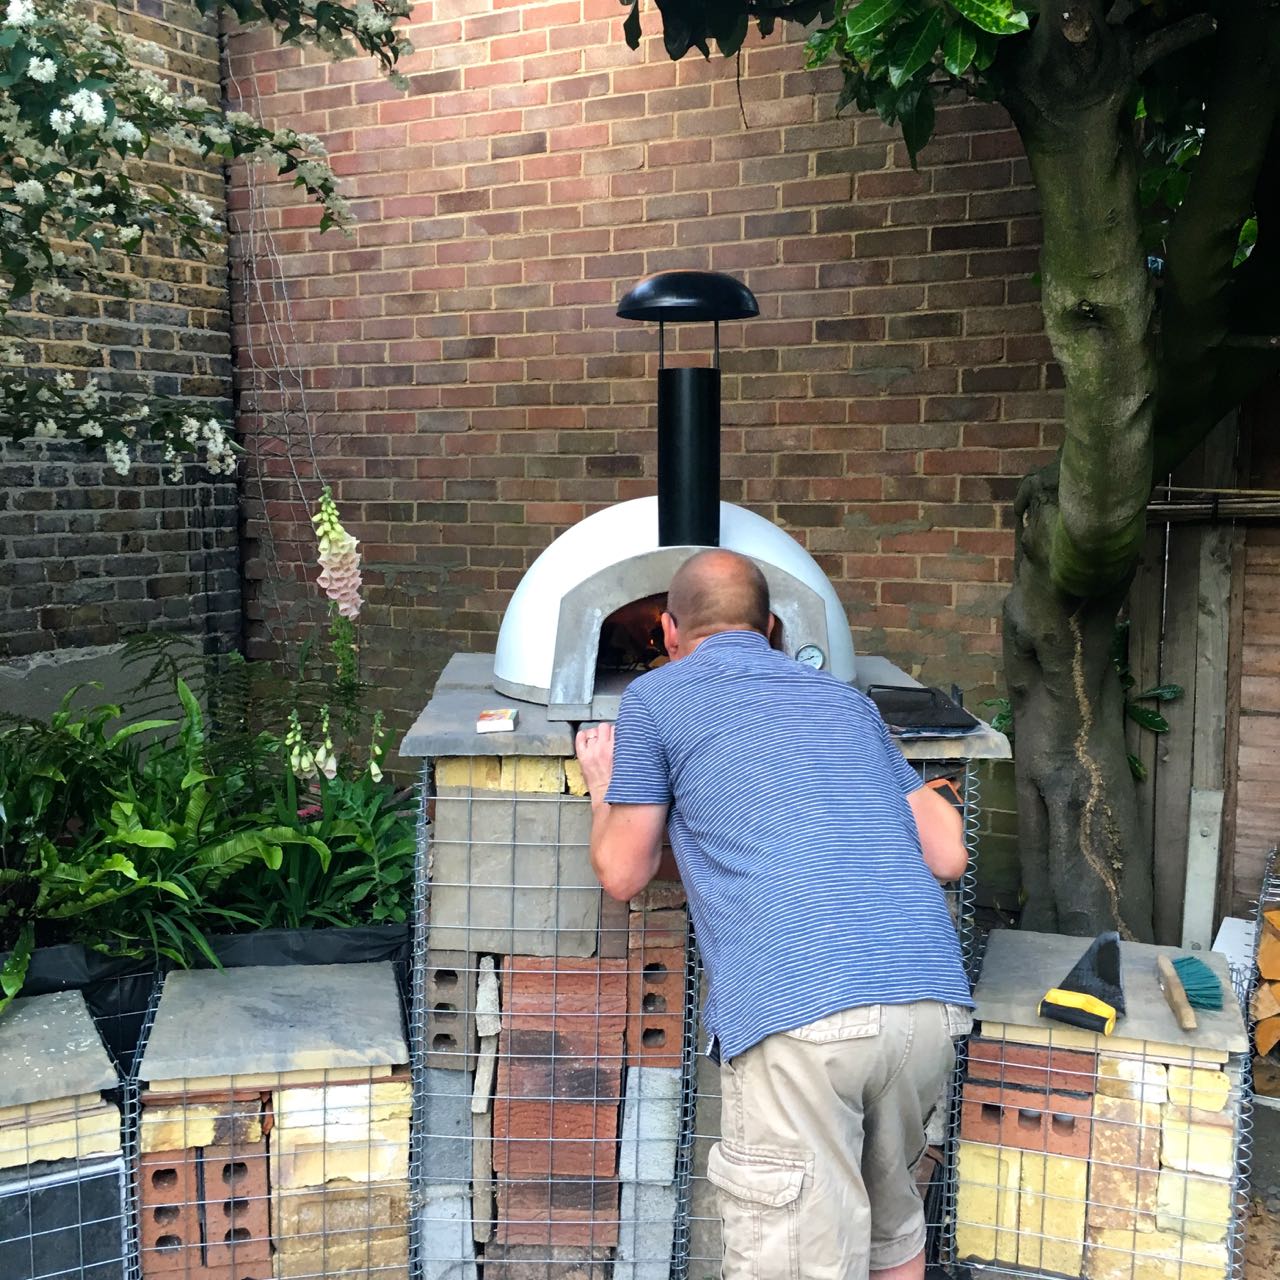
Before we could use it in earnest, the inner dome needed curing. To do that MOH lit small fires around the inside and waited for the temperature to reach about 200, which was the most angst-ridden and most precise thing ever, according to MOH. And tricky, so tricky that he decided he needed an infra-red thermometer, which had I know how pleased he'd be with this I think we could have started with that and progressed to the pizza oven, it's such a good boys toy!  

Seriously if you're looking for a gadgety gift for your OH then an infra-red thermometer could be just the thing. Just be prepared for him to tell you the temperature of everything close by, including yourself. It's kind of addictive though.

Back to the fire. Look. Fire.

FIRE...

FIRE...

As the oven was starting to cure properly - it needs to be done over four days - I decided to make a start on dough for our 110th party. There was a lot of dough, and boy did it rise. In fact it didn't stop rising and took on a life of its own. 

THE PIZZA DOUGH ROSE MORE THAN I EXPECTED IT TOO

THE PIZZA DOUGH ROSE MORE THAN I EXPECTED IT TOO

I like bread dough though, and while MOH tended his fire, and told me I'd made the pizza dough all wrong. I know, give him fire and a pizza oven and suddenly he's a grand master, even when I'm the one that makes the bread in this house...

Thankfully though it wasn't long before the fire needed a good close look at...

KEEPING A CLOSE EYE ON OUR NEW TOY

And our first pizza wasn't far behind either. We started simply; tomato sauce, torn mozzarella and topped with some torn basil (clearly we hadn't got to that bit for this photo!) and as you can see the lively pizza dough continued to bubble in the oven too.

OUR FIRST PIZZA - IT PASSED THE TASTE TEST

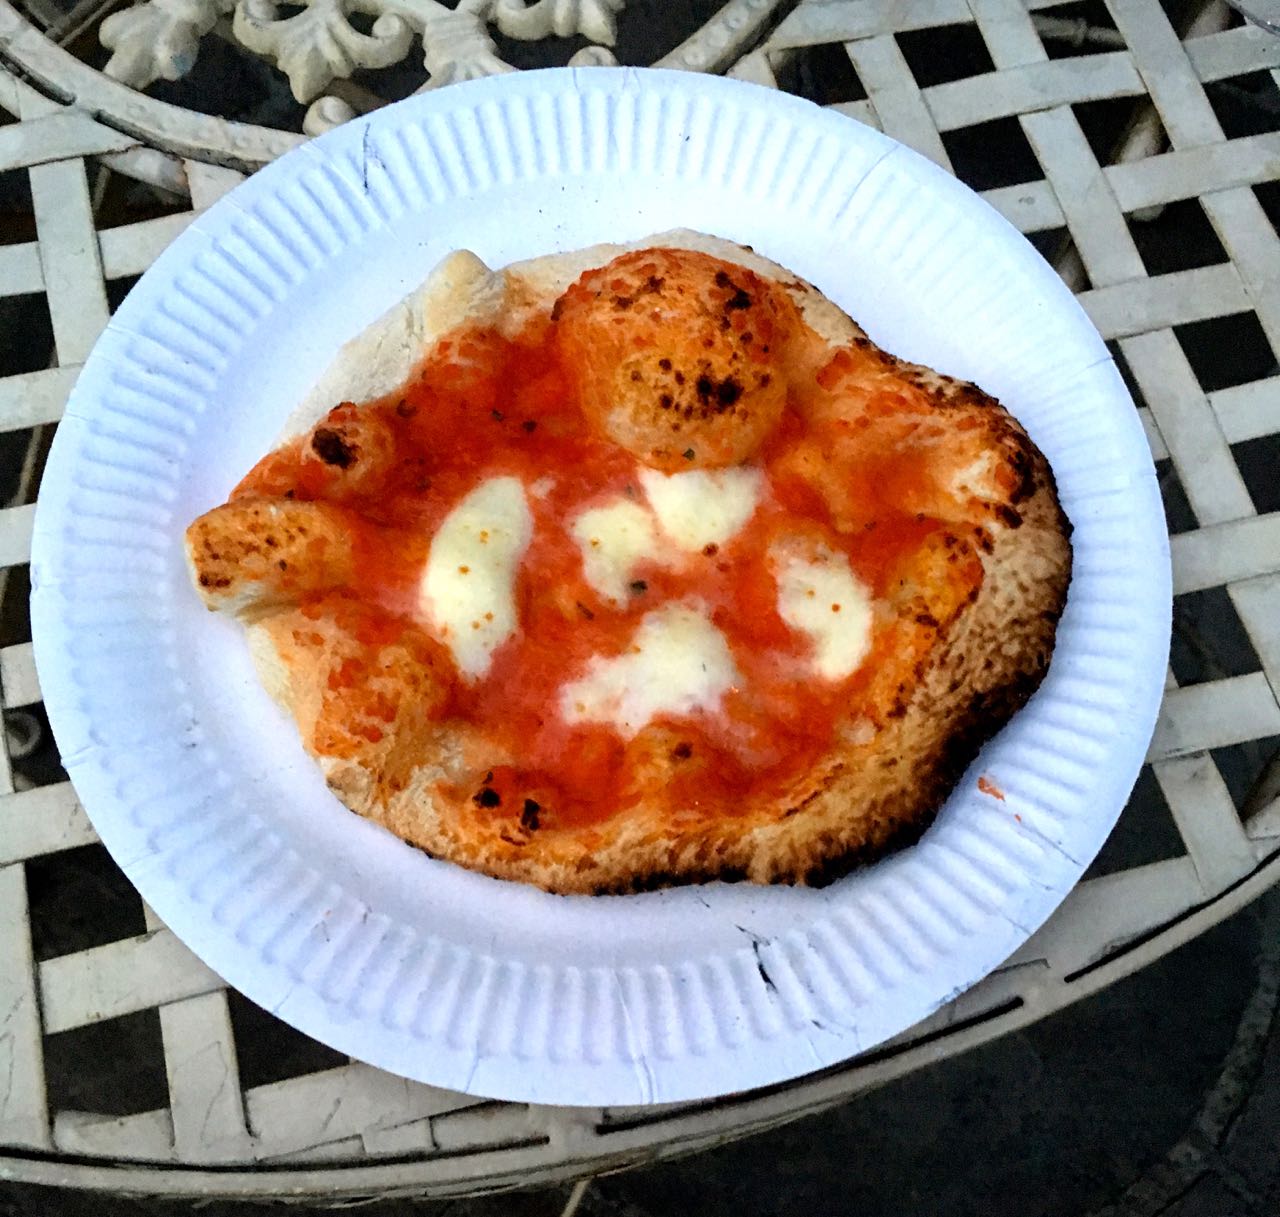
It tasted great. Way better than any shop-bought, oven-cooked pizza and just like the ones from our local pizzeria. We just need to master slightly bigger pizzas now, and to not annoy our temperamental neighbours with the smoke...  I guess we could always offer to cook them a pizza!

I've some more dough to make - perhaps just half of what I made before, and the plan is to freeze it before it's second prove so that we're never that far away from a decent pizza.

What do you have on yours?


Filling our gabion baskets

It's been a while since I shared the start of our gabion basket journey, and I can't believe how quickly it's gone, so today, belatedly I'm sharing how we filled them. I was keen for a mix and match approach, but MOH favoured buying rocks and going for a more normal look. The sort of look you see on the sides of motorways, and as we later discovered in our local B&Q, and then again for part of the gabion wall at Hyde Hall. They're everywhere and it’s like when you've decided on a new car, you’re suddenly aware of it everywhere, and wonder if you’ve made the right choice.

I don't expect you'll be surprised to learn that we didn't go for the uniform and more usual buying rocks to fill these. MOH had worked out the quantities needed - using one of the gabion basket providers sites - and told me a big number, I think in the hope to shock me. It didn't shock me as I'd already used that calculator and gone one further and worked out the cost for buying the stones too.  Yes, exactly.

I did some speedy internet searching, on eBay and Gumtree and Freecycle, to see if we could buy bricks and rubble, and even if people would give them away. It turned out we could, and even better, there were a couple of people giving stuff away less than twenty minutes away by car. Proving to MOH that we could collect enough stuff for free, and he knows me well enoug to know when he was beat.

So on another one of those hot days we headed over to Hither Green and loaded the boot of my Renault Clio full of sacks of rubble, bricks and broken slabs. The lady there was happy for us to take as much as we could and a car-full was gratefully accepted. The next day we headed over to the other side of Blackheath and loaded the car again, this time with help from the man giving the rubble away.  He said he was glad to be getting rid of it, so it was the least he could do. In this collection there were roofing tiles, more broken slabs, some rubble and some bags of post-crete that had been activated. 

So now as well as the stones, bricks and other suitable garden rubbish we had two car-fulls of free rubble or hardcore. And the latter was all stored in our front garden, so there was still the large job of moving them through the house and up to the end of the garden. In the heat that wasn't a job we relished, and then while we were preparing the area and getting the baskets positioned I managed to get a reaction to a mosquito-like bite.

We'd already decided to fill the large 1 metre depth x 1 metre high x .5 metre wide baskets first. There's two of those and they were the most important to be filled as our new pizza oven would sit on top of these. With the bite growing ever bigger and me becoming increasingly grumpy about it and less mobile, I was banned from carrying bags of rubble.  

Thankfully that coincided with the day that my SIL and BIL were drafted in to help out, and the day the four of us installed sleepers in another part of the garden.  And yes, they did work hard and we were ever so grateful. It's amazing how much more work you can get done with four pairs of hands, over two (even when one pair of hands isn’t as useful as they’d be without that bite!)

So while the three of them carried our newly found collection of rubble through the house, around the chicane of the dining room table, out of the conservatory, across the circles and up to the stone circle at the end of the garden I waited and sorted out pieces suitable to be at the front and on display. The thing with gabion baskets is they get their strength from how they're filled. So the filling needs to be compacted and free of large gaps, as large gaps don't equal stability.

And so we made a start. 

Starting to fill our gabion baskets with bricks and rubble sourced from freecycle

What we immediately learnt was that 1 metre is a long way to place things, and I quickly became a dab hand of nursing blocks for the edge down the drop using hands through the wire baskets. And even then it'd often fall over as it got to the bottom, and that's where the rake (both ends) came in handy. 

Never let it be said I'm not resourceful!

And gradually I got into a rhythm and worked out how many bricks and half-bricks I could fit into a row, and how by using slate I could make the small level adjustments I needed. I was also keen to use the remnants of paving we had leftover from our patio and the stone circle (and subsequently the patio extension and barbeque stand) so there was some continuity and of course, so we could finally use up what we had left!

Starting to fill the gabion baskets ensuring the front was 'pretty' enough to be on show and negate MOH's  concerns

It didn't take that long for them to fill. And clearly that's easy for me to say, as I was waiting for the rubble to be delivered rather than lugging it up the garden!

Filling the two larger baskets - a hands on shot

Throughout the afternoon there was much stepping back to admire and check progress. And if you tackle a project like this (or in fact any project) it's something I recommend. The level may be telling you it's level, but what does it look like? For a detail person like me, who annoyingly can often spot when things are millimetres from where I wanted them, it's the only way to go and be sure you're happy with it. 

That of course occasionally gets me into slight pickles, like the time when I wanted the stone circle moved by five centimetres, thankfully I'd spotted its location wasn't right before digging really started, so while the gardeners were a bit miffed to start with, once I'd shown them the difference it would make, they were totally on board, but it was touch and go for a moment.   And if you're wondering how I managed to show them something that didn't exist, well I didn't of course, but I did show them the view from our rear windows and how the circle was niggle-ling-ly (yes I know that's not a word) out of kilter for the eye.

Stepping back to admire our work

And let's zoom back in for a moment, as once the gabion baskets are filled, they need closing and so the sewing with wire skill was called on again. It's pretty neat isn't it?

ALL MOH'S OWN WORK

ALL MOH'S OWN WORK

Following advice from Katie Rushworth, from ITV's Love Your Garden, we laid a paving slab inside the basket, then closed the lid and added a paving slab on top. The reason for this is that if (or when there's movement inside the basket, the internal paving slab will help retain some the baskets stability. Clever huh?

Feeling pleased with how the first of the smaller cubes - aka the designated cooking stand - turned out

Oops, it's time to stand back and admire our work again!

Stepping back again - that happened a lot - to check progress

And this is with all of the baskets filled. We didn't have enough rubble and hardcore for all of the smaller baskets and ended up buying some London Stocks bricks to give it enough of a yellow feel for me. We also bought some thermal blocks (think breeze blocks that are easy to cut) for the inners. This made filling the final three seating baskets much quicker and gave us the knowledge that our seating blocks, will be pretty stable. 

And then suddenly the baskets were full

So our gabion baskets are filled, and it's starting to take shape - what do you think?  There's still a bit to do and I hope to share the next installment much quicker than before, because it won't be long before we get to the pizza!

If you're keen to see more examples of how gabion baskets are used, then why not follow my board on Pinterest. It comes highly recommended as MOH also undertook research and sent me links to some of the things I'd pinned onto my board. He doesn't do social media, and couldn't work out why I found this amusing...  

But if gabion baskets can get him looking at Pinterest (albeit through Google searching) then it really is quite a powerful tool!

Home Etc

An irresistible hibiscus

Almost too irresistible, but also so very beautiful and delicate. This beautiful hibiscus was one of our gifts at our 110th party the other weekend.  It's also known as a rose of China and is a tropical plant which is tender here in the UK, most often seen as a houseplant in conservatories or greenhouses. They're plants I look at in wonder whenever we visit the big houses with these, but now we have our very own.

It's beautiful, and it's blooms are exquisite.  The leaves are waxy like a camellias, but shaped more like a rose - it's a crazy, mixed up kind of plant, I guess.  And one that's been enjoying the warm spell, so long may that continue.

A present, a hibiscus, and a flower - yay!

The flowers only last a day or two, and with the weather last week it's thrived in our garden. 

A fallen - and spent - bud from our new hibiscus

However, it looked as if it could do with a larger pot.

A standard hibiscus, in quite a small pot - what it needs is a much larger pot

And, I had one in mind. One that while it was full, it was full of self-seeded plants. It wasn't long before these were moved into the compost and the hibiscus was planted in their place.

And I had a much larger pot, that could do with something more
 
All of the plants here were self-seeded

I think it looks great in this pot and it's flowers add a real pop of tropical colour right at the edge of the patio. Reading more about its care I suspect I'll need to repot it so I can bring it inside over winter, as while that pot also needs protecting it's normally dragged under a nearby bush and covered in bubblewrap, and I don't think that'll work now.  

And quickly replaced with the new standard hibiscus

The buds start as tiny little things nestled in the leaves, and our plant is covered in them.  As they grow the flower develops and becomes visible bit by bit.  And then boom! the flower is revealed.

From this very tiny bud, you get a flower
 
Slightly bigger and the petals start to show
 
And then it flowers - beautiful aren't they?
The the flower drops leaving this on the plant

Once the flower has faded, all that's left is the unfurled bud, and the intrigue as to which bud will flower next.

The flowers really are amazing on this hibiscus, which was a present for our 110th birthday/anniversary

So hours of fun for me watching this plant develop, and a really thoughtful gift - thank you.  And a new plant to learn how to look after, if you've tips for caring for a hibiscus, then let me know.