A week of finishing up projects

Some weeks are more industrious than others aren’t they? And that’s been the case here, unwittingly it has been a week of finishing up projects, some of which have been ‘on the go’, even though some may not necessarily have been verbalised previously, for a while.

And it feels good.

I’ve plenty more projects to start, but it’s so good to get some over the line, or in one case over the line as it is now. I could be a perpetual project starter - I have plenty to start, and the materials to start many of those - but there’s something about finishing and achieving isn’t there that’s equally as rewarding. The ‘glow’ of making it happen, making the change you planned and seeing just how well it turned out too.

I don’t know if it’s coincidence or all part of life, but this week I’ve also completed my dental treatment plan. Since my crown fell out earlier in the summer, and subsequent infection, a root filling and a new crown or two I’ve been a regular visitor to the dentist practice just up the road from us. I found them one night while I was kept awake with excruciating pain from that infection - tooth ache is not a good pain, but it certainly sharpens the mind when you need it sorted, I’d been meaning to get the crown looked at and nature said right now please!

I’m hoping that my troublesome toe takes some hints and also continues to behave and get itself completely healed. The x-ray results I was waiting on showed no breaks, no fractures, no infection and nothing really of concern, which is good and a little frustrating. I was hoping that it would provide the answers, but no. It is less troublesome than it has been, and in the most recent appointment the doctor said my body needs time to heal. So it’s got some more time, but is on a watching brief!

But back to my industrious week.

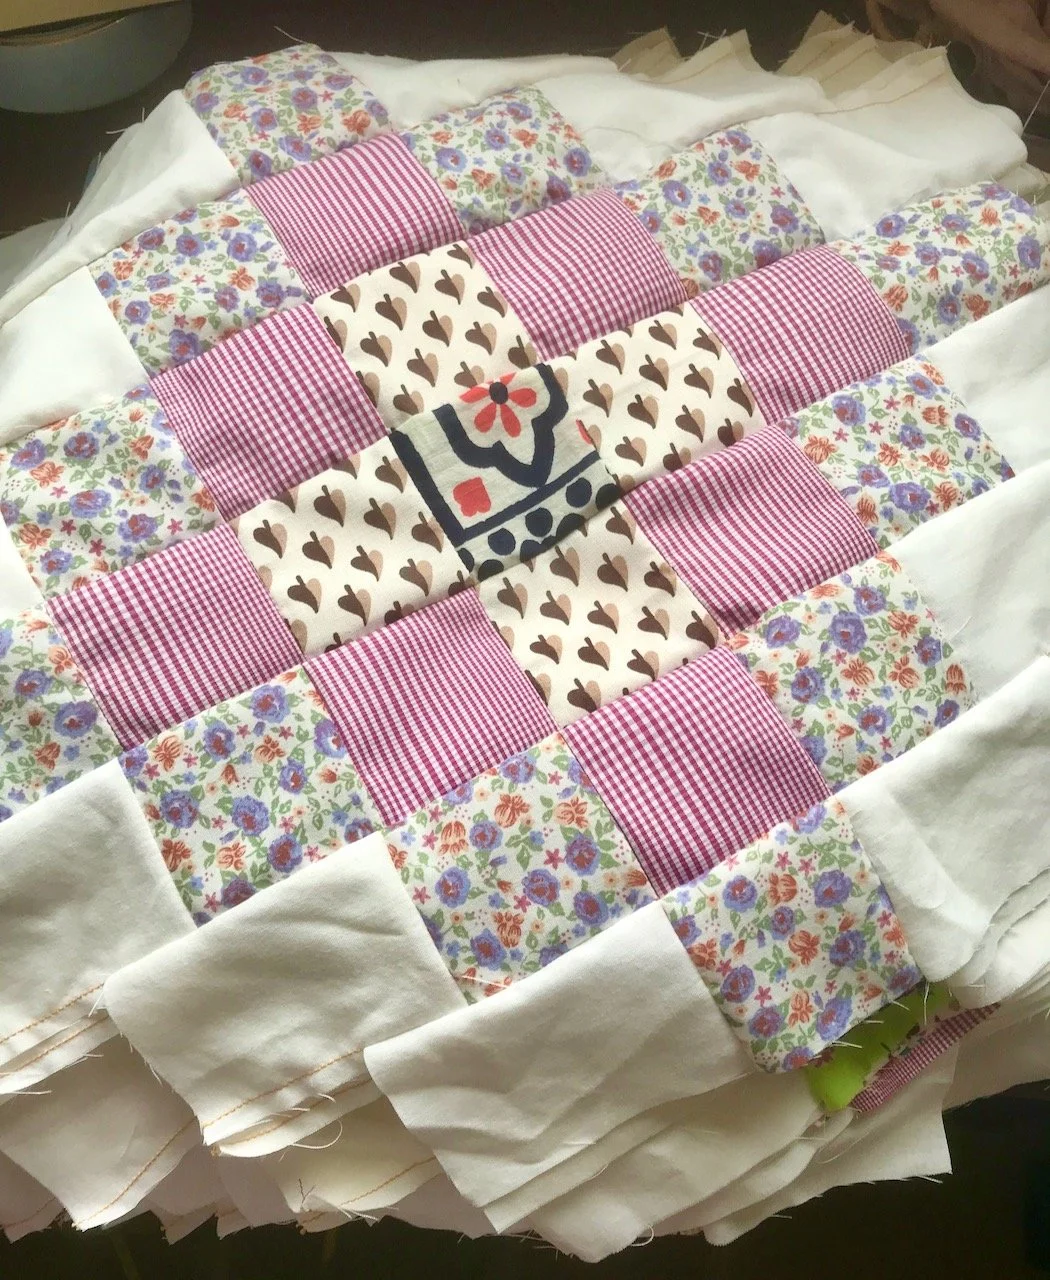
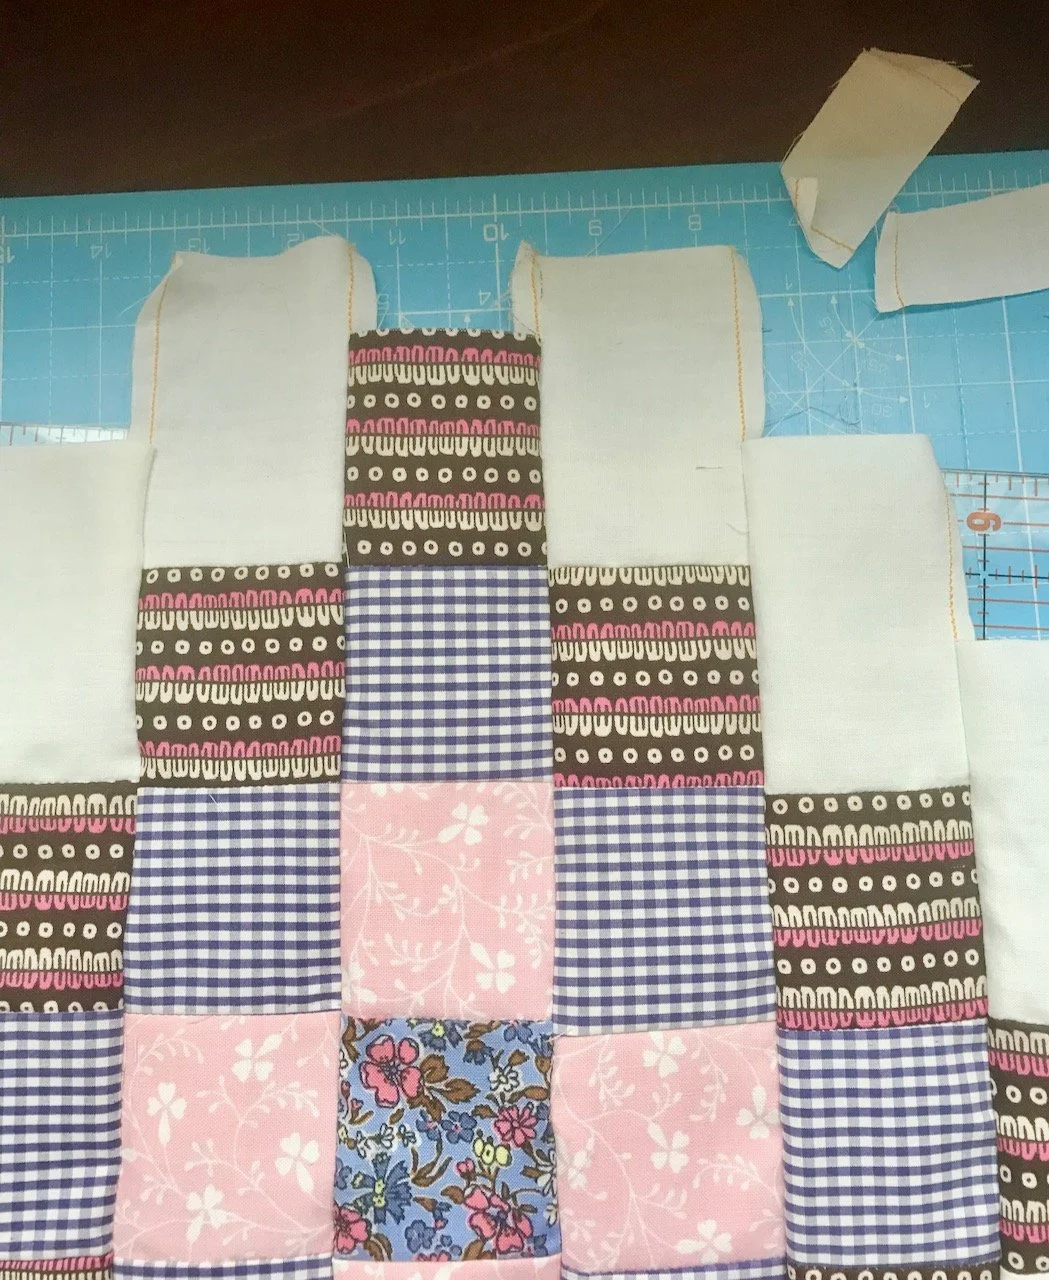
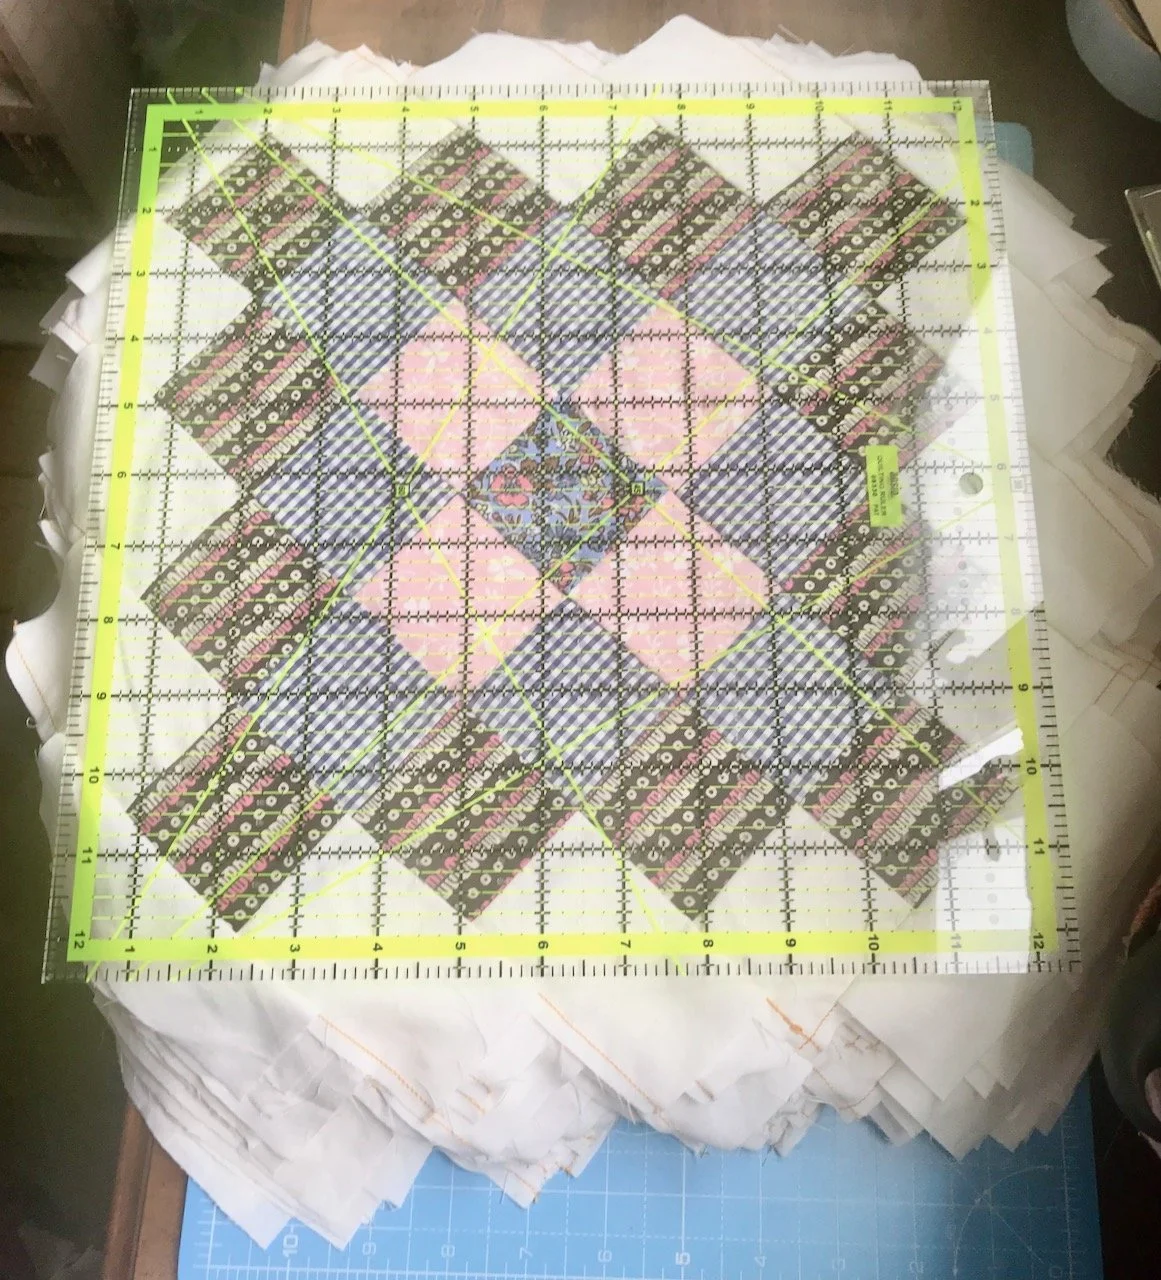
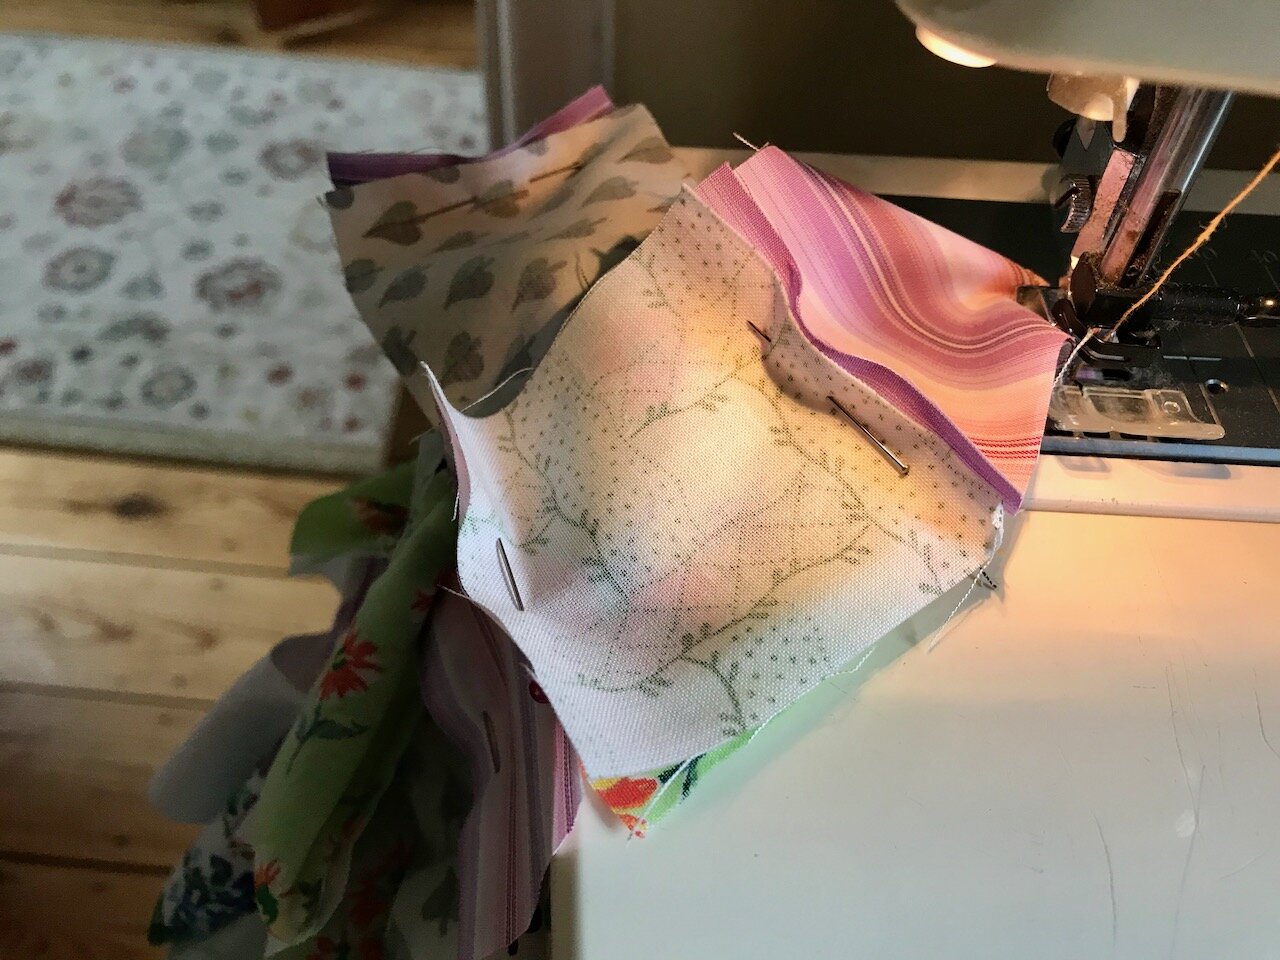
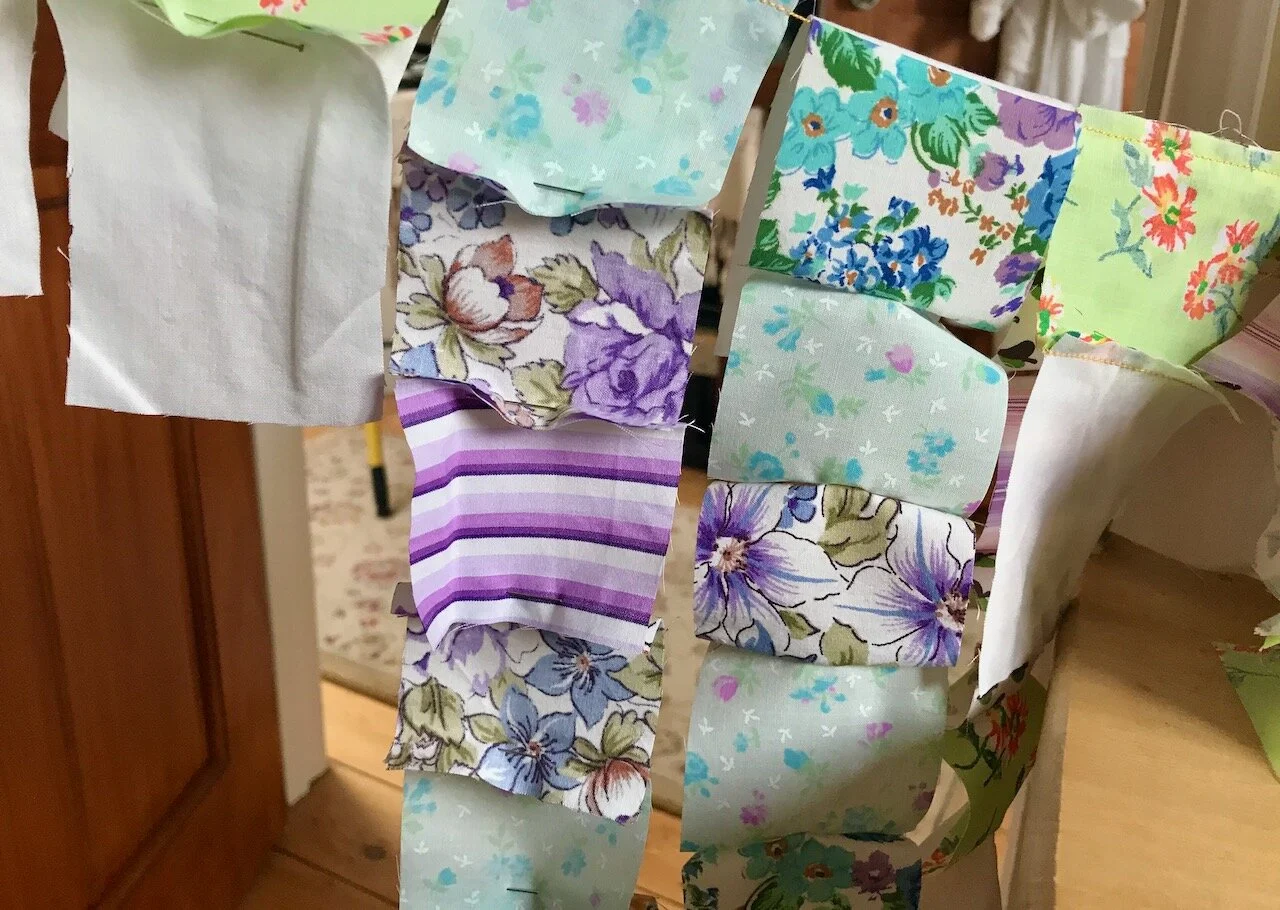
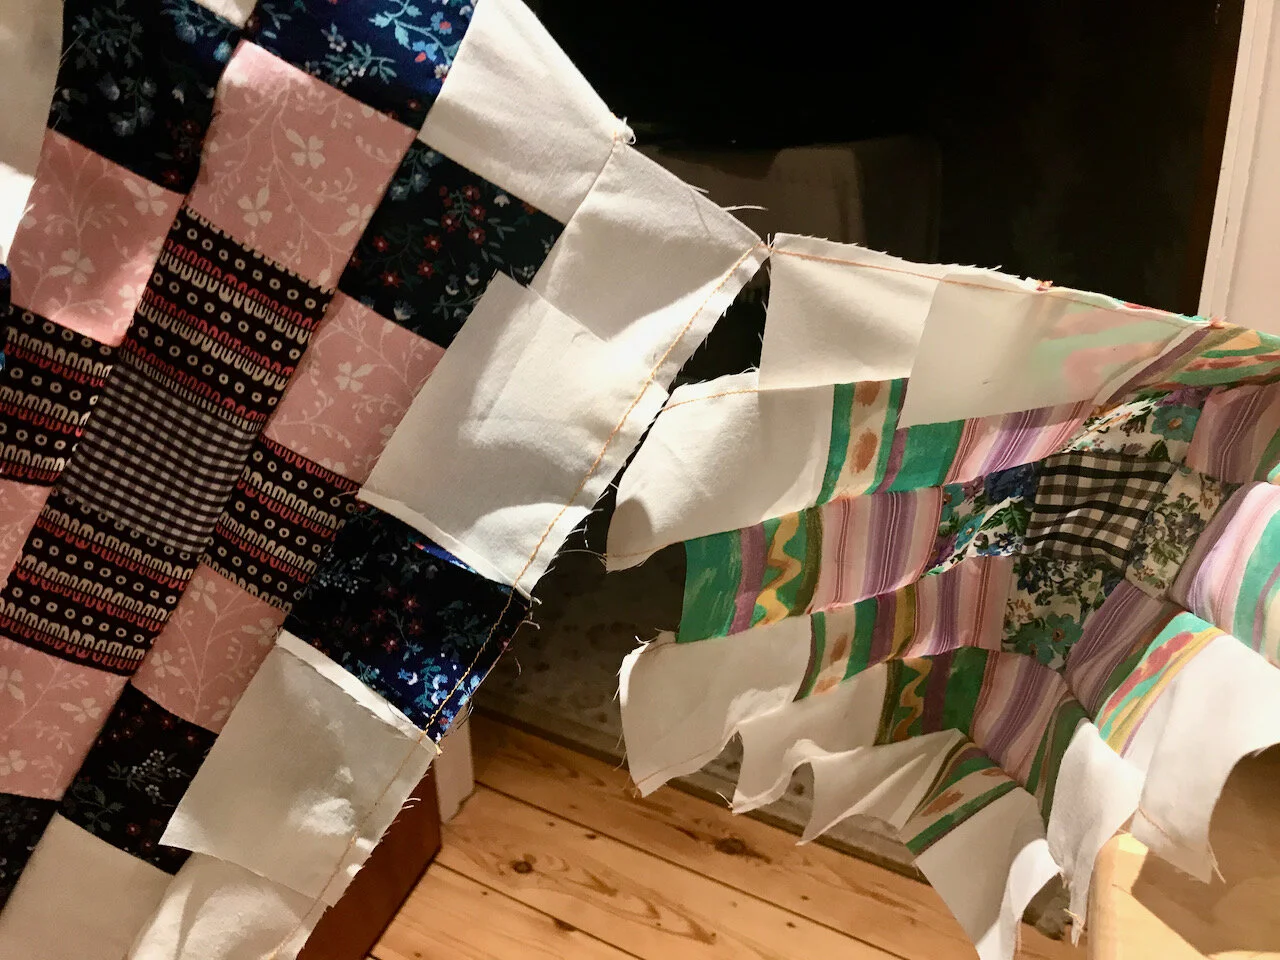
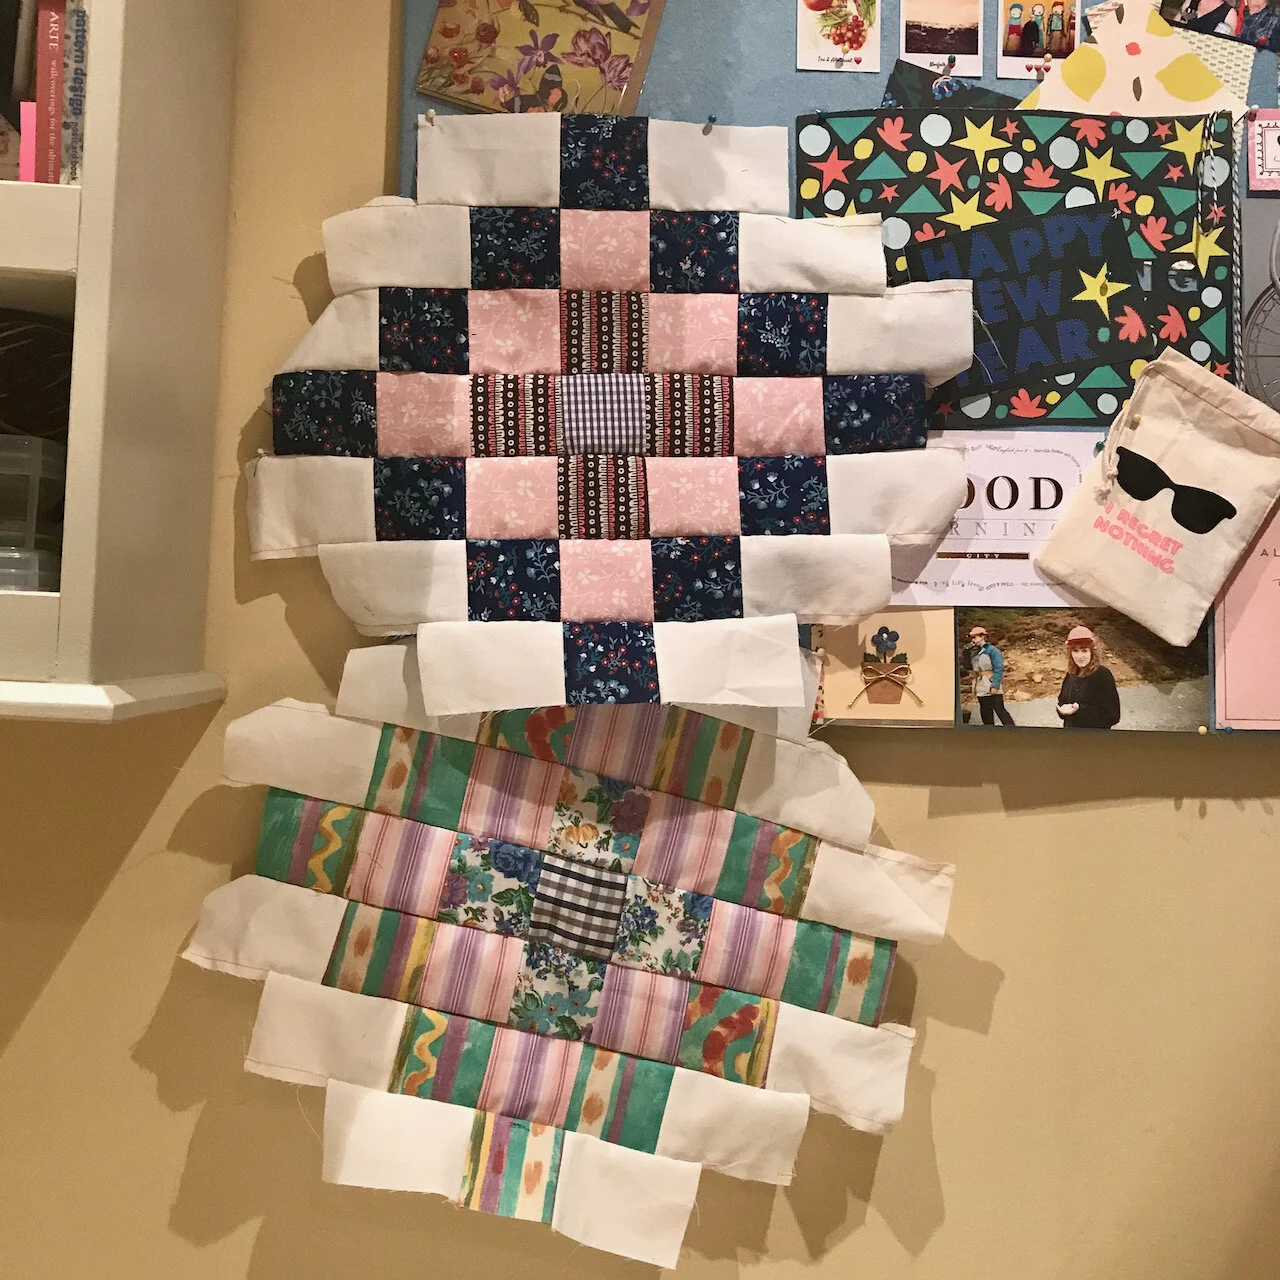
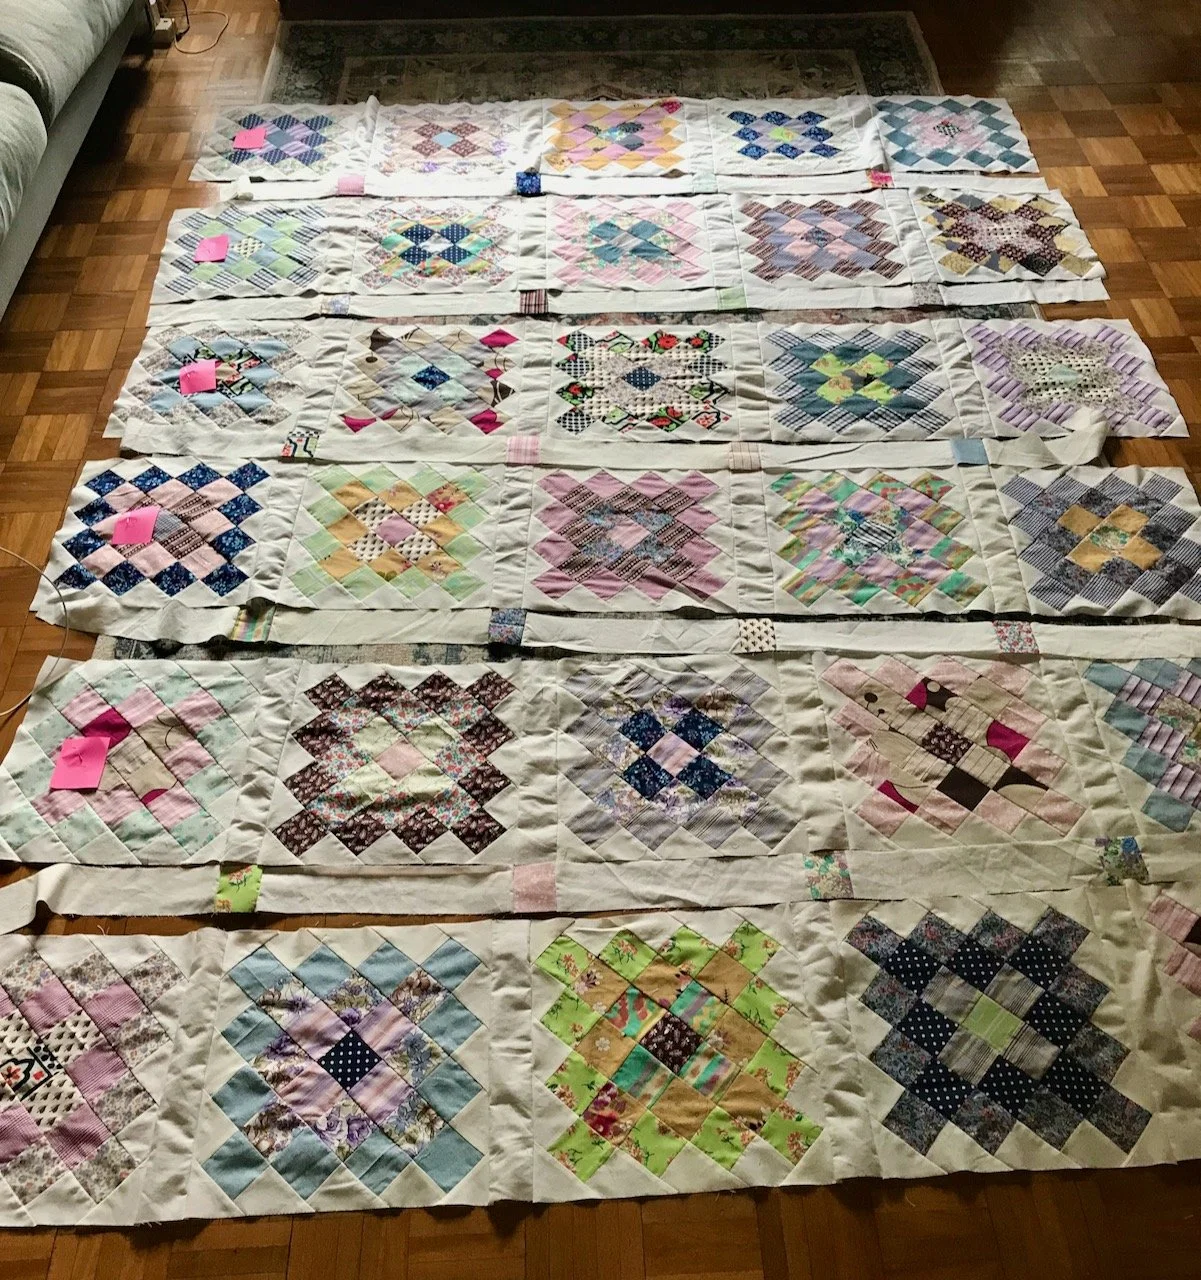
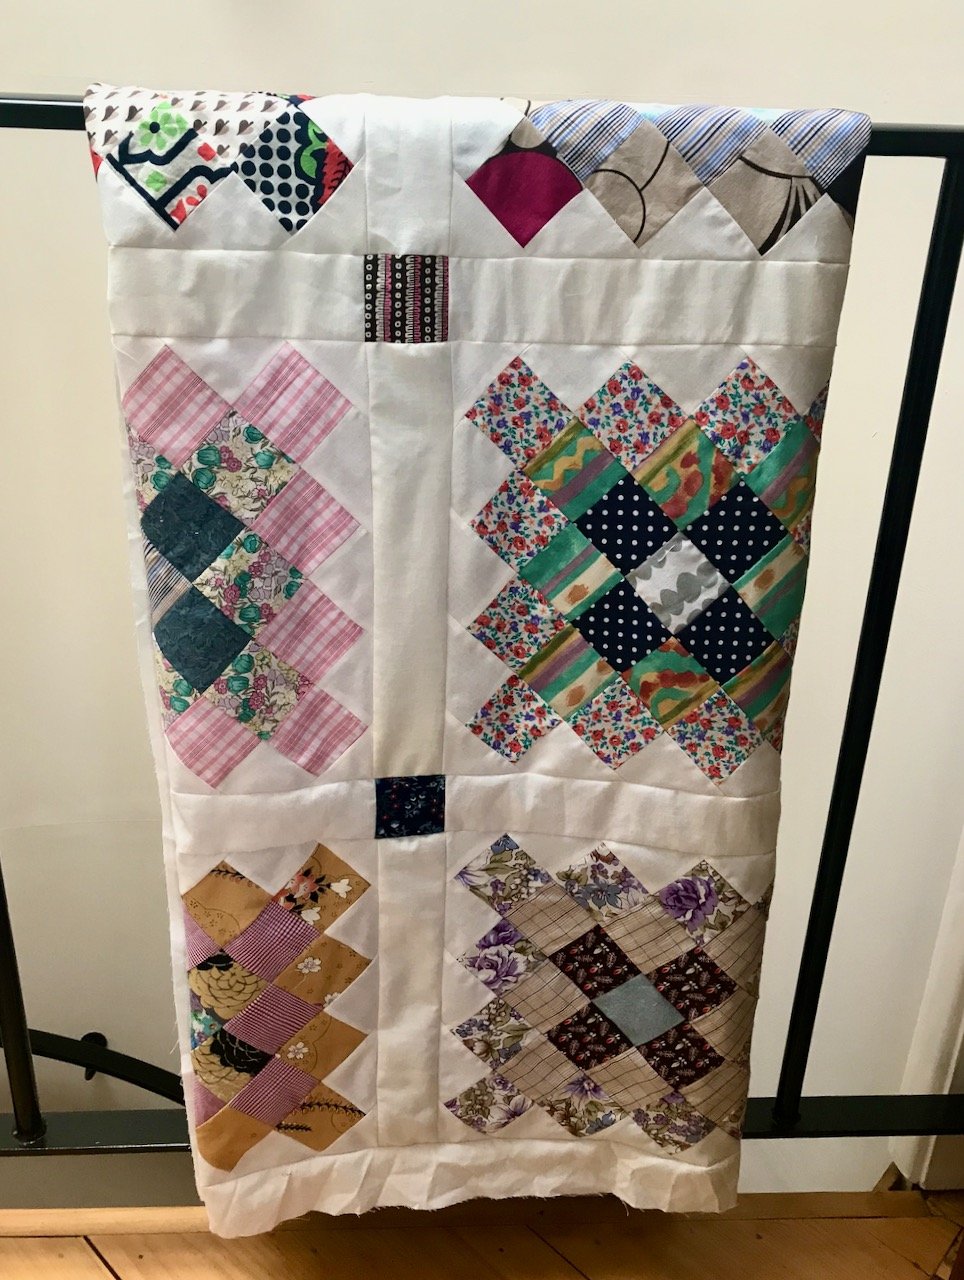
My Great Granny quilt top

It was only in August that I wrote about the deliberation that lay ahead, but it turns out that didn’t materialise quite as much, or for as long as I expected. After taking a punt on the sashing between the blocks - I randomly picked the patterned blocks, and randomly placed them - after a fair bit of rearranging and crawling around on the living room floor, I finally worked where they looked best, and sewed them into place before I could change my mind!

thirty patchwork blocks laid out on the living room floor
the assembled quilt top with the sashing rows sewn in between rows of blocks - the quilt top is placed over a double bed

I did spend some time deliberating if I should add another border or two, but decided that as I’d already deviated from the pattern by including more blocks, that another deviation wouldn’t harm. I also wasn’t sure that a patterned border would actually be seen, or add much, and so I declared my quilt top finished.

The folded quilt top hung over the bannister of our spiral staircase

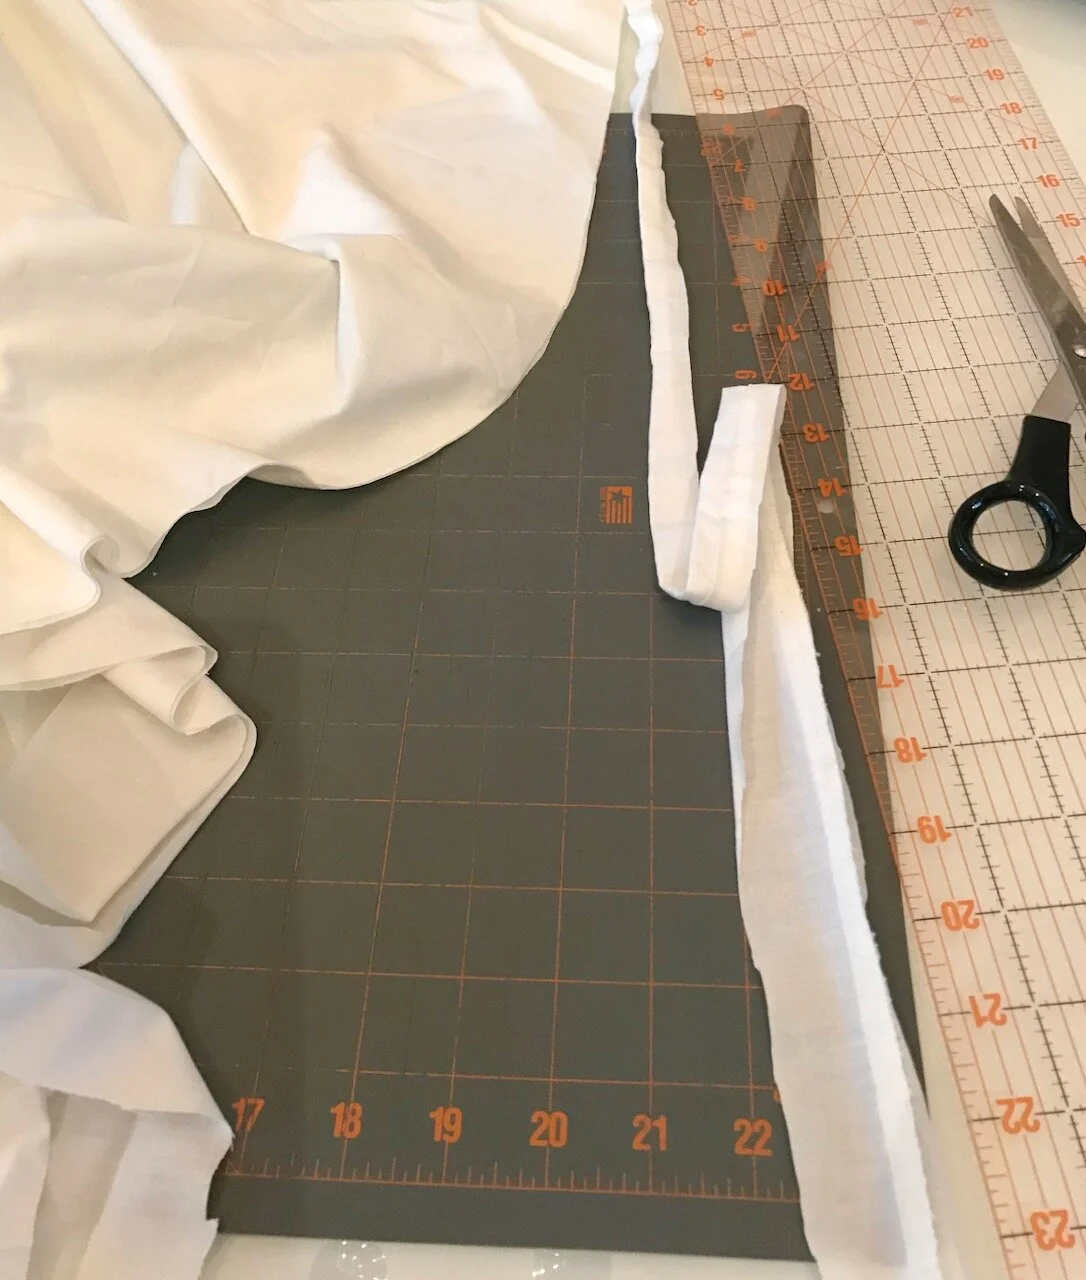
There’s a little way to go before declaring the quilt finished, but I’m ok with that. I need to think about what I’ll use as backing, get some wadding and then assemble it - and then can consider how to quilt it. But a large chunk of this is done, which I’m grateful for - it’s been a long time getting here though, I started it back in 2017, and it’s been one of those projects that I pick up and put down.

New life with a box of dye

Well, two boxes actually. I’d had plans to use the black dye on this tablecloth for a while, but hadn’t quite made it happen. Then recently I found the tablecloth again and remembered just how much I liked it, but how it didn’t work with our redecorated space. The tablecloth originally was bought in Bruges by mum for my oval mahogany table, but since we’ve got our new white glass table the cream and natural coloured lace tablecloth didn’t really work. So (and after checking a long time ago) this was the week the box of dye came out - and it’s turned out brilliantly.

Close up of a lace tablecloth now dyed black with the white of the table showing through the lace
The black dyed table cloth on the table with a chrome twisty candlestick and black candles, in the background across a white chair is a bright multi-coloured throw
The corner of the table with the dyed black tablecloth with kitchen cupboards in the background and a mustard yellow chair at the table

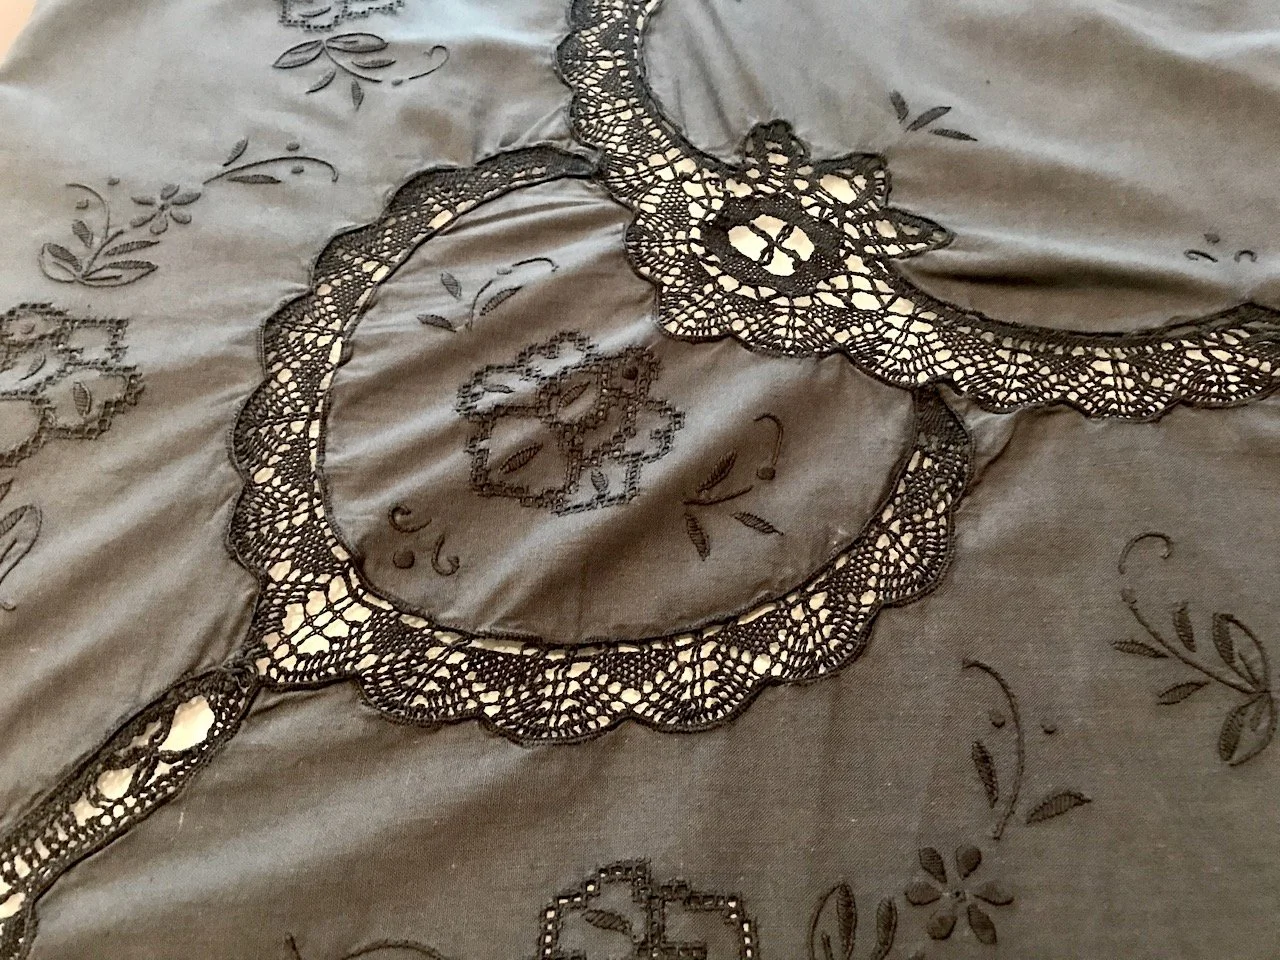
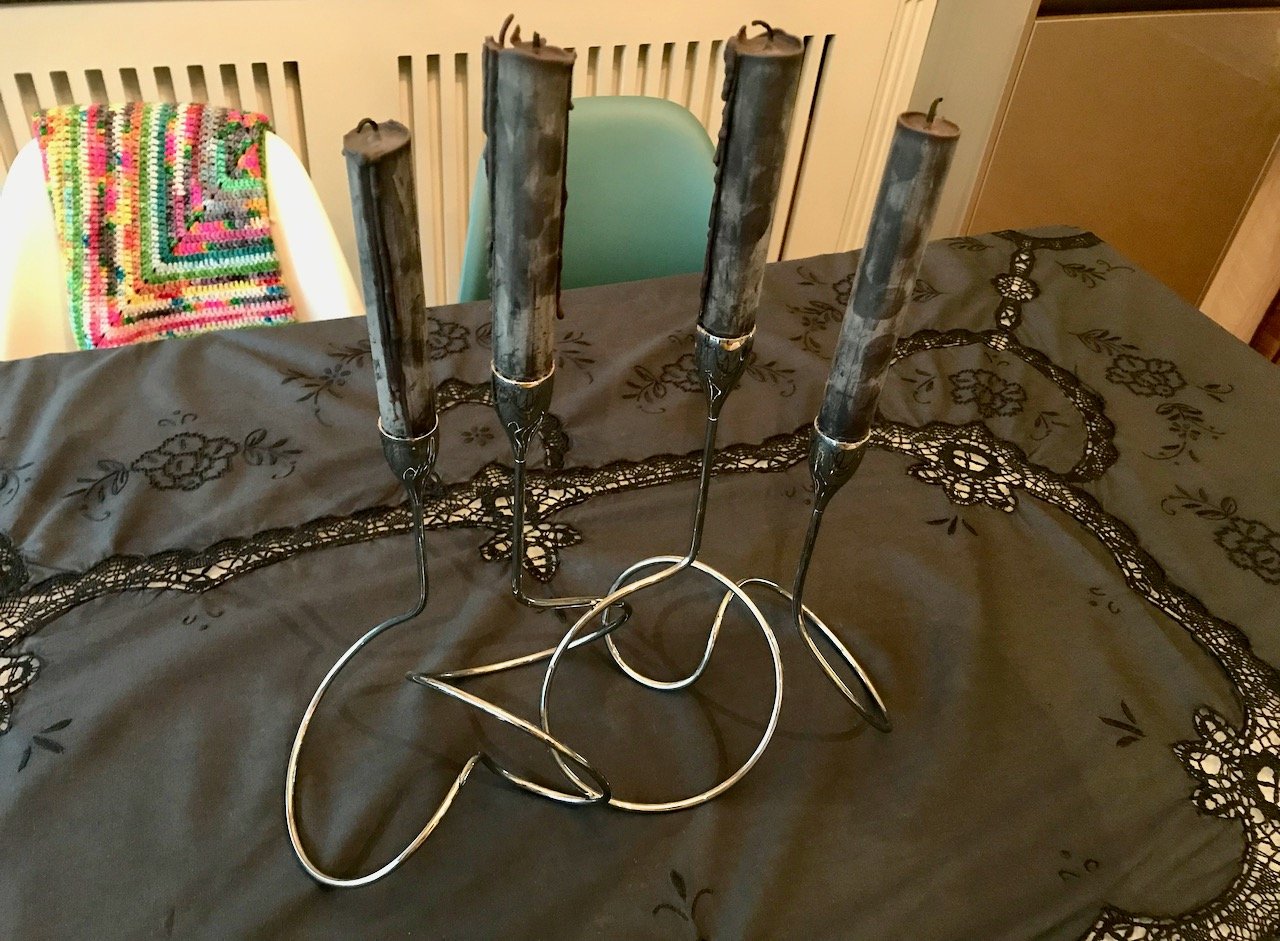
I wasn’t sure if the lace would take the dye, but in fact that’s taken it more strongly than the material which is a slate grey. You’ll also be pleased to see that I haven’t totally ditched my love of colour - the multi-coloured throw and chairs are here to stay, at times now though they’ll be paired with this rather elegant revamped tablecloth.

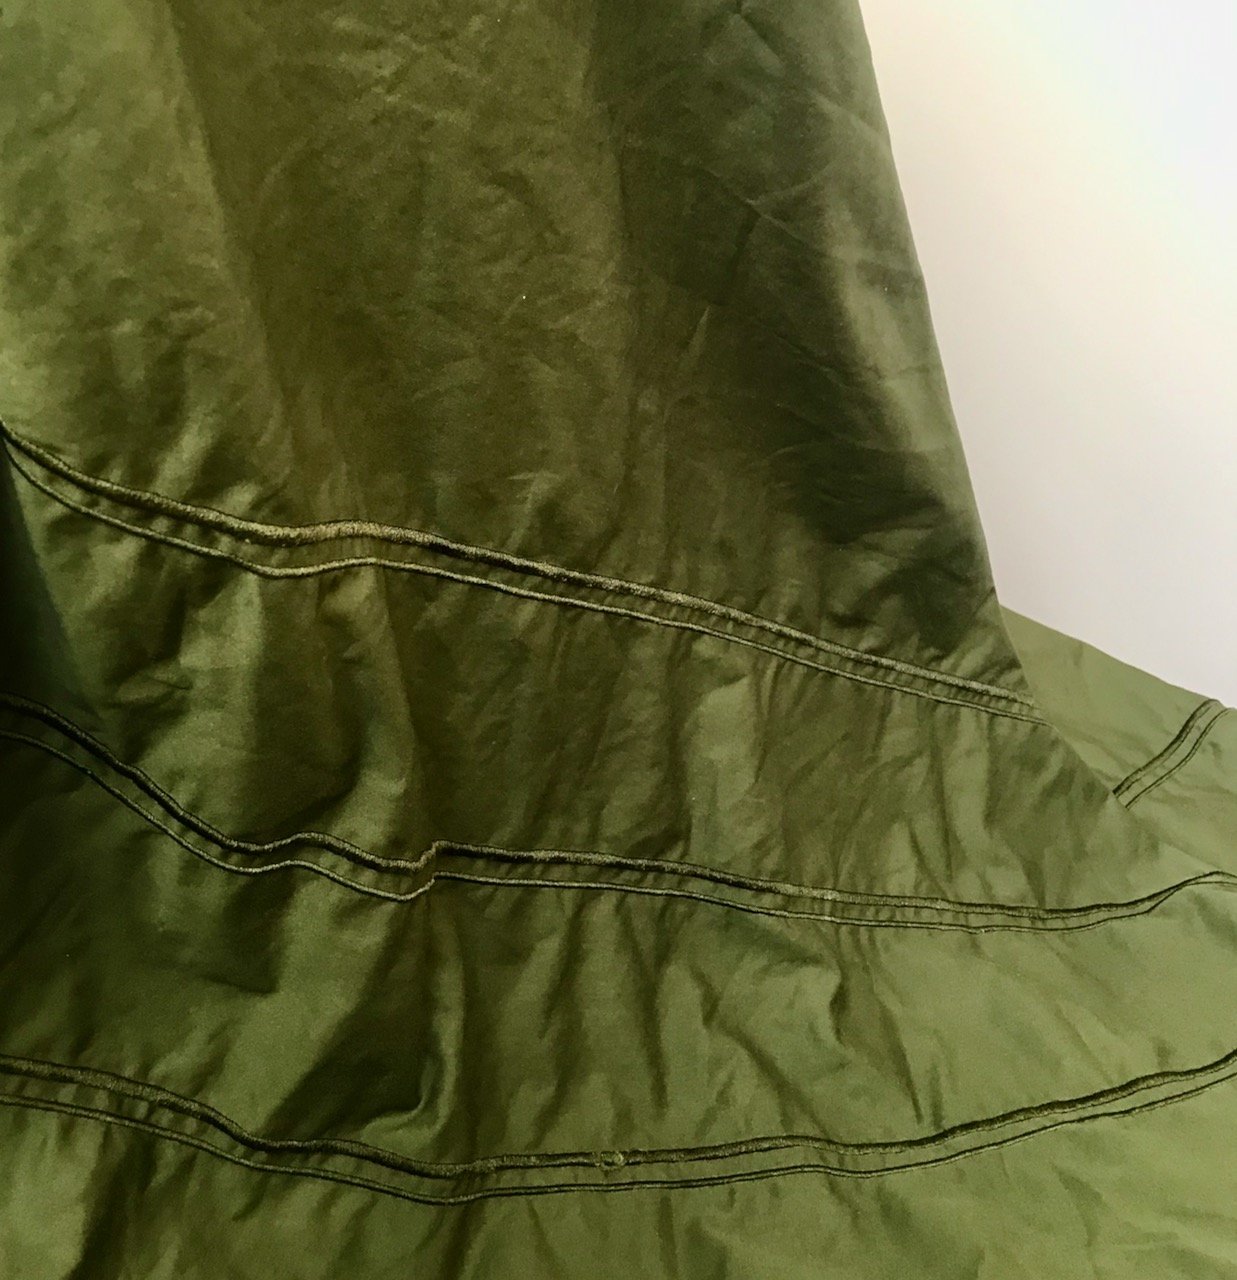
While I was winning with the dye, I thought I’d try my luck with an older and no longer used duvet set. Again, there was nothing wrong with it but the colour was from a previous iteration of our bedroom’s colour scheme, and somehow this set had never made it into use in our spare bedrooms. For me the colour was just a bit meh, a bit too beige and nothing - or it was. It is now the most glorious olive green, and again I was pleased to see the stitch detailing also take the colour. I know that this will be the perfect foil and show off a future project I have planned - you see, there’s always a project forming somewhere!

The results of dyeing an old beige duvet colour the most lovely olive green - fair to say I'm happy with how it turned out!

You never really know how the box of dye and materials will take, and thankfully I’ve been really pleased with both of these this week and now I have some newly refreshed older items to make use of and bring into use once more.

A new cardy

Like so many of my projects I get to a point where the making is done, and then I put it aside often starting something new before finishing a project completely. And that’s been the case with this cardigan too - for me, the thrill is the crochet part not the putting together part which is mad really as the putting together part is just as important.

And so, another project called to me this week - look, it was so close to being done.

A crocheted cardigan - body and two arms - laid out on a sofa
A close up of the body of the cardigan in granny square stitch (in rows) alternating between pale soft grey and a multicoloured pink, yellow and green yarn

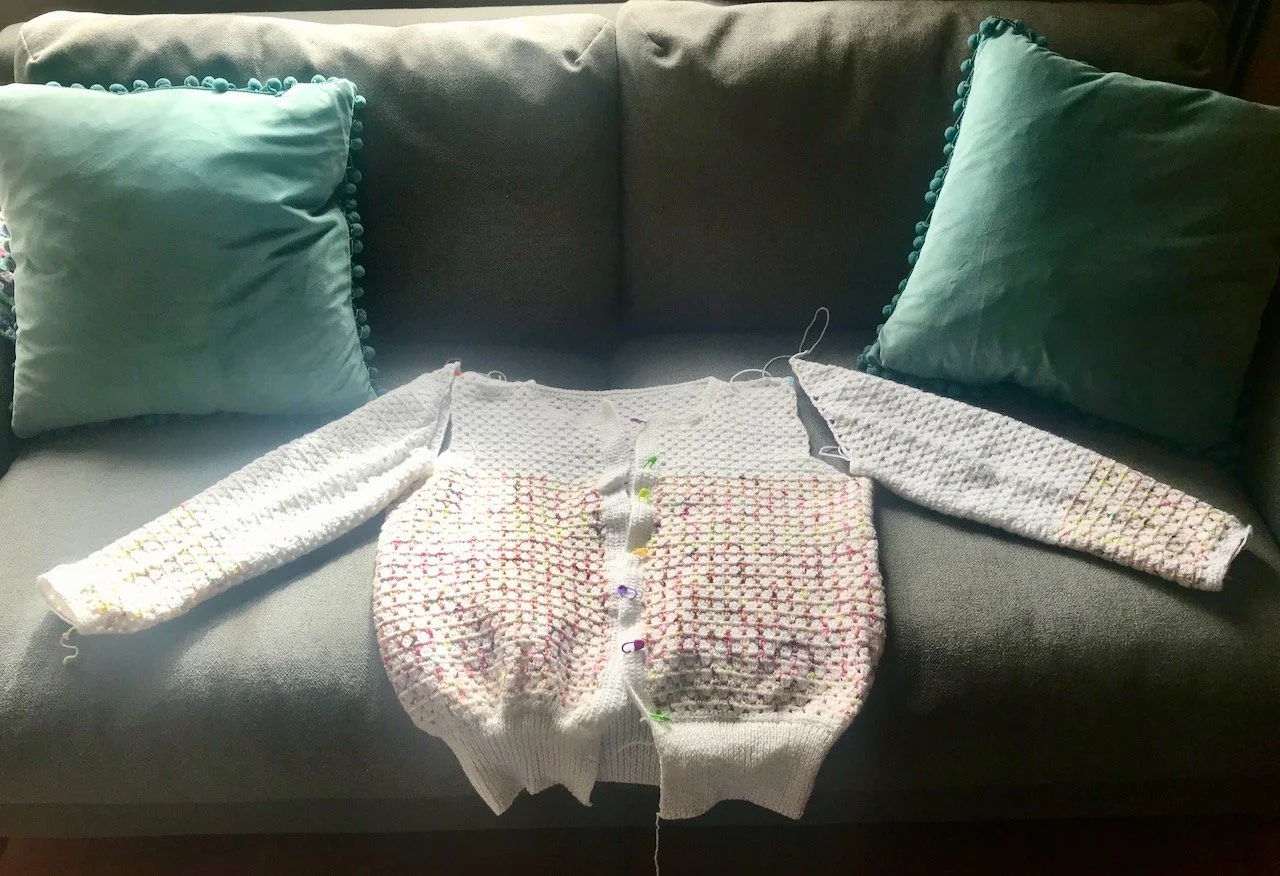
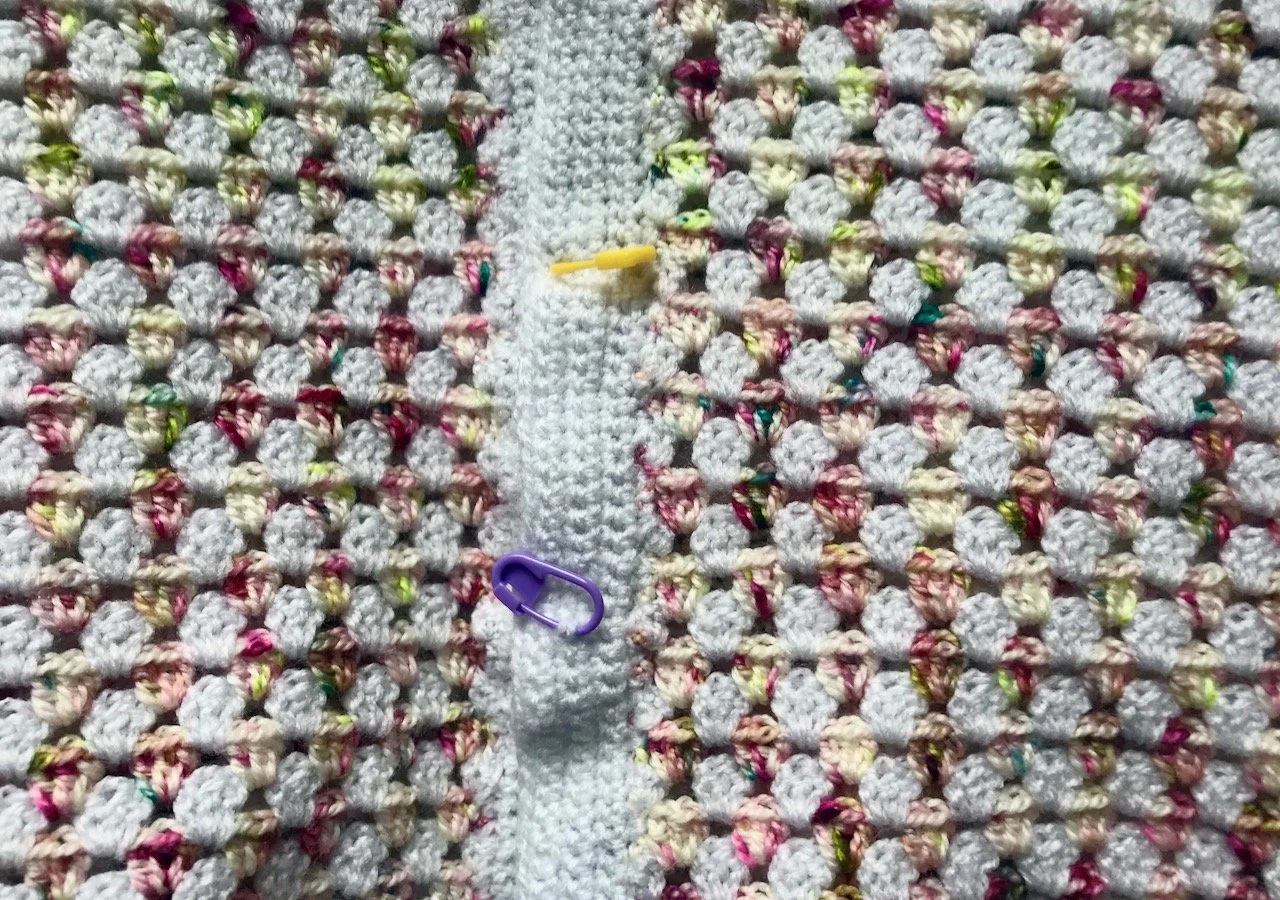
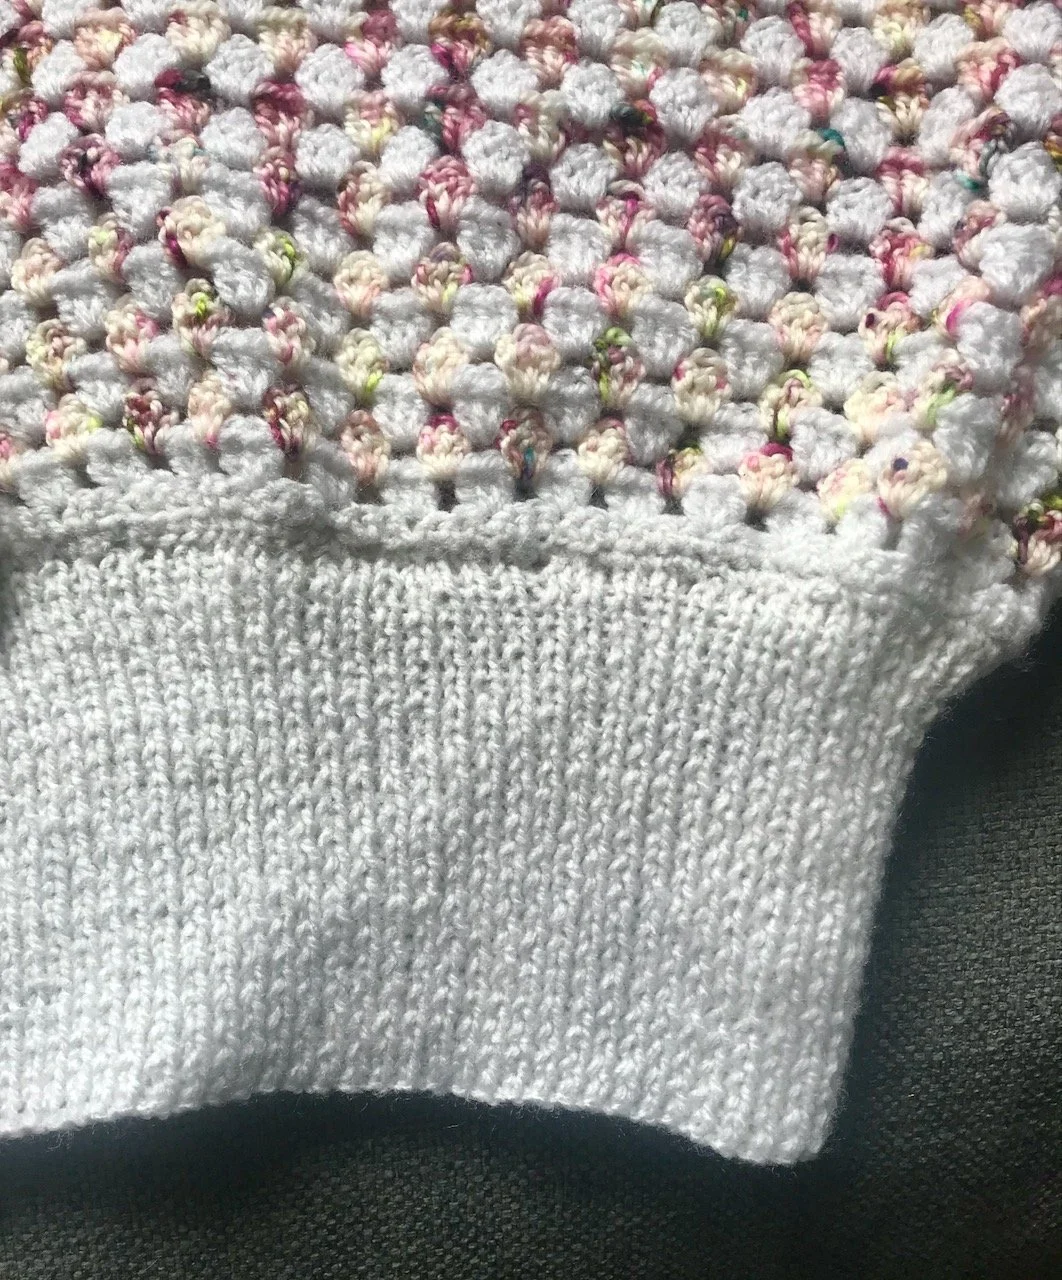
It’s another project where I’ve gone slightly off-piste. The pattern called for bold stripes of alternating colours, but I figured this soft grey was the perfect foil for some artisan yarn I’d bought a while back. I was pretty sure I wouldn’t have enough to continue the pattern to the shoulders though, and so decided to set aside two of the skeins to use for the sleeves and to use the rest for the main body and to see how far I could get. Turns out that was up to the arm holes, and so that worked out quite well, and has become my design feature by default, which I actually quite like.

Once the body was made I decided I wasn’t so keen on a straight edge, and much preferred a deep rib - and so I dug out my knitting needles and added one. That was a bit of trial and error as the first time I realised I hadn’t picked up enough stitches to make it actually wearable, but knowing this meant success the second time round.

A close up of the bottom of the cardigan - the same granny square stitch as before, but also a deep knitted rib in the pale grey
Looking at the buttonholes in the mid section - with a cerise pink square button and a round button alongside the stitch markers showing the placement

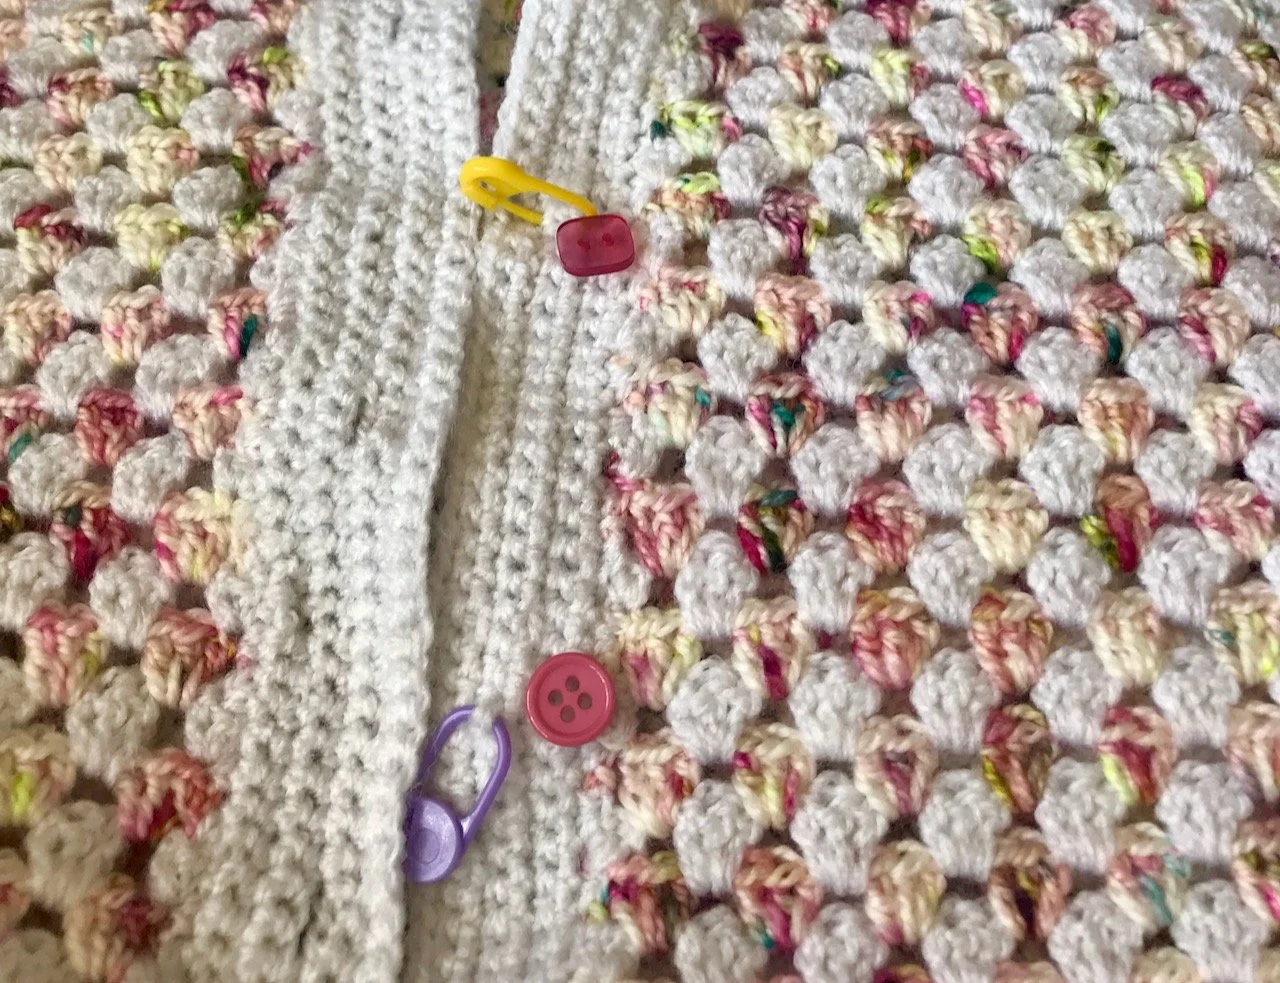
Which just left the buttons. I have a stash of buttons which seems to keep growing, so I knew I must have some that would work. And I did, just not enough of the same design, so the lower half will have the round traditional style buttons and in keeping with the ‘doing it my way’ approach the top four buttons will be square.

So a good week getting things done my own way, as usual!

I was featured on Blogger Showcase

Deliberation lies ahead

If you’ve been here for a while then you’ll know that I’m a fan of scrappy patchwork quilts, and may even know that I had a grand plan to make my own using fabrics from my stash. As it turned out, progress has been slow - it’s been on the go since 2017, but as the saying goes you can’t rush a good thing! Or that’s my excuse anyway.

Over the Christmas break of 20/21 I picked it up again, the delay had been cutting the cream fabric which surrounds the coloured blocks, and once that was done I’ve been plodding through making up the blocks. The pattern says twenty blocks, but I’ve decided to make more i) for practice, ii) because I’d already sewn more when I realised and mostly because iii) so I can make sure the quilt fits a double sized bed.

This week I finally met the target of my forty blocks. Some are better than others, but overall even though I say it myself, they’re pretty good.

A pile of 40 great granny patchwork blocks

So having reached the target, I’ve stepped out of my chain sewing comfort zone and I’ve trimmed all the blocks so the final cream piece can be added on all four sides.

squaring off one of the blocks

The next few stages are ones which create some offcuts. Hating waste I contemplated what I could do with them, but as I have no need for even more new projects they have gone into the bin.

A pile of trimmings
Pinned the final strip ready for sewing

Now I’m ready to square off the blocks. I’ve practised this next step on my wonkiest blocks, with the ones where the seams were not quite aligned. And I’ve surprised myself - this was my first sewing project for a long time, and since I started putting the blocks together I temporarily broke off to sew masks for both MOH and I during the early stages of Covid.

the patchwork blocks with a square ruler centred over them

I’ve got fifteen blocks that are trimmed, so that leaves 25 to go - and then the deliberation and procrastination can start as I’ll need to decide on the layout for the quilt top, and exactly how many blocks I’ll use and the subsequent adjustments needed for the rest of the pattern.

With any luck, and a good wind behind me, I could actually have a quilt top in the not too distant future!

I was featured on Blogger Showcase

Picking up my patchwork

It’s been a while, but over Christmas the patchwork quilt I planned and started a while back started to call my name. So I braved it, pulled it out and quickly remembered the reason I’d put it aside was because my next job was to cut up an old duvet cover to use as the plain sections of the quilt. I also remembered that I needed to cut over 300 pieces once I’d done that.

However, as I said it was calling my name, so there was nothing for it, but to get on with it.

cutting up an old duvet cover

And like many things, once I’d started it wasn’t as bad as I feared. It wasn’t long before I got into a rhythm and piles of the right sized blocks started to form.

some of the pieces cut and ready for use

So the next piece of my quilt puzzle was to reacquaint myself with the 2.5 inch squares I’d already cut after choosing fabrics from my stash and working out the layouts. Now I needed to decipher my system - thankfully my logical self had left plenty of clues, including some blog posts and photos of each Great Granny Square layout. Sometimes I even amaze myself.

previously cut squares

Which all meant, it was time to start sewing. I decided to pin a couple of blocks to speed up the actual sewing, and it’s a system that’s working out well for me. I currently have four blocks assembled, two more ready to assemble, two ready for the first seams to be pressed and another two blocks pinned and ready to sew.

I do like a system.

SEWING SQUARES TOGETHER

SEWING SQUARES TOGETHER

CHAINING MORE SQUARES TOGETHER

CHAINING MORE SQUARES TOGETHER

SEWING THE STRIPS TOGETHER AND ASSEMBLING THE BLOCKS

SEWING THE STRIPS TOGETHER AND ASSEMBLING THE BLOCKS

The sewing is actually the enjoyable bit, cutting out less so - but clearly needs to happen. I’m sure MOH is bemused about the desire to cut up bits of fabric to sew them back together again, and on a level I see his point, but knowing I will create something bigger and better than its parts is what it’s all about.

Each strip and block I sew is full of memories. I know where each piece has come from and many are years old and some are much newer. In the blocks below, the pink and white floral pieces are from remnants in mum’s stash of the Laura Ashley curtains I had in my bedroom as a teenager, the brown stripey fabric is newer and a recent purchase from the V&A. The turquoise aztec pattern is from remnants from a childhood dress of mine, not the actual dress, but a piece that mum made me a magazine bag which I used and used. I used so much the handles came off, and so it was put aside and when I came to look for fabrics I knew this was going in.

TWo OF MY ASSEMBLED BLOCKS

The centres of each block, and the pink and lilac striped material are from old shirts. I’m not sure its usual to use stripes in patchwork, however I am. Striped fabrics have memories too - though I’m trying to use them so all the stripes head the same way. I suspect there’ll be a hiccup along the way, but that’s the plan.

Some of my seams don’t quite match up, and some are perfect. I’m trying not to focus on those that don’t too much because when it’s all together it will be unlikely that the imperfections spoil the overall look. Well, I’m hoping not anyway.

I’ve realised just how much I do like patchwork quilts, and how long it is since I’ve sewn one. When I had my first house I made many quilts, selling them to friends and family but got out of the habit somewhere along the way. I’ve also realised that quilts have many life lessons in them, as well as memories, as done is way better than perfect.

And while I’ve certainly not been rushing this one, they aren’t something to rush either. Though even I’ll admit leaving it a few years in between stages is pushing it. I’m not even sure MOH believes it will ever exist as an actual quilt either. I’m sure it will, though I’m not quite prepared to say exactly when!