Making some hanging lavender sachets, finally

Way back in 2014 I shared a link and a tutorial to some gorgeous hanging lavender sachets I’d seen and fallen in love with, and clearly had intentions to make some for myself. Well fast forward to our house move and I rediscovered the pieces of material I’d cut in preparation and two sachets which I’d mostly sewn.

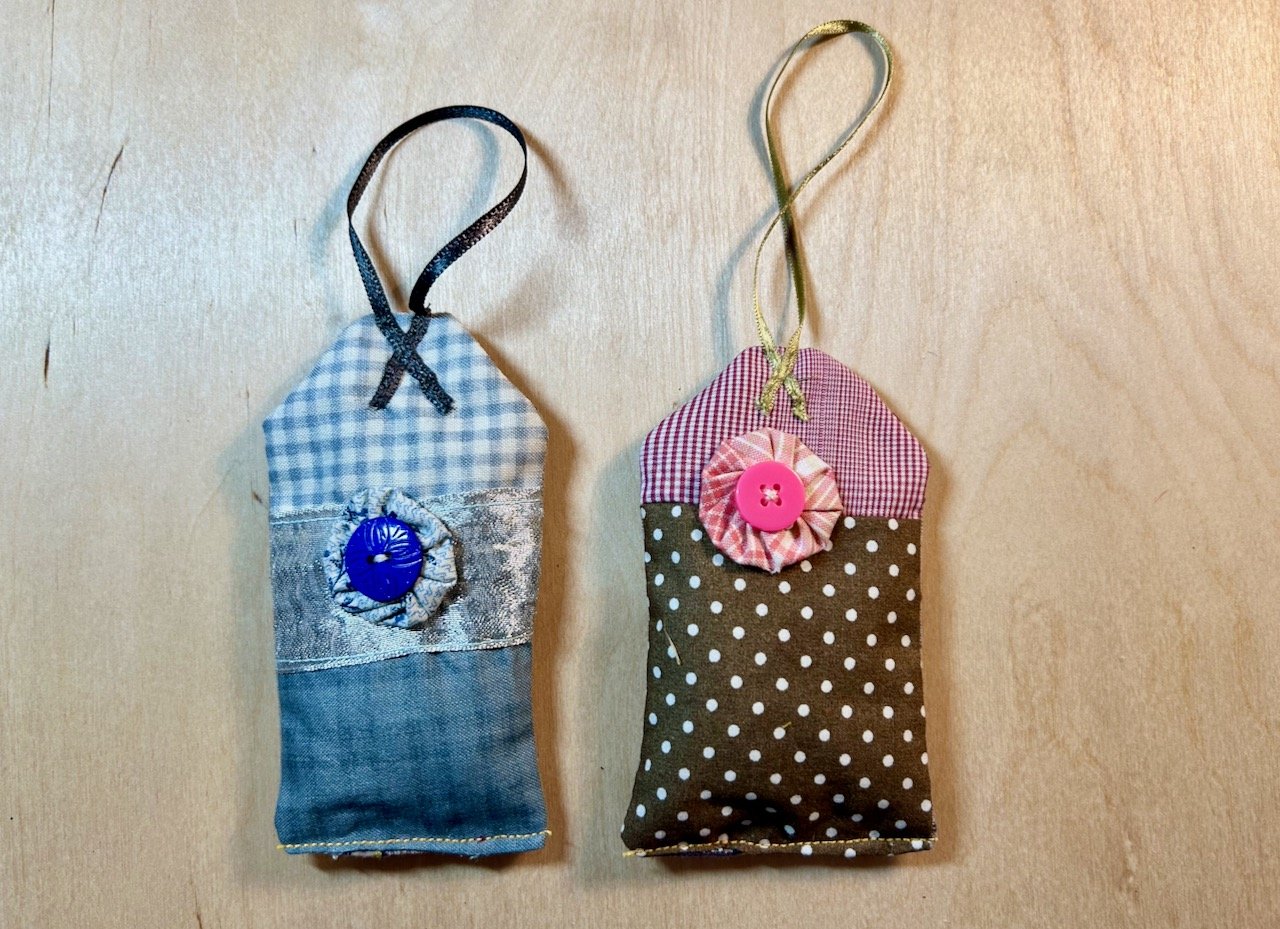
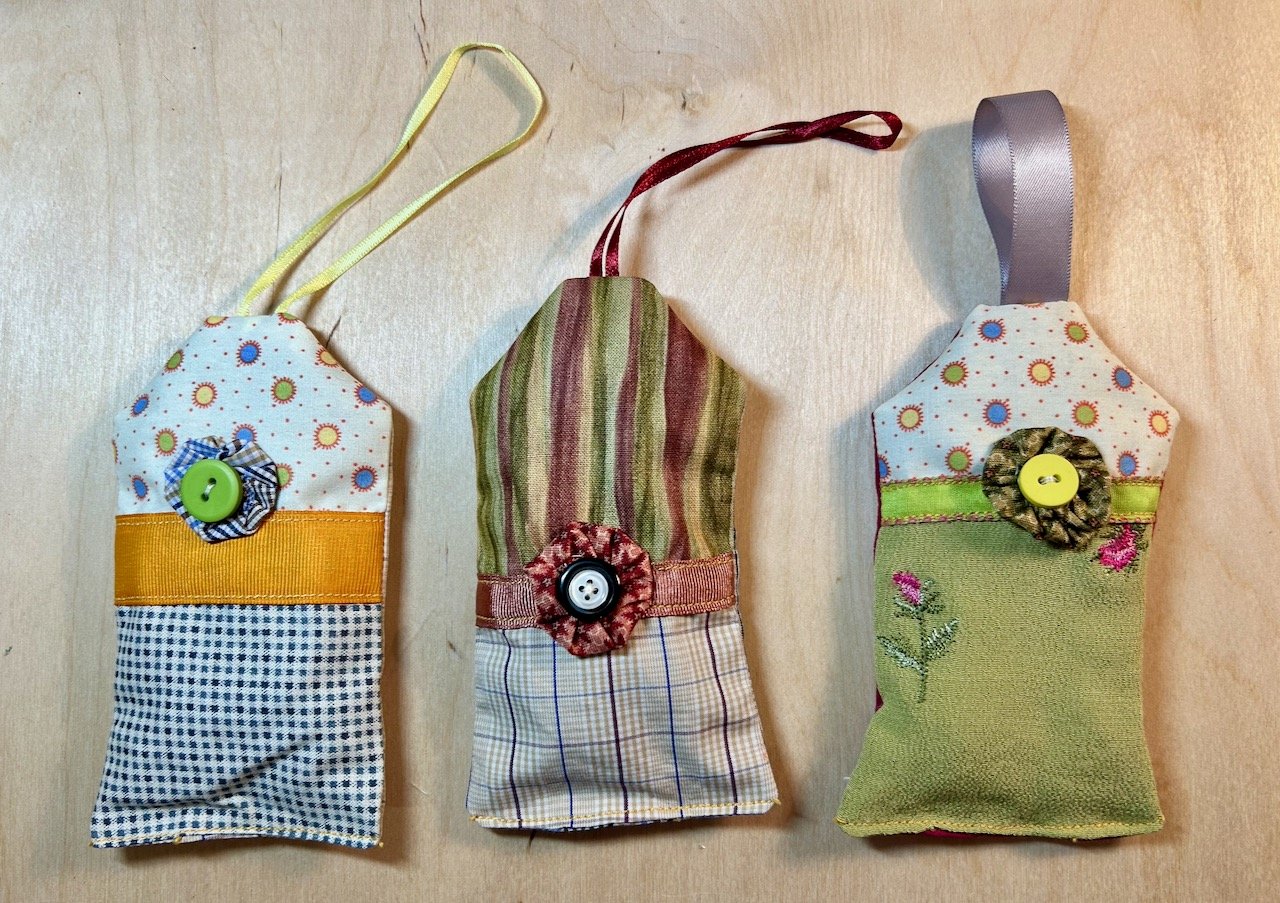
THE TWO THAT WERE MOSTLY SEWN, NOW FINISHED

Thankfully I’d left myself enough clues about my original plans, and so with my ever increasing supply of ‘magpied’ ribbons (from clothes, Christmas crackers, chocolates and no doubt many more places) I went through and laid out items to decorate each of the sachets.

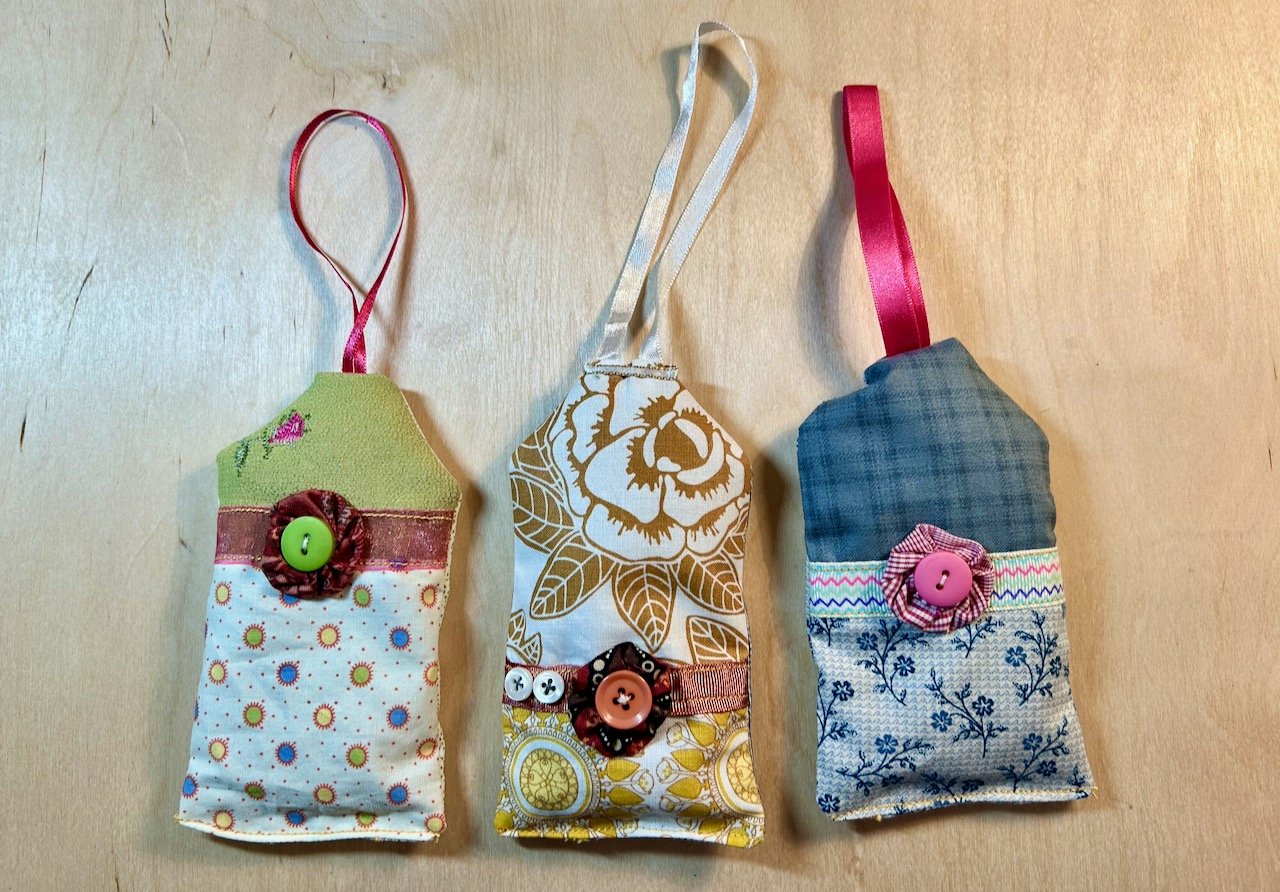
They were a great way to get back to being familiar with my sewing machine, after a longer than intended break. They were small, creative enough but not overly challenging, as the majority of sewing was in straight lines. I realised though after completing the two above that adding the hanging ribbon afterwards could be time consuming, and therefore likely to not happen - so I made a change, and pinned the hanging ribbon so it could be part of the seam at the top of the sachet.

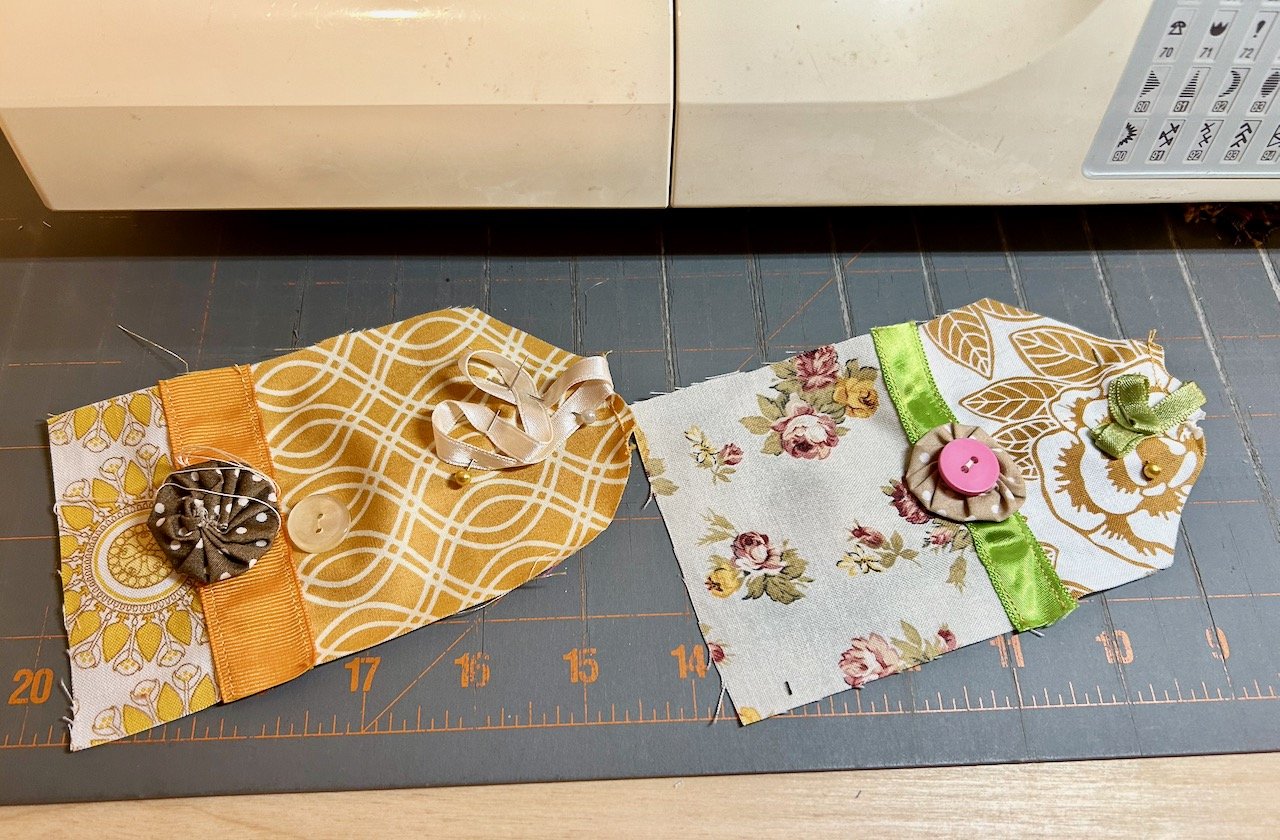
And then I motored through them, until it came to finishing them off.

I’d filled them with lavender and pinned the gaps at the bottom closed and they were ready to be hand sewn, and hung. But it was always the job I never quite got to, putting it off - you know the sort. Until I realised that I could sew the gaps closed across the bottom by machine, and then at least they’d be done and no one would be none the wiser (that is until I just told you!)

And so my mini production line was off again.

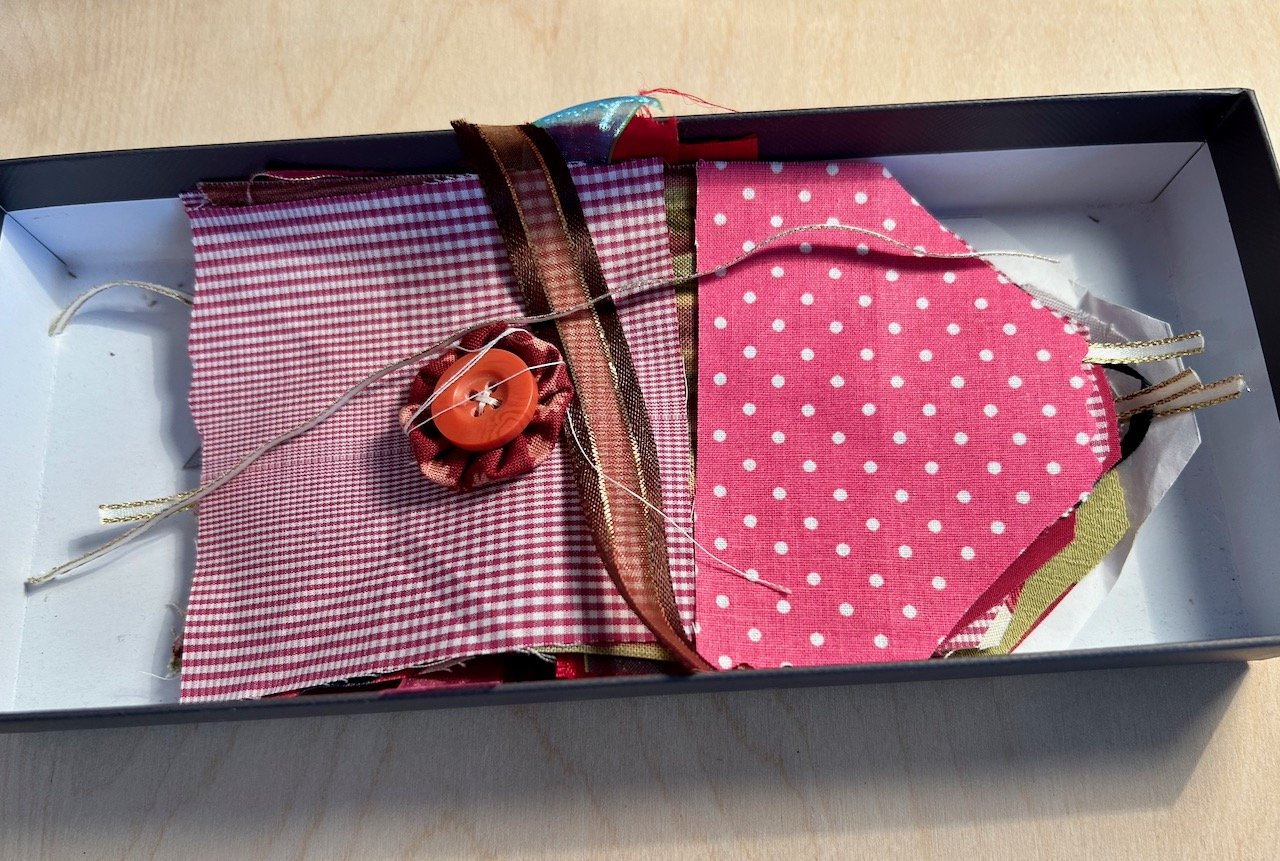
It was simple really, and I don’t think look any worse for the adjustments I’ve made. Though I’d had my fill of sewing lavender sachets (for the time being anyway) and so I packed the remaining future sachets back into the box, but I know my future self will be pleased that I’ve added yoyos, buttons and ribbons for decorating and hanging so when I’m in need of a simple sewing project, I have one that’s ready made.

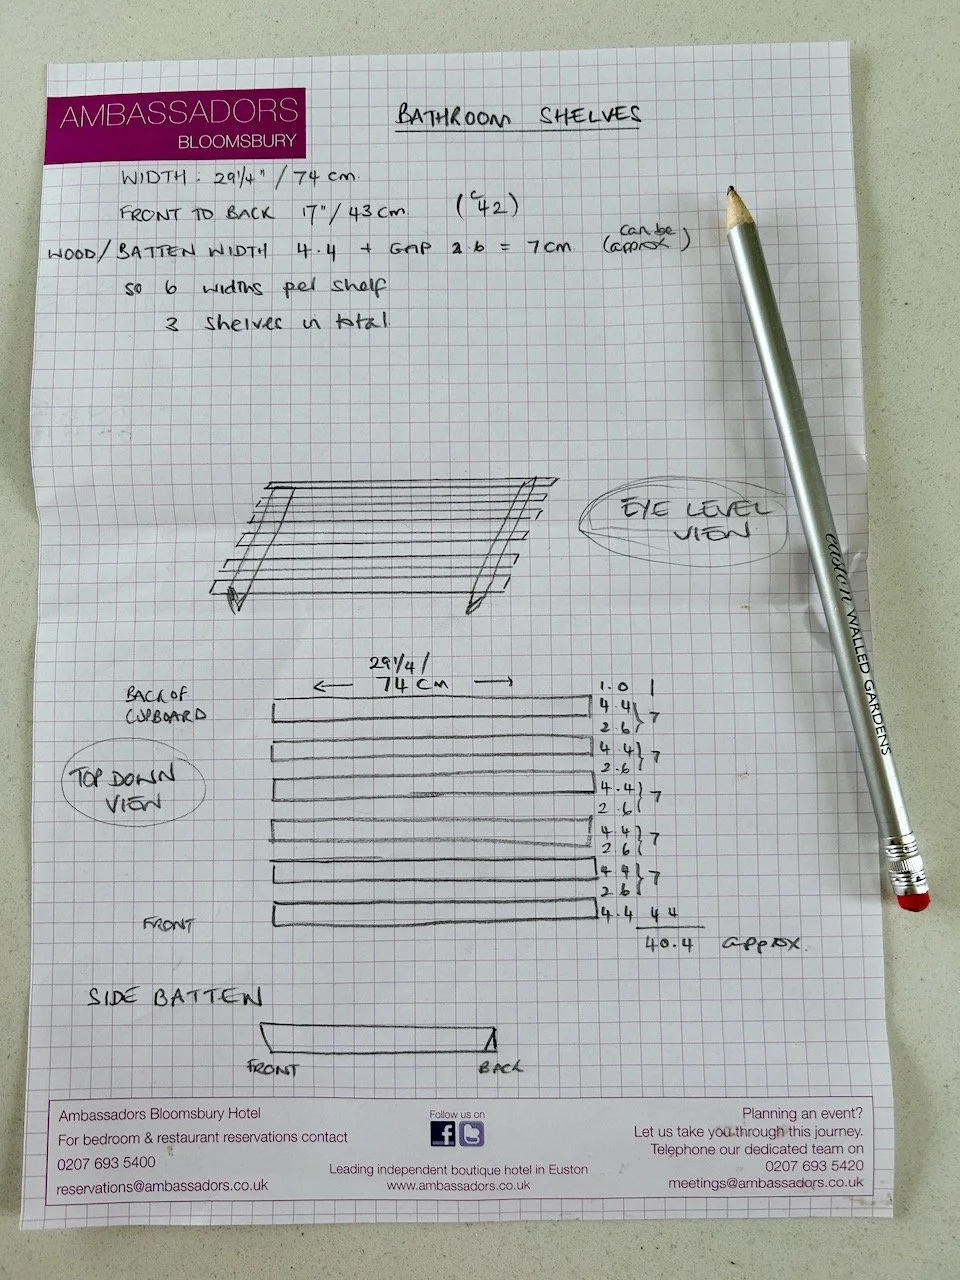
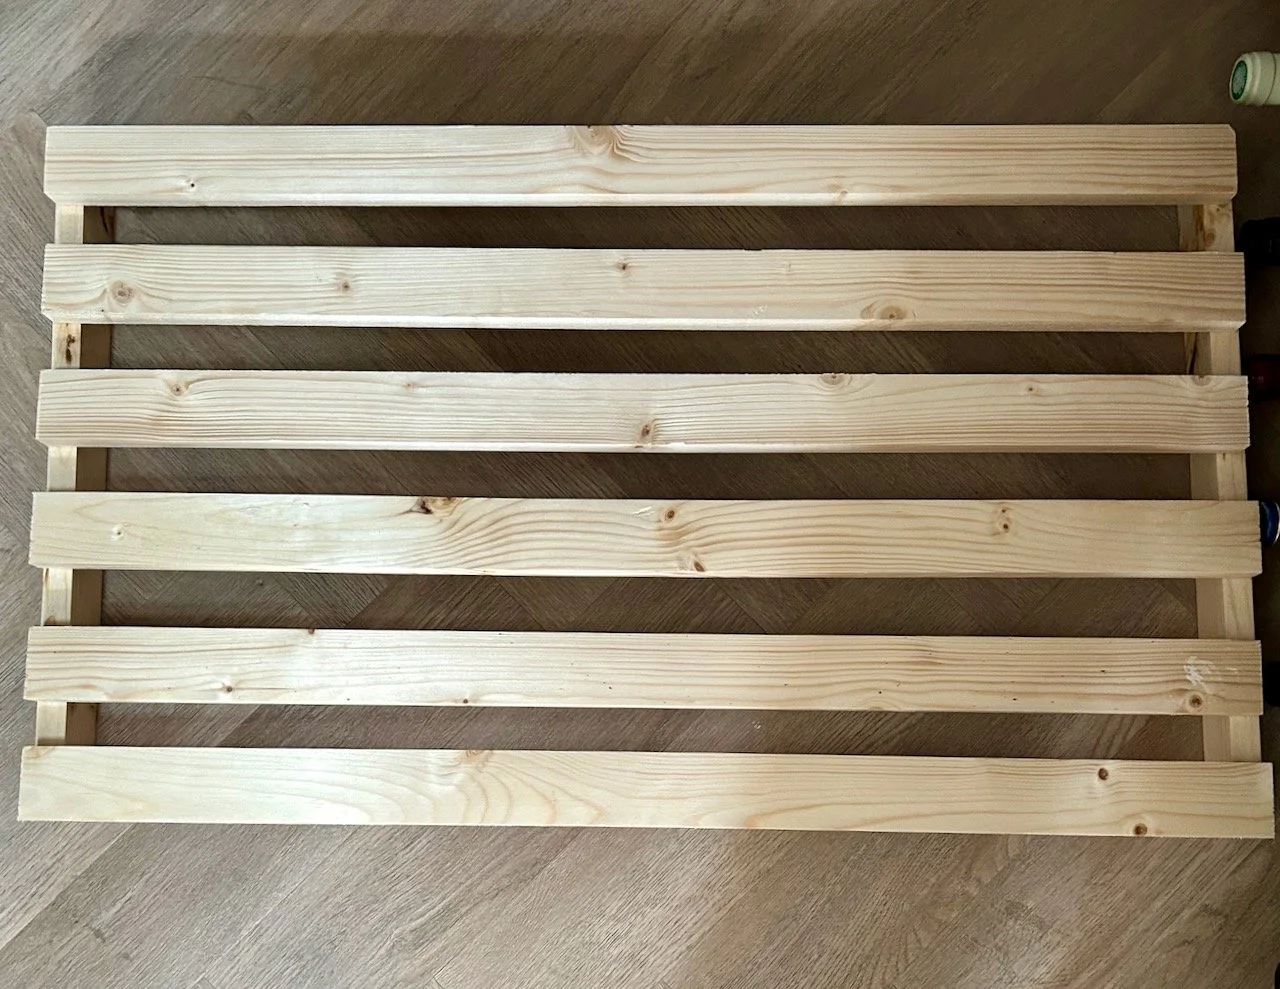
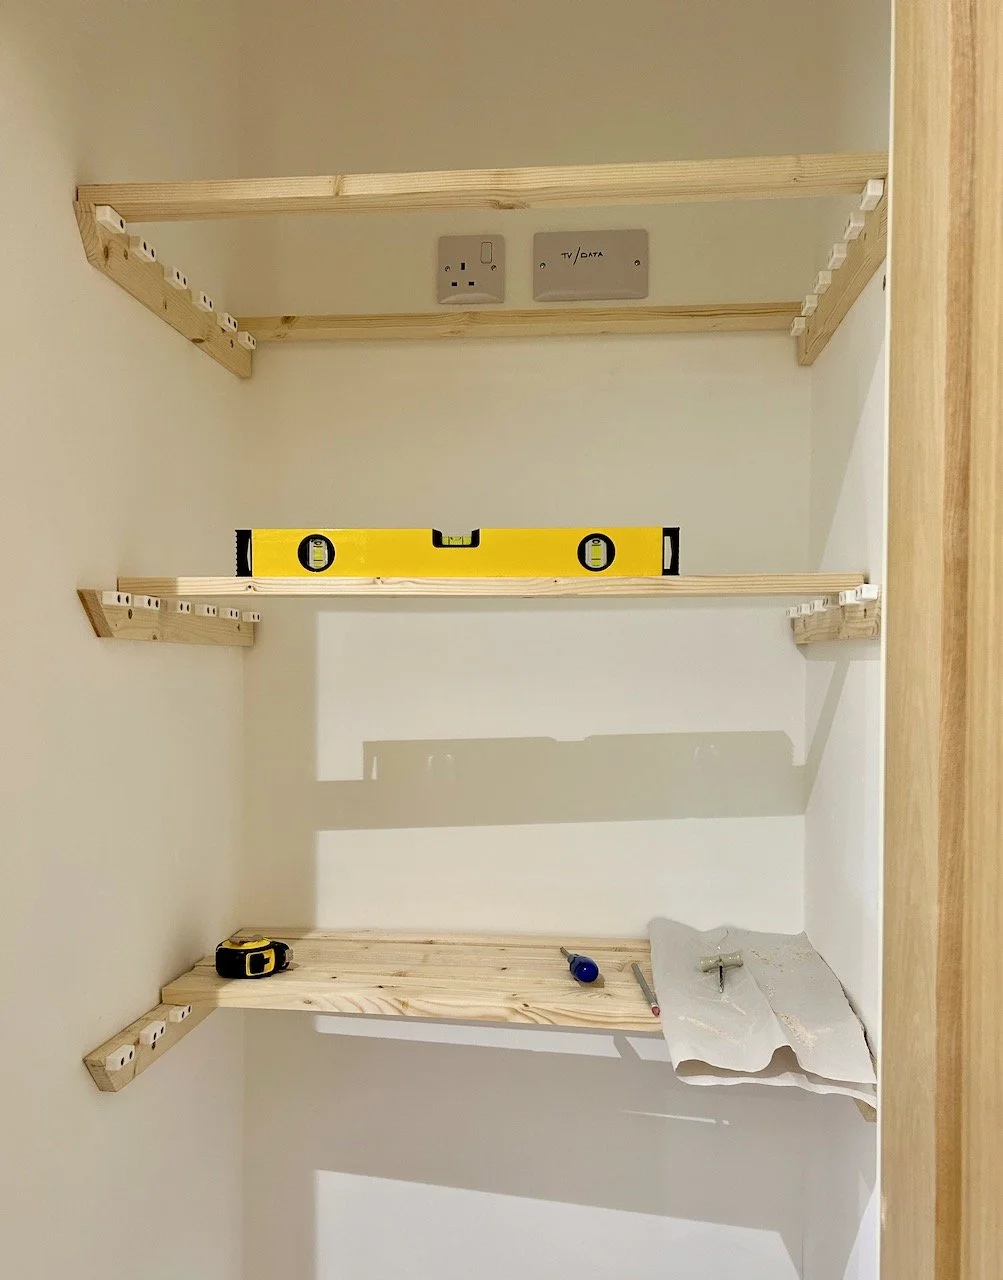
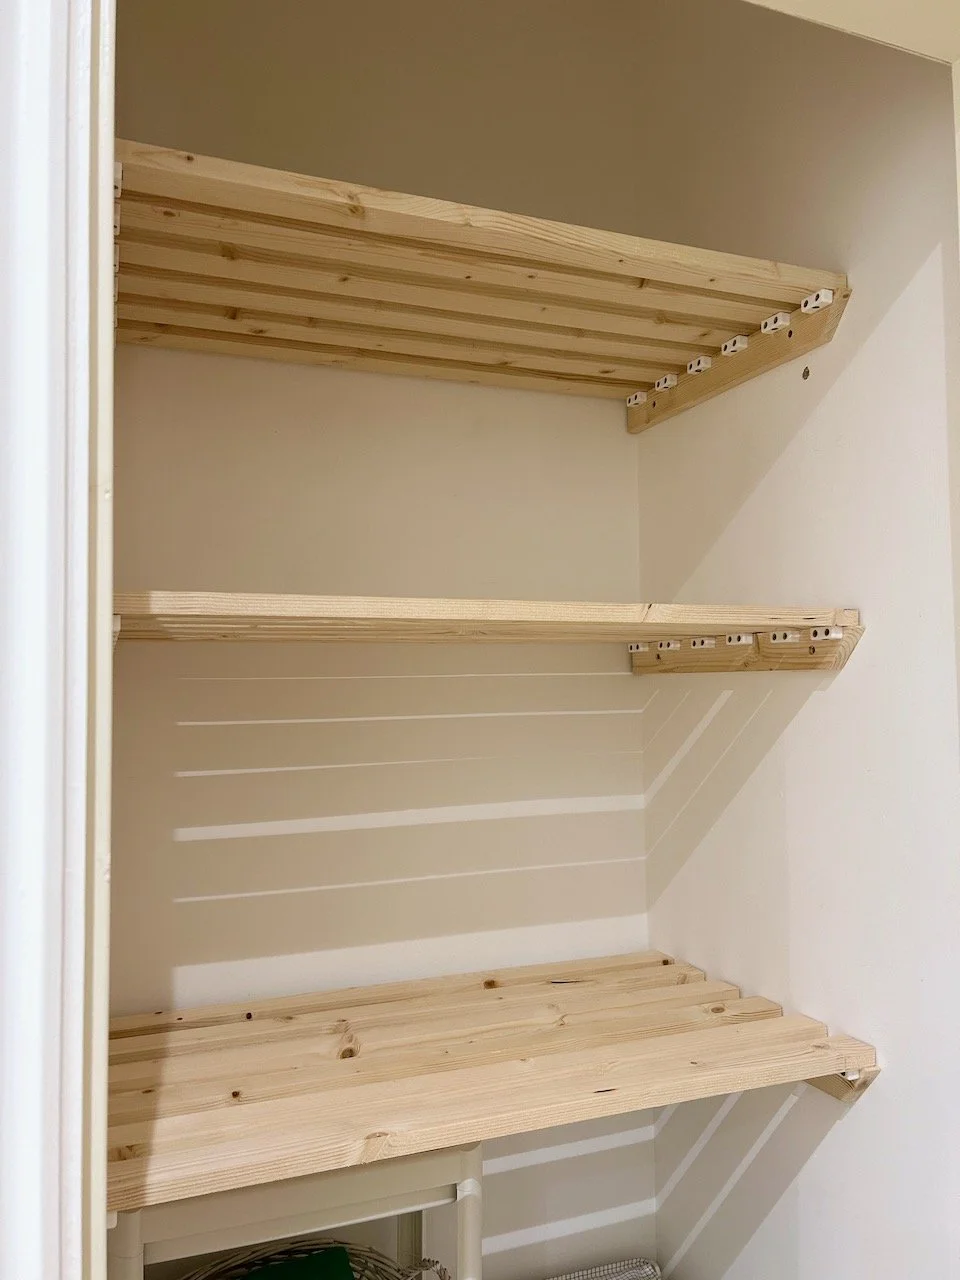
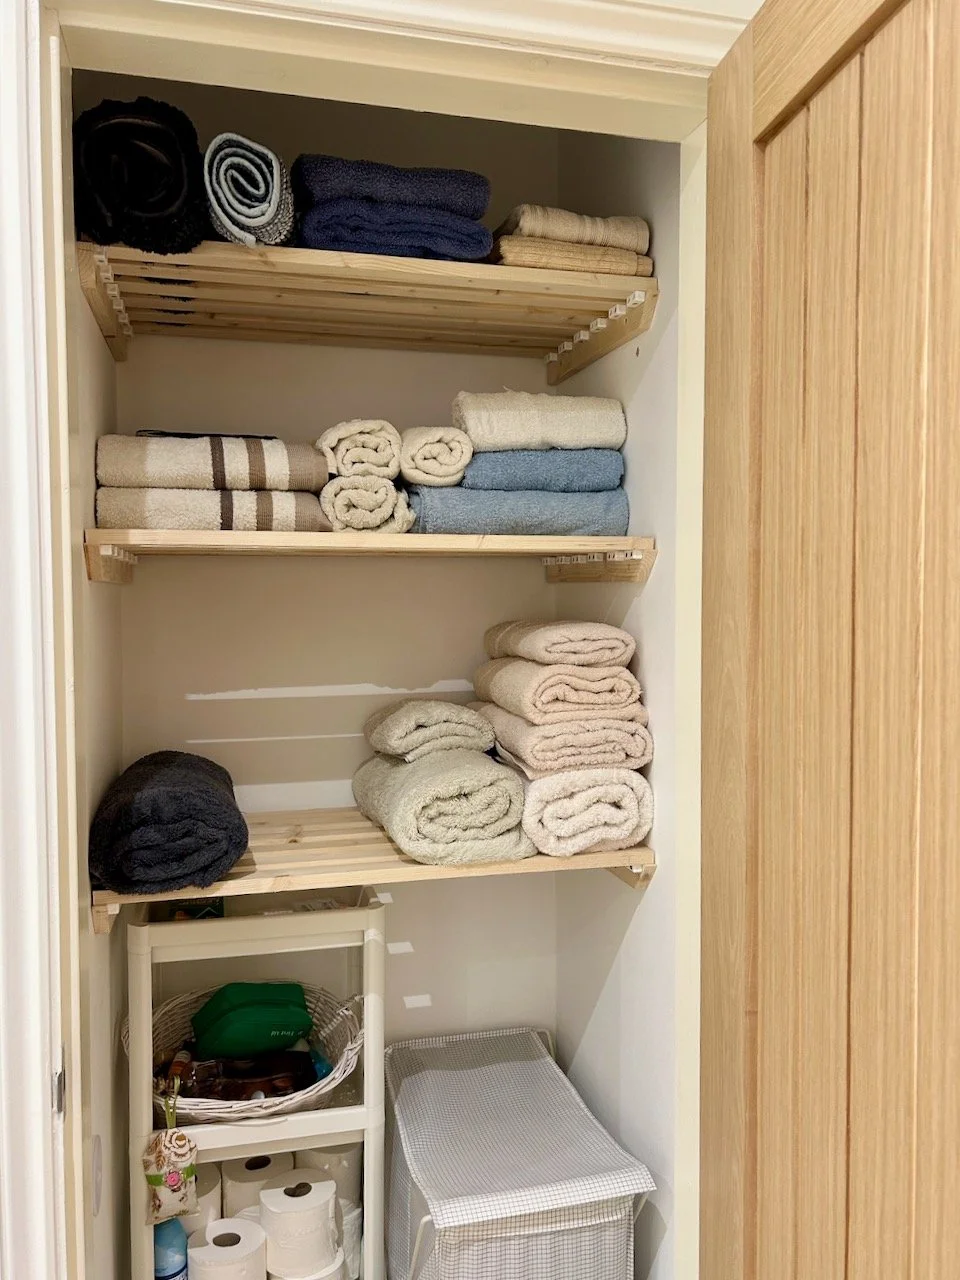
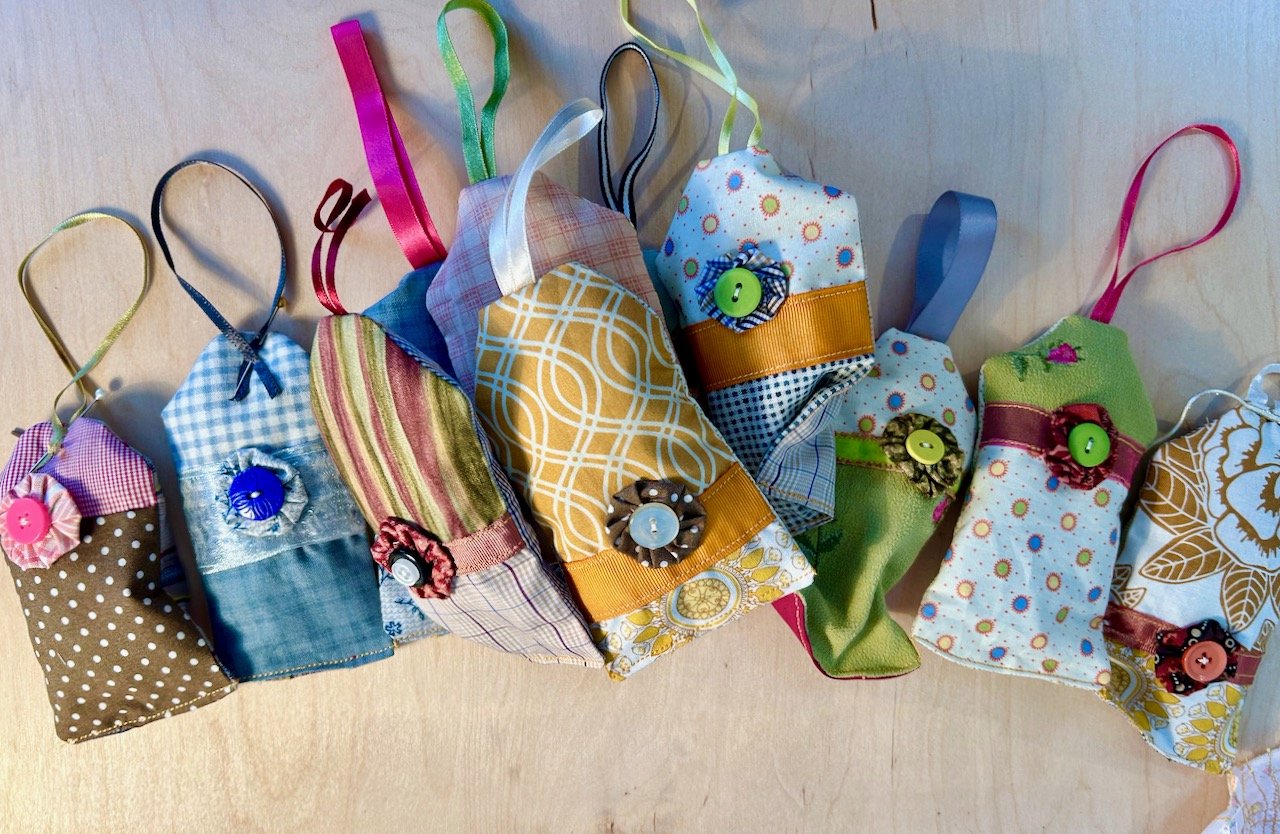
I’m really pleased with how the lavender sachets turned out, and have found plenty of wardrobes and cupboards here to hang them in, in fact you may have spotted one of them hanging in the bathroom cupboard with the new shelves.

The final set of three hanging lavender sachets, one blue, one gold, one cream floral

I love that how each of them are different, and how they all use remnants of material either from old clothes that I’ve cut up, or from previous projects alongside the ribbon and buttons I’ve also saved. Plus they smell lovely, and thankfully not too overpowering!

And had you spotted that there are eleven finished sachets? Well it’s totally a coincidence that I finished these in the week leading up to my blog’s eleventh birthday, I picked up this project towards the end of January and while I’d like to say I plan ahead, well that would be a total fabrication! Spooky though hey?

PostCommentLove

The year of the shelves has begun

At the start of the year I unofficially christened 2024 as the year of the shelves. I think MOH thought I wasn’t serious, but actually he knows me well enough to know better, and so it’s good to report that the year of the shelves is officially underway.

One of the things that’s obvious about moving to a new build is that you’re the first person to live there. That means there’s a lot of things you usually take for granted that just aren’t there. I think I’ve spoken before about light and curtain fittings and toilet roll holders, but today it’s shelves.

These aren’t the first shelves for MOH since we moved as we ordered some self-assembly freestanding shelves for the utility room and pantry at the end of year, and which tested the patience of a very patient MOH. I’ll share these here soon, as they look great and have made both of these areas incredibly usable.

MOH’s also recovered sufficiently, so it was time to reintroduce the need for more shelves. We have three spaces identified, plus the shelf above his workbench in the garage, but first up was the bathroom cupboard. It’s a big cupboard and will be great for storing towels but to make the best use of it, yeap - shelves. We’ve already added a open shelf unit for cleaning stuff, toilet rolls and such and a washing bin (both from Ikea) but even so, we weren’t making the best use of the space.

I wanted some simple slatted shelves, which MOH said he could make. When we bought the wood for the hooks for tools in the garage we bought extra knowing that there were more shelves on the horizon, which given the price of wood was a smart move. It also gave MOH enough to get started, but getting started meant nailing down the details, which is where my handy drawing came in.

A working plan for our bathroom cupboard shelves including measurements

While it may seem overkill, it was a great way of explaining what I had in my mind’s eye, and helped MOH envisage the end result. It also meant I didn’t have to answer 101 questions like did you want it like this, or that as he went along. And it meant that I was in for a fab surprise when I got back from my last gelli plate printing class to this work in progress.

A shelf in progress, made from the plan

I perhaps need to get out more, but it was just what I wanted. Sadly though he was out of wood so we needed a trip to get some more, and I found myself pondering life choices after spending way too much time in the screw zone, where you can pick up ‘pick and mix’ screws to fill a pre-determined sized and priced bag.

Shelves of multi-purpose screws - in Zone A

But it wasn’t long before the bathroom cupboard started to look like this.

The startings of 3 shelves inside my bathroom cupboard with the spirit level across the middle shelf

And then this.

The three completed shelves in my bathroom cupboard

Originally my plan was to lightly paint these white, hence the white blocks (which I made MOH buy specially!) - but seeing the shelves in situ I changed my mind. I like the natural look of the wood and so we’re keeping them like that for now at least - there’s an option to paint them at a later date, but right now that’s a long way off.

Don’t they look great?

It looks even better with the towels on, and as well as it being another job jobbed, it’s another space that now has functional, practical and good looking storage, and means our towels are now stored together. It also highlights that we have a penchant for cream and blue towels!

After a suitable shelf-break, next up for MOH is some shelves to maximise the space in our pantry! He really can’t wait…

PostCommentLove

My garden in January

It’s been interesting to see what’s happened in our new garden this past month, as I said in December’s update I have more pictures than perhaps I’d normally have at this time of year. That’s because I’m keen to learn, record and share what the garden has in store for us. Though, it’s still January and it’s been pretty chilly, and wet and I only managed to get out into the gardening once, and that was on the penultimate day of the month!

But early in the month it was good to spot this colour from the hebe, the purple leaves as well as the vivid purple flowers - what a treat in what can be a pretty dreary month, and a month that’s not my favourite.

purple hebe flowers appearing in January

That said, the euphorbias we brought with us from our London garden seem happy enough. They are still contained in the pot they moved in, and I’m not sure yet where - or when - I’ll unleash them. They multiply a lot, and are already spreading in the pot, so I’ll need to remember that.

Looking down on the euphorbias in the rain

In December I finally got around to potting up some daffodils, and so it’s great to see them pushing their way through the soil. The ones I didn’t get around to planting also sprouted and have gone a little bit awry without the soil. They too have now been potted up, though I’ve needed to be gentle so they don’t break - I’m hopeful they will continue to grow, as they’ve been pretty resilient so far.

Daffodil shoots poking through the soil in pots
Looking down on the compact setting of elephant ears

There’s plenty of plants in the border near the garage, and the elephant ears above are doing really well. When the weather, and ground, is a bit warmer I need to plant the elephant ears we brought with us alongside one of them which is doing less well.

One thing that’s quite different from our previous garden is the amount of bird visitors, we have far fewer here. In London we had robins, blue tits, great tits and plenty of pigeons, as well as a blackbird or two. Here, when we first moved in there were a couple of wagtails, and we’ve seen a robin occasionally. We’ve also seen a blackbird a couple of times, hanging around the crab apple tree no doubt looking for food.

The two days after the RSPB Big Garden Birdwatch we had a crow visit around the same time of day, but nothing any more regular. In an attempt to look attractive to smaller birds, and encourage that robin we’ve bought a hanging bird feeder and filled that with fat balls. We need to get something that the blackbird will appreciate more though, and work out what that is, where to put it and how to make sure it’s only attractive to the intended species.

A sustainable bird feeder filled with fatballs hanging on the bare branches of the crab apple tree

But we’ll work that out, though grateful for any advice you have.

The tulips from dad are also poking through the soil, and they’re also in pots so that I can move them into view from the house when they’re flowering. The ones we brought with us are also coming up and it’ll be great to see them again.

Tulips potted up in December already pushing up through the soil in the pot

It’s good to see how the plants are growing, and I love the pale greeny pink dots that promise flowers to come.

small pale pink & green dot like buds appearing on one of the bushes (not sure what it is yet)

And look how much those daffodils have grown in a month…

The daffodil shoots are almost two inches by the end of the month

The mahonia has changed too, the bright yellow flowers are less prominent but in their place berries with a blueish tinge are starting to form, so it continues to be a plant to watch.

Looking down on the crown of the mahonia, with flowers in the centre and berries forming on the outer stems
The red tips of new growth on the red robin bush

The fresh growth on the red robin tops are living up to their name, and look great as we look out the window. These were a plant on my wish list, so I’m really pleased it’s here already.

Flowers starting to form on the hellebore, even though the leaves appear to be blackening

January is also the time of year when hellebores start to make their presence known - the one we brought with us, a deep, deep red which came from my FIL’s garden is showing signs of new growth which is a relief as it had looked pretty unwell beforehand. I also spotted that we have one planted, though I’m not sure why the leaves are tinged with grey/black, possibly its been affected by frost, I’m not sure. I don’t know what colour this one will be, but my guess is a greeny cream, though I could be completely wrong - I’ll let you know.

Our silver birch 'whip' planted up in a pot against the black trellis

And finally, we have a new tree. It’s small, and has plenty of growing to do. Our council here offer up to two free ‘whips’ for residents, and while we already have five young trees in our new garden we took advantage of this offer with a single silver birch. I’ve put this into a pot to give it the best chance, as where I want to plant this needs a bit of prep work which we haven’t been able to do just yet, but soon hopefully.

PostCommentLove